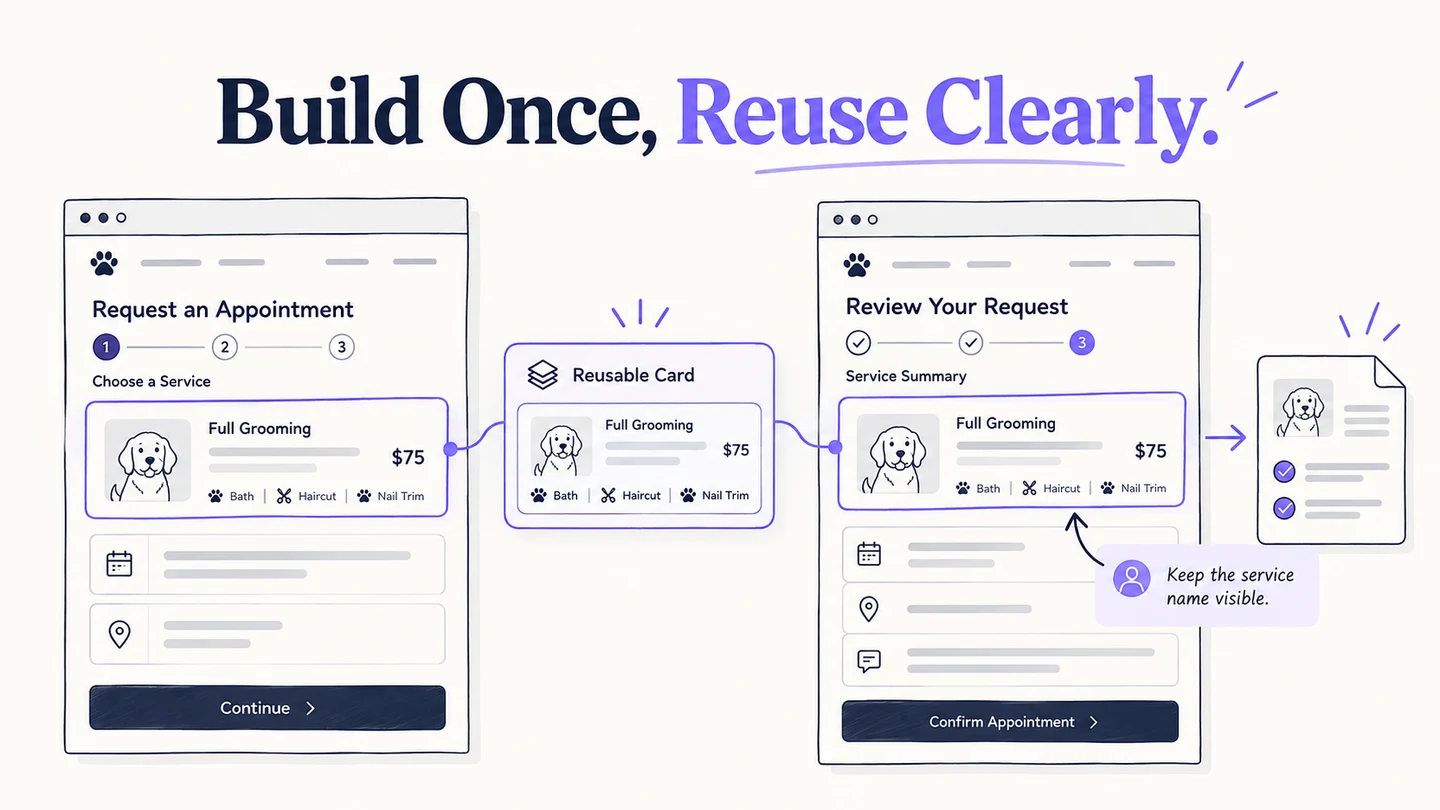
To create a wireframe online, start with the screens needed for one task, add basic widgets, connect the route, and share a preview for review. Reuse repeated elements so a change to the layout does not become a separate editing job on every screen. Add notes where the wireframe alone cannot explain a rule.
This guide follows a seven-step workflow with Mockitt's online wireframing tools, with particular attention to reusable widgets, master instances, and review notes. For a broader introduction to deciding what belongs on a screen, see the guide to creating your first wireframe.
Before Creating a Wireframe Online
Mockitt is a web-based prototyping and wireframing tool. You can lay out screens, connect interactions, and share a preview for feedback. Start with a small task rather than trying to represent the whole product. Browser access does not mean every plan includes every feature, and storing work online does not remove the need to choose appropriate sharing permissions.
For the example in this guide, sketch a pet-grooming appointment request: choose a service, choose a day, enter contact details, and review the request. Keep a service-summary card visible on the relevant screens so the person knows what they are requesting. This is an illustrative wireframing exercise; it does not create a live booking system.

Prepare a short list of screen names, realistic example labels, and the questions you want reviewers to answer. Use fictitious contact details. Decide who needs view access before sharing the project. The retained editor images below illustrate the original workflow; the location of a control may differ in another editor version.
How to Create a Wireframe Online
The seven steps move from a blank project to a reviewable flow. You can try the workflow with the access available in your account; do not assume that a trial or a free plan includes unlimited projects, collaboration, or export.
Step 1: Create a Wireframe Project
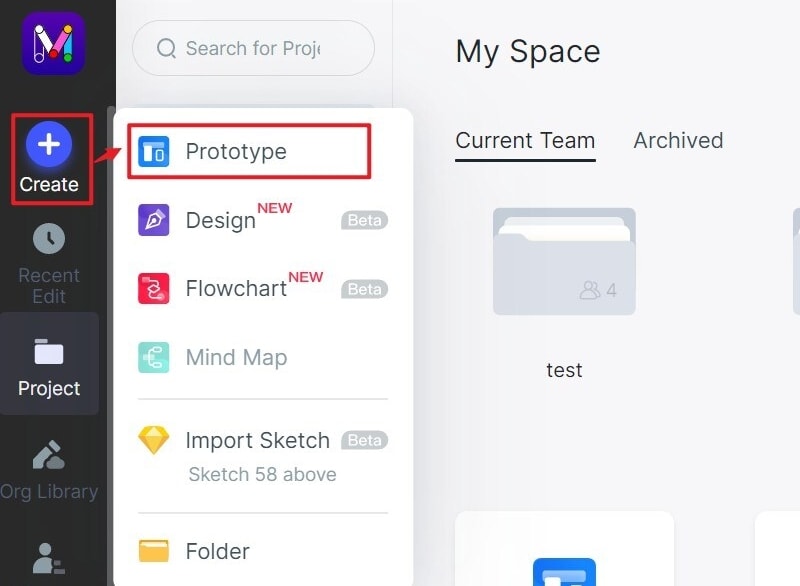
Create a prototype project in the browser and choose a suitable screen size. You do not need to install a desktop application to use the browser workflow. Give the project and its screens names that describe their purpose, such as “Choose service,” “Choose day,” and “Review request.”
If the screen dimensions are wrong, adjust them in the project or screen settings before duplicating the layout. Use one intended viewport for the first review. A mobile screen and a desktop screen may need different arrangements, rather than simply scaling every element.
Step 2: Add Widgets to the Wireframe
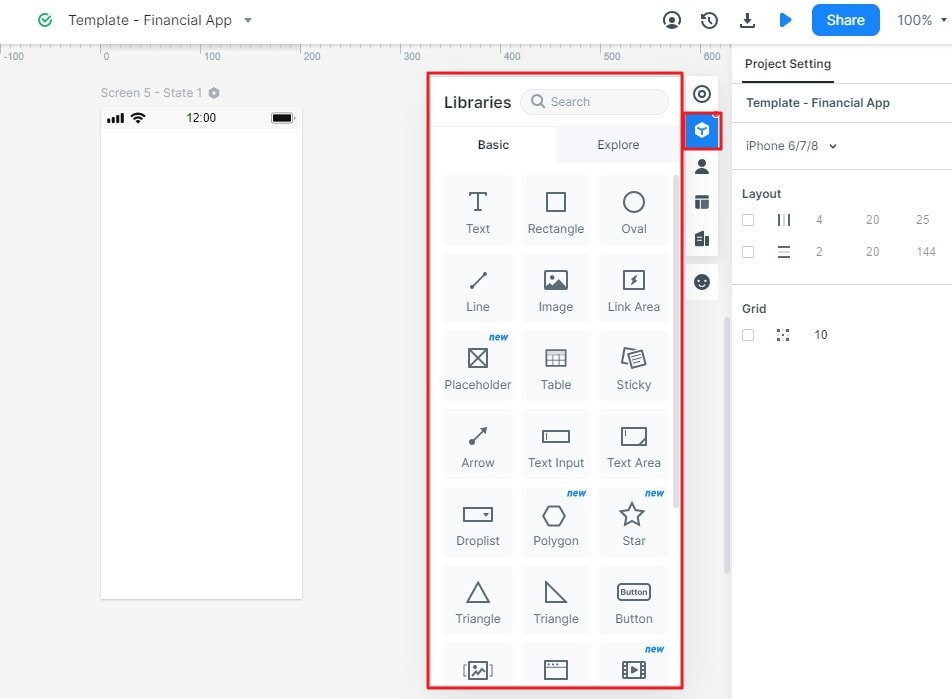
Add the basic shapes, text, buttons, and inputs needed for the task. You can drag widgets from the library onto the canvas. Once a widget is selected, use its properties to edit its size, position, and content.
Keep the first layout rough. For the appointment request, the service card needs the service name and enough information to distinguish it from other options. The primary button needs an action label such as “Choose a day.” Blank boxes labelled “Text” would not reveal whether the wording helps someone make the right choice.
Step 3: Save Widgets for Reuse
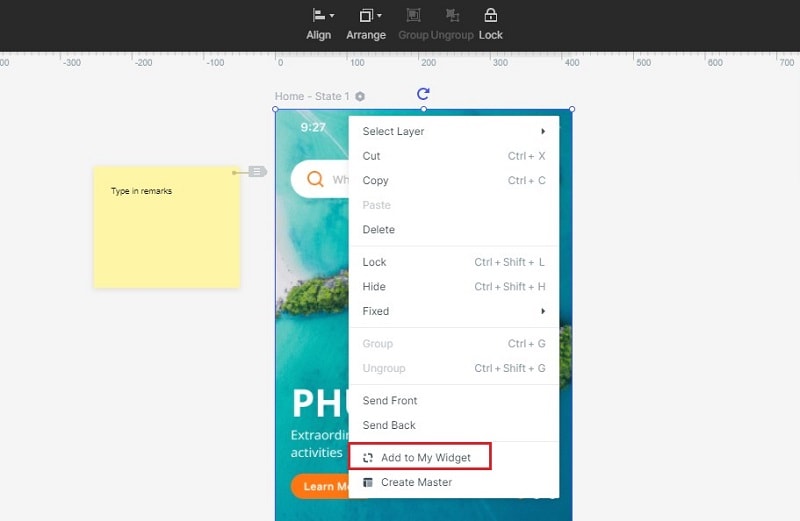
Well-designed widgets can be saved for later use. In the original editor workflow, select the widget and use Add to My Widget from the context menu. A saved widget can then be used again instead of rebuilding its appearance each time.
For the service-summary card, first group the name, description, and supporting shape into a meaningful unit. Give the saved item a recognizable name. Reusing a saved item is not the same as guaranteeing that every copy will update automatically; use the linked master workflow in Step 5 when synchronized changes are the intention.
Step 4: Add Links Between Screens
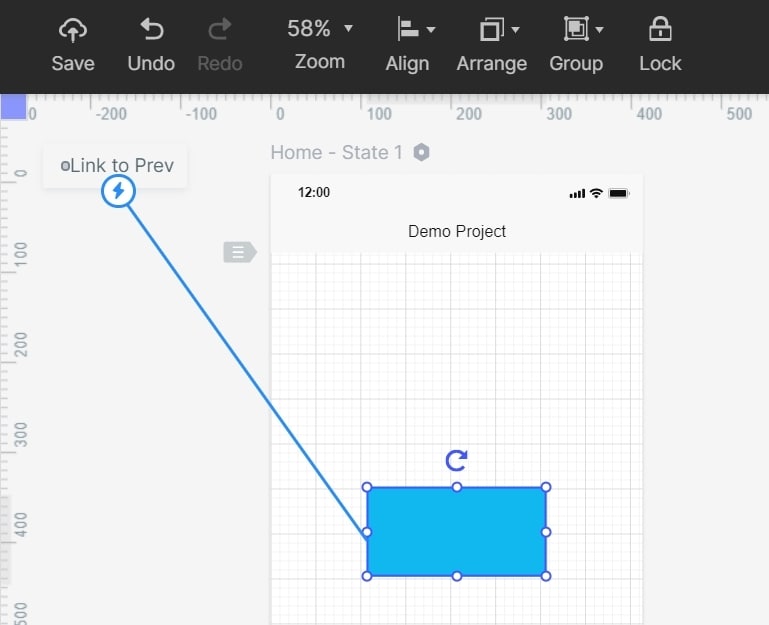
Choose a widget and add an interaction to the intended target screen. Set the trigger, action, and destination; add an animation only if it helps explain the behavior. The original editor also shows a connection handle that can be dragged to another screen.
Connect the service choice to the day-selection screen and then to contact details and review. Provide a return path so a person can change the chosen service without losing their place in the flow. For an unavailable day, show a clear alternative instead of leaving the button disconnected.
Step 5: Use Master Widgets for Shared Changes
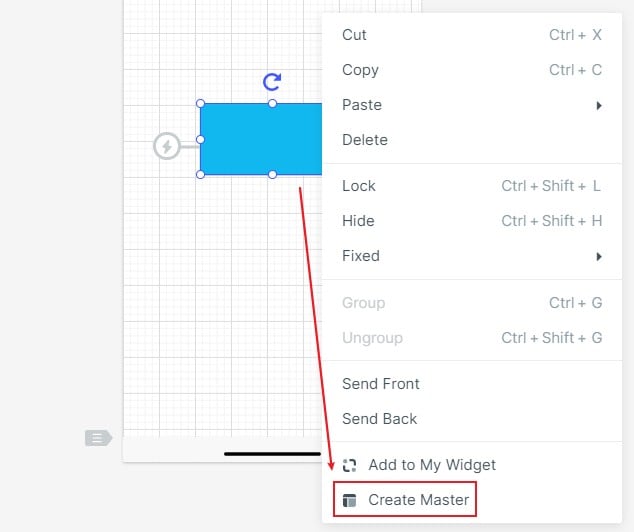
The original workflow uses Create Master from the selected widget's context menu. A master lets you reuse a linked component and make shared changes to its instances. This is different from an unrelated pasted copy. Do not assume that changing one widget updates all projects or every separately saved copy.
Use the service-summary card as a small check: place linked instances on the day-selection and review screens, then change the master's label or spacing. Preview both instances to see what inherited the change. Keep screen-specific information, such as the selected day, separate from the shared structure where appropriate. The master-widget guide explains the relationship between a master and its instances.
Step 6: Add Notes That Explain Decisions
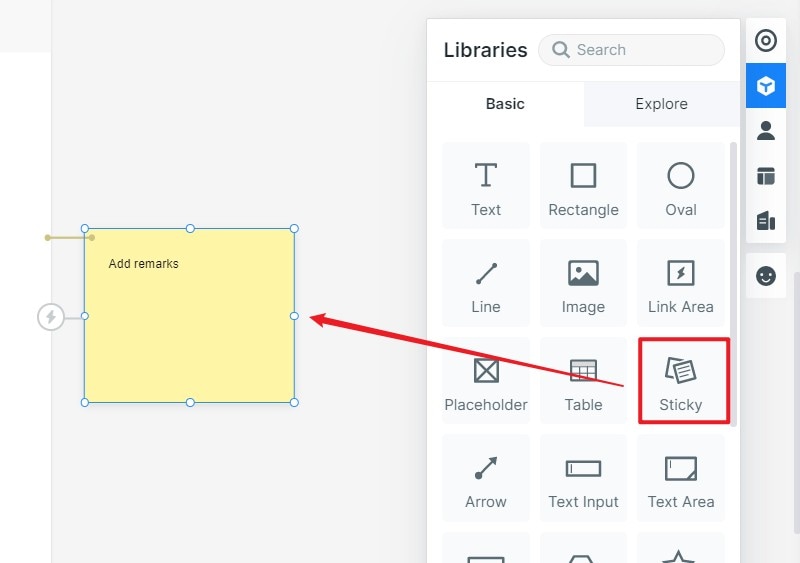
Use the built-in sticky widget to explain a rule or an unresolved design question. Place the note beside the relevant part of the screen rather than across the path a reviewer needs to click.
A useful note is specific: “Keep the selected service name visible when the person chooses a day.” Another might say, “Unavailable days need a clear reason and an alternative.” Avoid a vague note such as “Make this better.” Separate confirmed requirements from questions for the team, so a developer does not implement an assumption as a rule.
Step 7: Preview and Share the Wireframe
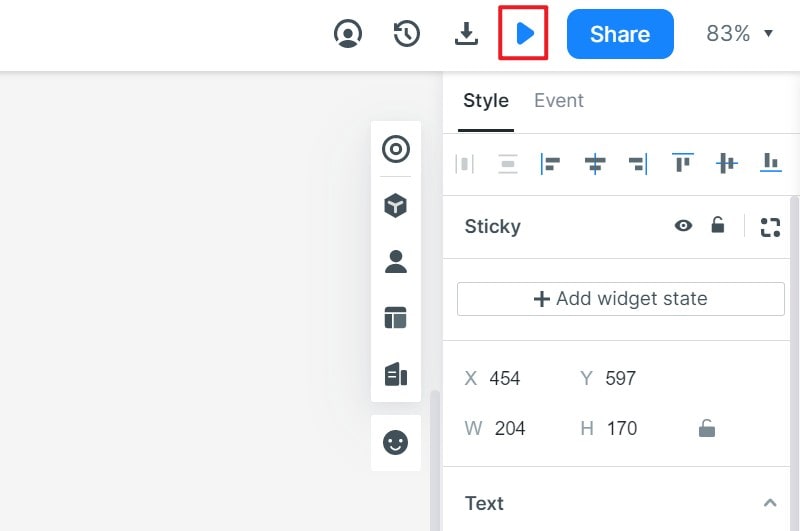
Once you have created the flow, save the changes and preview it from the intended starting screen. Try the main route and the return links. Check whether the service name is still visible, the chosen day is clear, and the final screen distinguishes a request from a confirmed appointment.
Use the sharing link or QR code to let reviewers open the prototype. Choose the appropriate access options and test the link from a separate browser session before sending it. The prototype sharing guide covers the available sharing controls.
Ask a reviewer to request a service and then change the selected day. Observe where they hesitate or lose context. If a shared card is inconsistent across screens, correct the component relationship; if the task is unclear, revise the label or flow. These changes make the wireframe useful as a discussion tool before the team invests in detailed visual design.