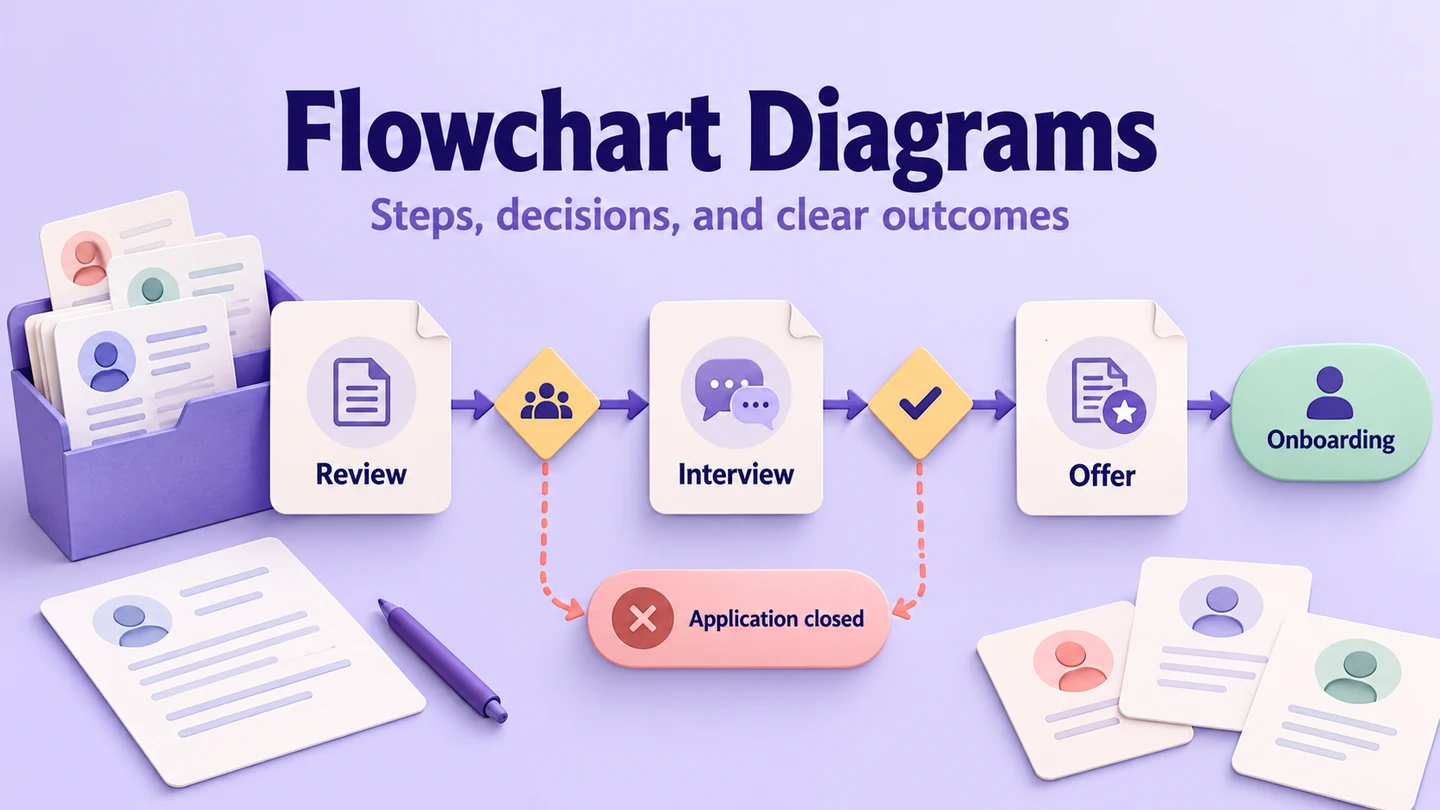
A flowchart diagram shows the actions, decisions, and outcomes in a process. To create one, define its start and end, list the main steps, put questions in decision shapes, and connect the possible routes. A readable flowchart in Mockitt should let another person follow the process without guessing what happens next.
An online flowchart maker provides shapes and connectors, but the team still supplies the process logic. Start with a small process you know, such as reviewing a candidate for an open role. Use a few standard shapes before adding specialized notation.
Use the billing and audit examples to understand the notation, then work through a hiring process. The goal is to draw clear decisions and useful stopping points, then choose an editor that fits how your team reviews it.
What is a flowchart diagram?
A flowchart uses shapes and arrows to explain how a process moves from a starting event through actions and decisions to one or more outcomes. A straight sequence shows what happens in order; branches show where the next step depends on an answer.
Use familiar flowchart symbols consistently. Rectangles normally represent actions, diamonds decisions, and rounded terminals start or end points. If your team needs a different convention, include a legend rather than making readers infer a new meaning for every shape.
Directional arrows connect the steps. Keep the main reading direction consistent and label the routes leaving a decision. A connector should point to the action that actually follows, including when the process returns to an earlier step.
The two older examples below show process routes, but use some nonstandard shapes. When redrawing them, put decision questions in diamonds so the notation matches the symbol guide.
Example 1:
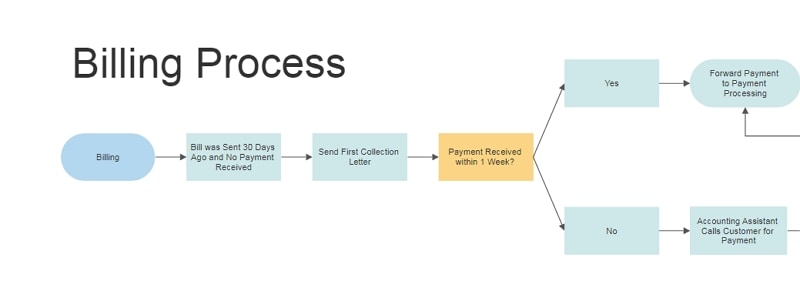
The billing example represents the steps involved in handling a bill. Such a diagram can support training because readers can see the sequence and the point at which one action leads to another. A process owner should still verify the rules behind the steps.
Example 2:
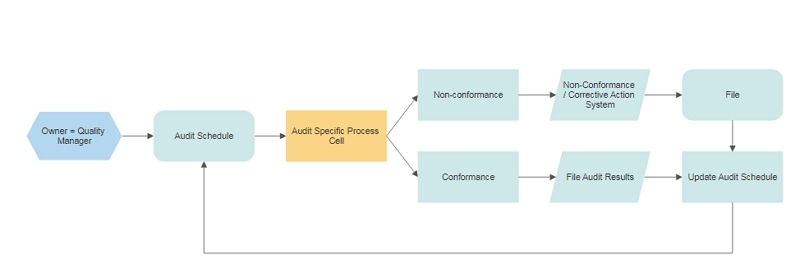
The audit example includes a decision about conformity and a route for handling a problem. It illustrates why a process diagram needs more than a successful path: the reader should also know what happens when the expected condition is not met.
How to create a simple flowchart diagram?
Choose a tool according to the editing and sharing you need. Access, collaboration, and export limits can differ between plans, so a small diagram is not automatically proof that every required feature is available without a subscription.
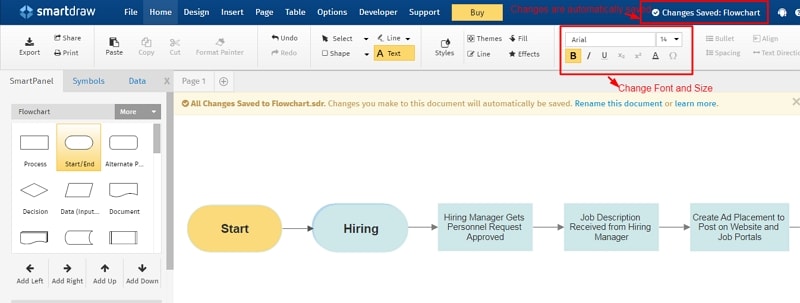
The original walkthrough uses SmartDraw to draw a hiring flow. The retained images illustrate its diagramming approach. SmartDraw’s flowchart tools include templates and automatic formatting; the important design decisions below are the labels, branches, and outcomes you put into that structure.
Let's create a flowchart for the hiring process
Step 1: Start the Flowchart
Start a flowchart and add a starting event such as “Approved vacancy received.” List the first actions: publish the role, receive applications, and review applications against the agreed requirements. The original SmartDraw image shows the beginning of this diagram.
Add process shapes for those actions and connect them in order. Keep each label short and specific. “Review application” is more useful than “Process,” because it identifies the work a person must perform.
Step 2: Add Decisions and Return Paths
The initial route can be linear until the process reaches a real decision. Automatic alignment helps the drawing stay tidy, but it cannot choose the decision or supply the hiring criteria.
Add a diamond for a question such as “Does the application meet the agreed requirements?” The Yes branch can lead to arranging an interview. The No branch should identify an action or end state, such as notifying the applicant and closing that application. Do not use a rectangle for the decision merely because it is convenient to connect.
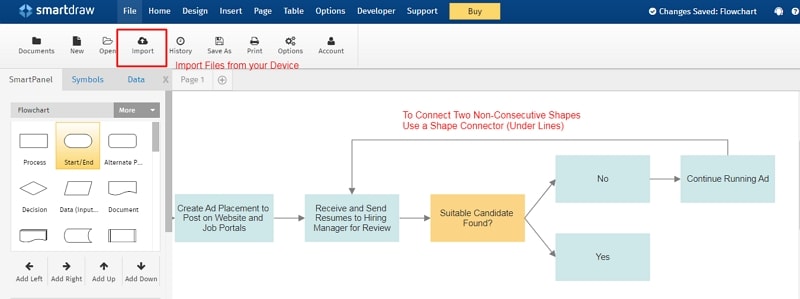
A return arrow is appropriate when something changes before another attempt. For example, if the team receives no suitable applications, it may review the role description before advertising again. Label that step explicitly rather than looping indefinitely through an unchanged process.
Step 3: Define Success and Other Endings
Once an applicant progresses through the interview decision, show the next milestone, such as making an offer. Each decision should have a clear question that the responsible person can answer.
After the offer, add a separate question: “Has the candidate accepted?” Connect Yes to the onboarding process. Connect No to the agreed next action, which might be considering another suitable candidate or reopening the search.
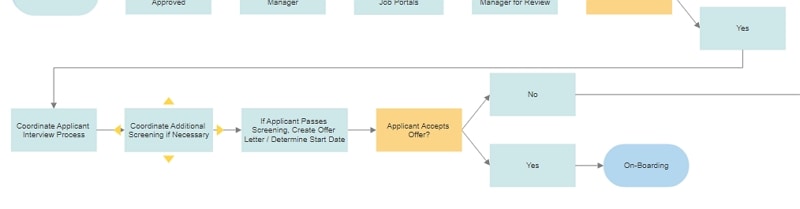
The original diagram ends at onboarding. Keep that successful outcome, but add other valid endings where they exist: application closed, candidate withdrew, or vacancy canceled. A useful hiring chart does not assume that every case eventually results in a hire.
A loop needs an exit condition. Show who can stop or revise the process and under what condition; otherwise a reader can follow the arrows forever without knowing when to act differently.
Check the hiring flow with three cases
| Case | Path to trace | What the diagram must explain |
|---|---|---|
| An eligible candidate accepts an offer | Application review → interview → offer → onboarding | Who handles each transition and what starts onboarding. |
| An application does not meet the requirements | Review → No → notify and close application | That ending this application does not end every other application. |
| No suitable candidate is found | Review search → revise role or outreach → reopen, or cancel vacancy | What changes before a new attempt and who can stop the search. |
This table is an illustrative process-design exercise, not a hiring policy or legal checklist. Use the organization’s actual responsibilities and criteria when you adapt the diagram.
Create a simple flowchart online
Mockitt provides another route for arranging a process with shapes and connectors, especially when the team also needs to discuss the product interface around that process. Begin with the same actions and decisions rather than changing the logic to match an attractive template.
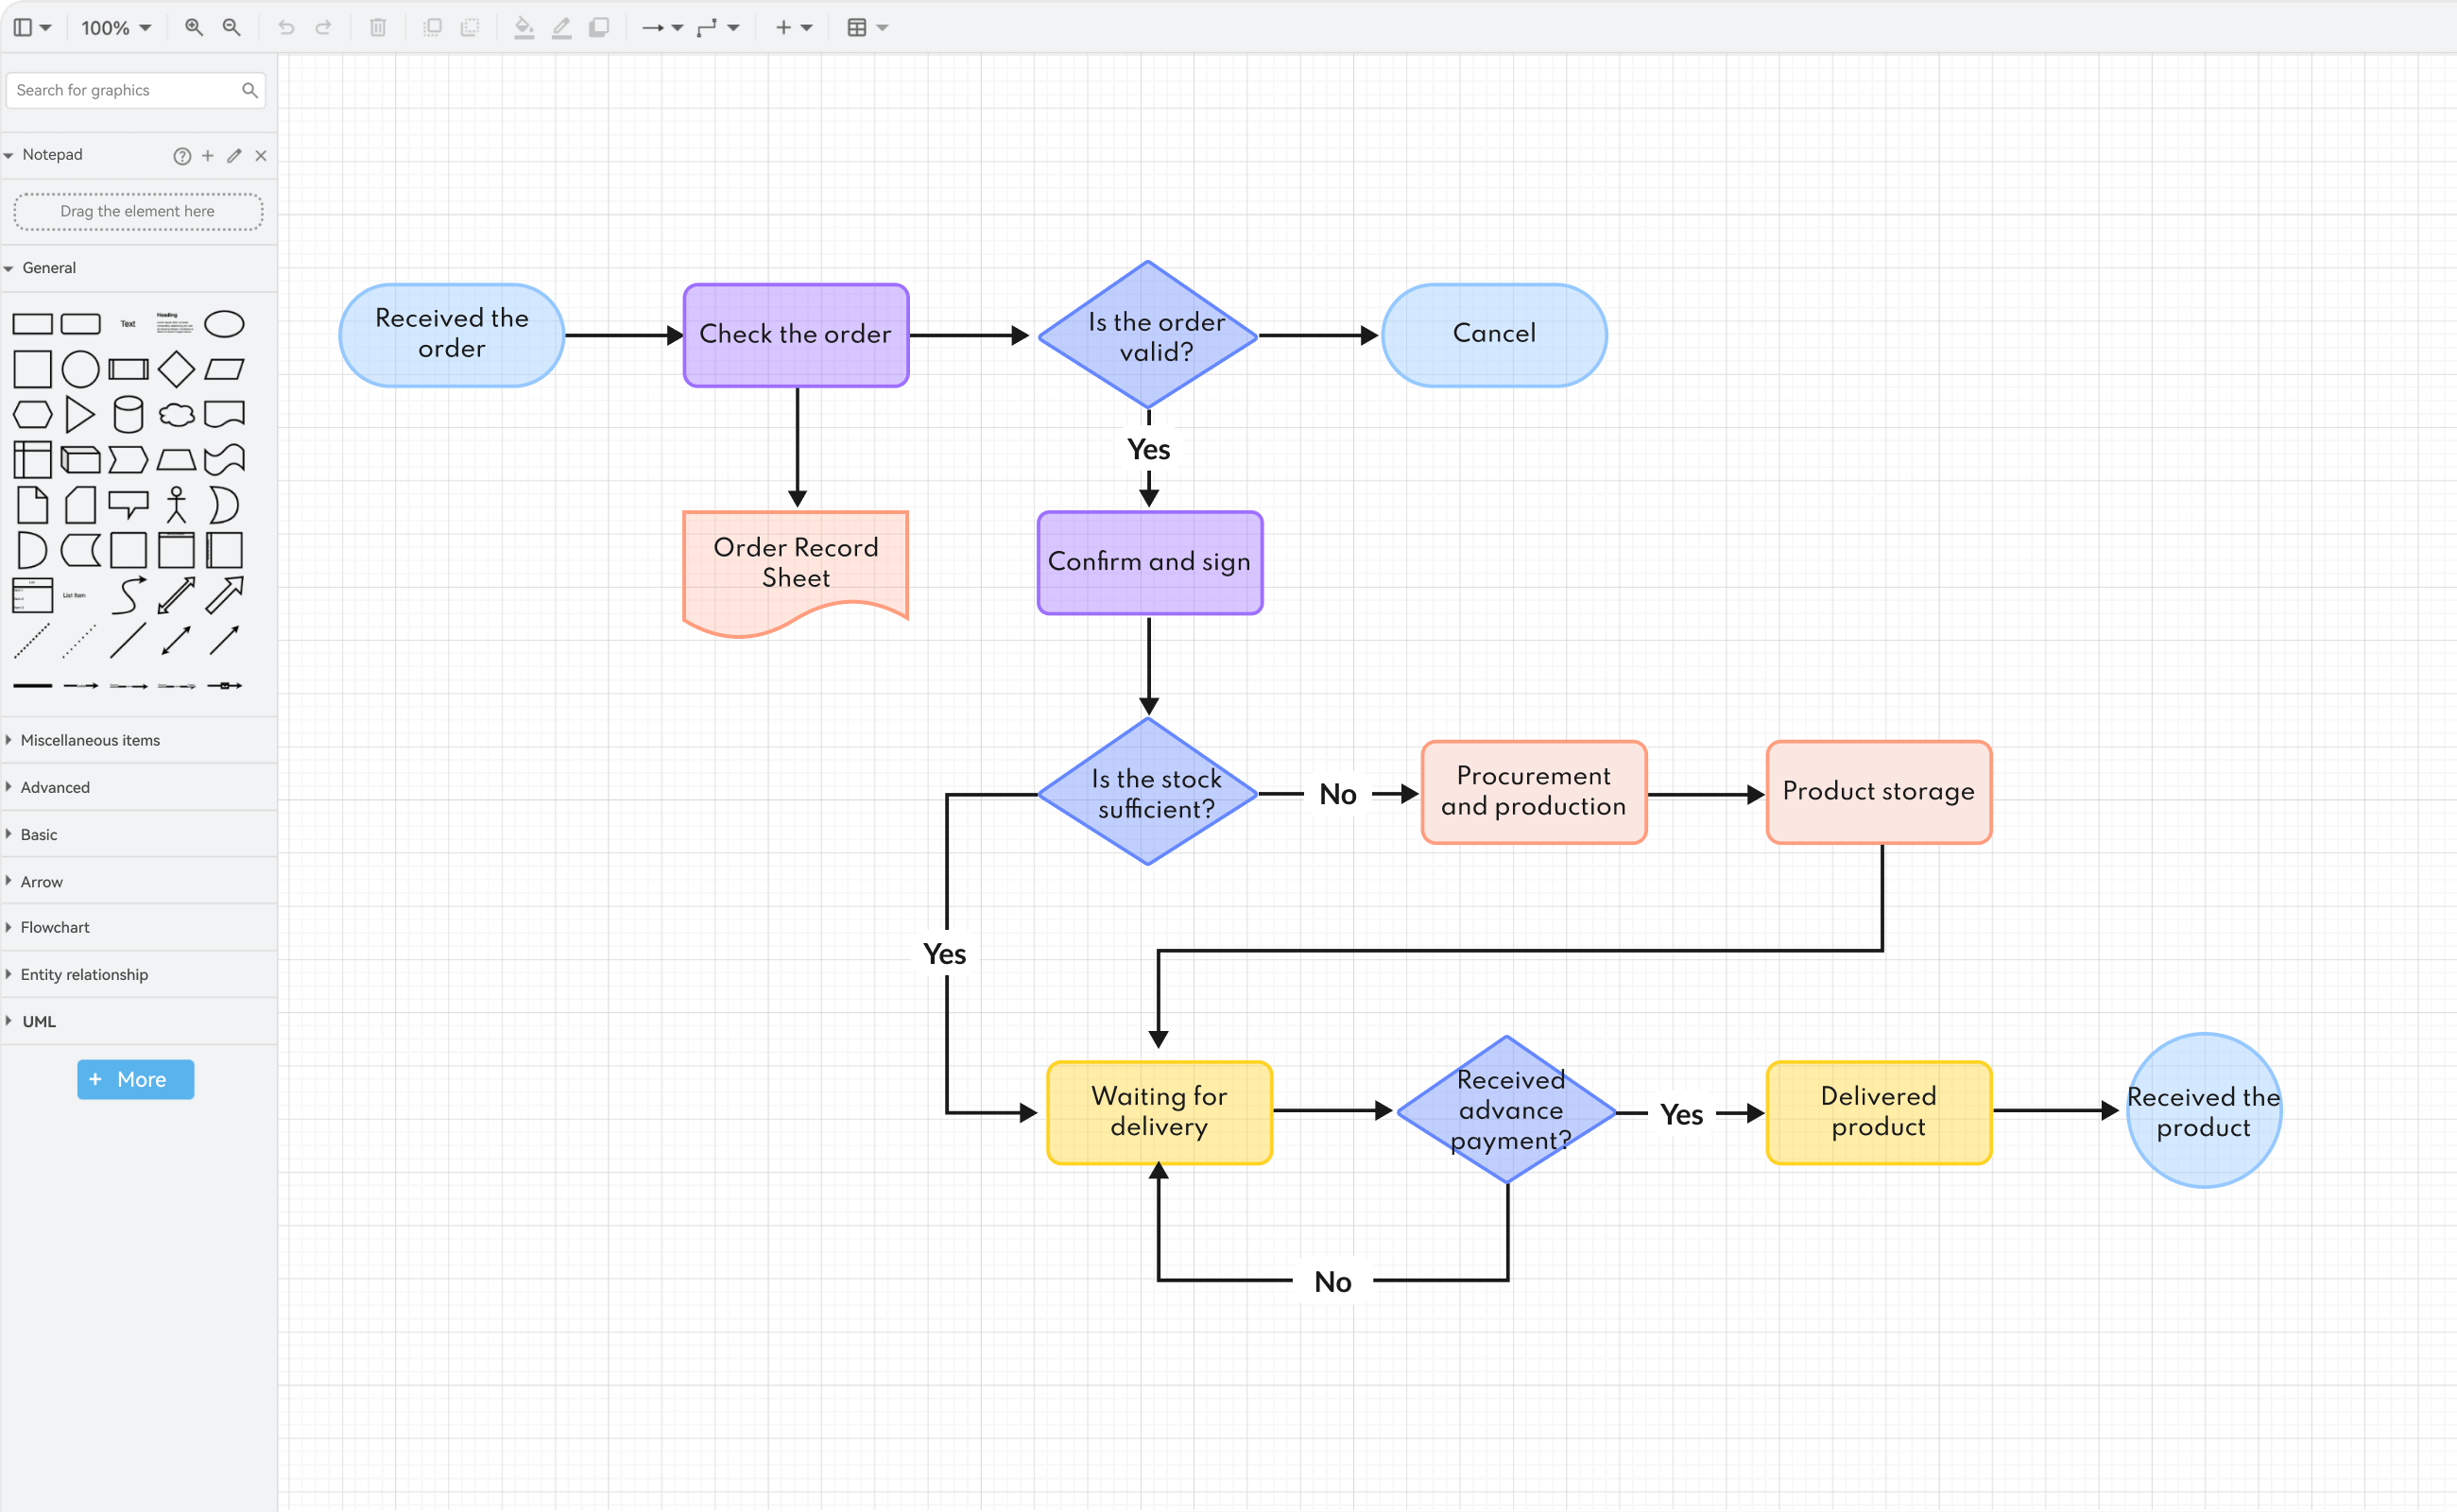
Use standard action and decision shapes and edit their labels to match the process. The editor example above shows an order workflow, not the hiring scenario. Before sharing your own chart, check every outgoing route: for example, the order-validity question's route to Cancel needs a No label.
For the hiring example, place the review steps in a consistent reading direction and leave space for the No branches. Distinguish the applicant’s outcome from the vacancy’s outcome: closing one application does not necessarily close the role.
Use notes to explain the criteria or owner of a step when the short shape label is insufficient. Avoid including real applicant names or sensitive recruitment details in an example diagram that will be shared publicly.
Review the process together in Boardmix
Boardmix is useful when a flowchart is part of a wider workshop. Its collaborative whiteboard lets a team work around the diagram and supporting notes. For the hiring example, place open questions about responsibility beside the relevant steps instead of burying them in a separate document.
Use Mockitt when the flow will inform a product prototype, Boardmix when discussion and process mapping share the canvas, or SmartDraw when its diagram templates suit the documentation task. In each case, review the same sequence, decisions, and exits. Changing editors should not change the meaning of the process.
If the process has several teams with distinct responsibilities, a cross-functional flowchart may make the handoffs clearer. Keep this first diagram small; split a complex subprocess into a separate map rather than making every connector cross the whole page.
Conclusion
A useful flowchart makes the process easier to inspect. Before sharing it, ask someone who performs the work to trace a successful case and an exception from start to finish. Correct the missing actions or unclear decisions they find before spending time on decorative styling.
Keep the editable diagram with the process owner so that changes to the workflow are reflected in the drawing. The best next improvement is usually a clearer decision or a missing exit, not another shape.