Mockitt - Best Free Wireframe Tool
Helpful Tips About Wireframe
- How To Create A Wireframe
- Wireframe Tools You Should Know
- Wireframe Templates for Your Inspiration
- Free-to-use Wireframe Kit
User Flow vs Wireframe: What to Create First
Compare user flows and wireframes, decide what to create first, and connect both artifacts into a testable product prototype.
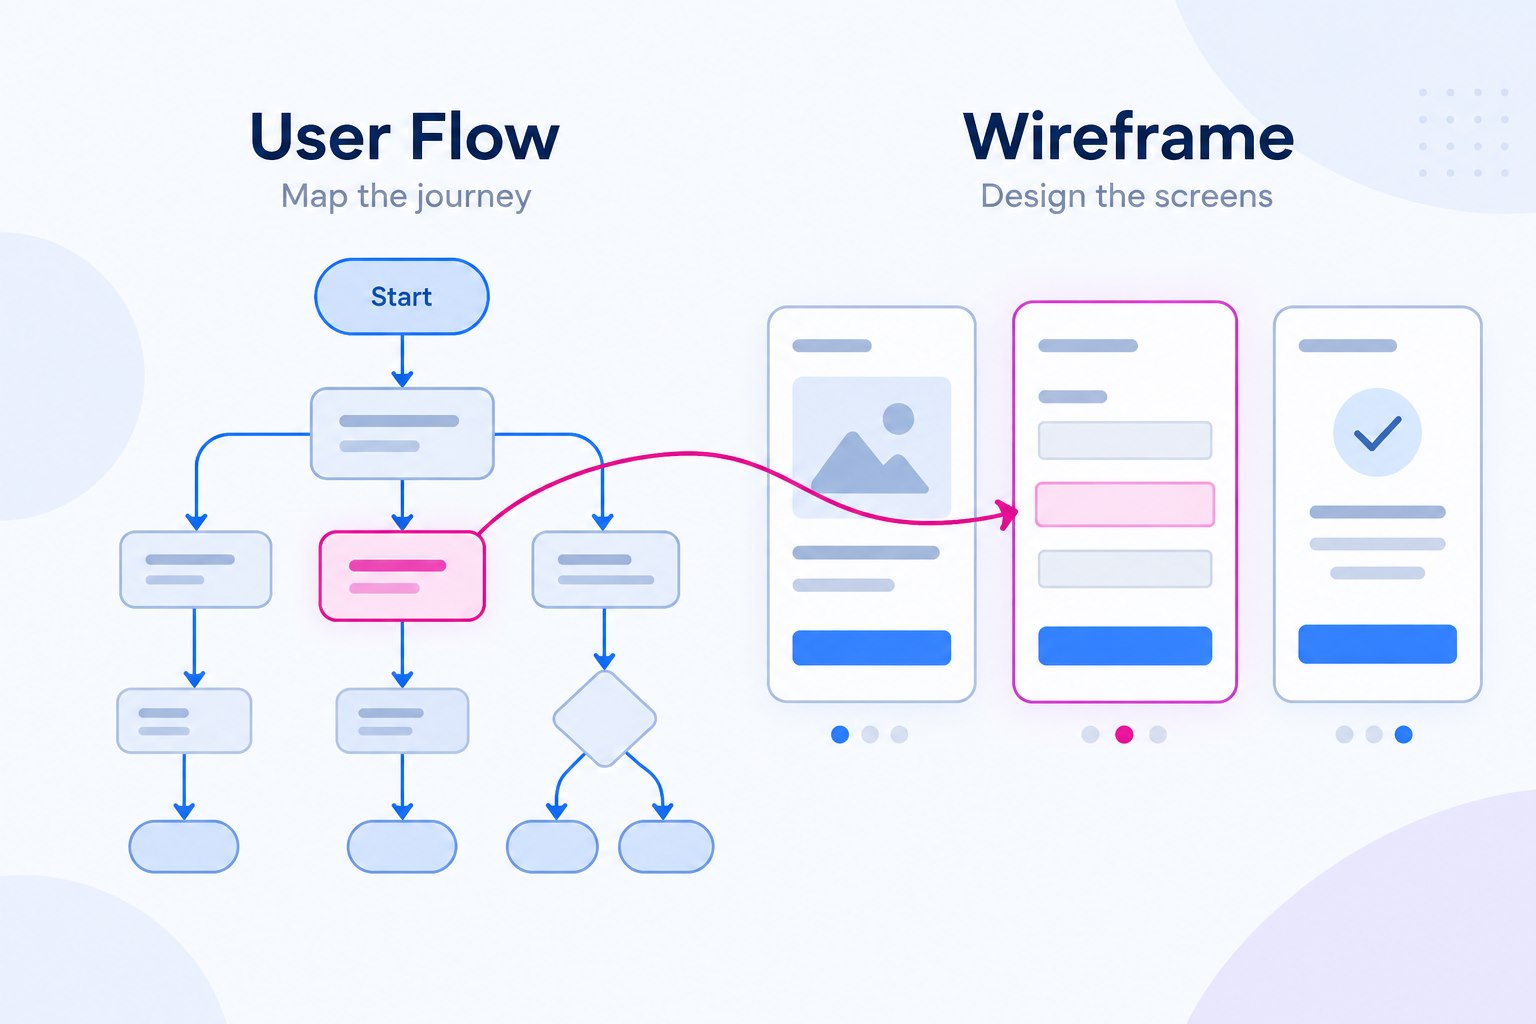
User flows and wireframes answer different design questions. A user flow maps the decisions and steps a person takes to reach an outcome. A wireframe sketches what a screen needs to show and how its controls are arranged. They often work together, but neither one is automatically the right first artifact for every project.
Choose the starting point based on the uncertainty you need to reduce. If the team is unsure about task order or branching, map the flow. If the task is understood but the information hierarchy is unclear, sketch the screen.
Use an appointment-booking example to see the distinction. A visitor needs a consultation on a chosen day, but that day may have no available times. The flow must explain the no-availability path; the wireframe must make available times, the selected date, and the next action understandable on one screen. This is a worked design example, not a completed user study.
What question does each artifact answer?
A flow asks: “Can the user reach the outcome, and what decisions or conditions change the path?” It is useful for finding missing steps, dead ends, and unnecessary branches.
A wireframe asks: “What must this screen communicate, and how can the user act on it?” It is useful for discussing content priority, layout, controls, and relationships between screens.
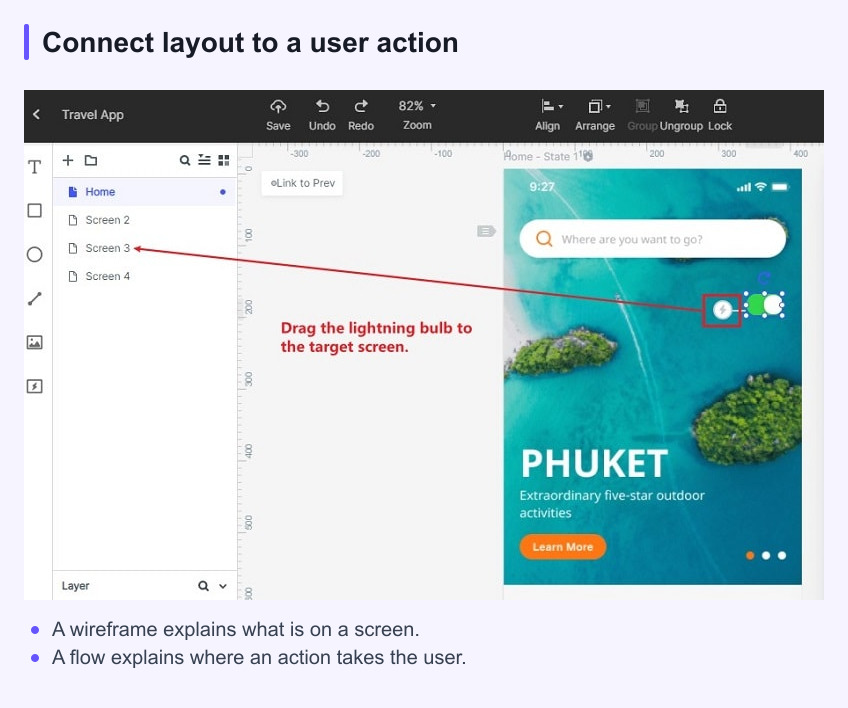
In a clickable prototype, the two can meet. A tool such as Mockitt can help a team connect a screen sketch to the interaction path it represents. The team should still record which question each version is intended to answer.
When to create the flow first
- The requirement contains several roles, permissions, or decision points.
- People disagree about the order of steps or what happens after an error.
- The project includes an unfamiliar domain where terminology and task boundaries are still being learned.
- The team is comparing a short path with a more guided path.
Start with the smallest useful flow. Name the user action and outcome at each step, then mark conditions such as “no saved projects” or “reviewer has no access.” You can sketch screens after the path is understandable.
Map the booking example as Choose service → Choose date → Check availability → Select a time → Enter contact details → Confirm booking. At Check availability, add a “No times available” branch that returns to Choose date. If the team disagrees about whether contact details are required before a visitor sees available times, settle that sequence in the flow before designing the form.
When a wireframe can come first
- The task path is already agreed and the main uncertainty is information hierarchy.
- You are exploring several layouts for the same step.
- A content model or responsive constraint needs to be visible before the full flow is mapped.
A first wireframe does not need visual polish. Label the purpose of the screen, the primary action, and any content that is still unknown. Then connect it to the shortest flow that lets someone review the task.
Once that booking sequence is agreed, sketch the Choose a time screen. Put the selected service and date above the time choices, show the selected time beside the Continue action, and provide Change date without requiring a restart. Sketch a second state with “No times available on this date” and a Choose another date action. These are layout and wording decisions; the route through them belongs in the flow.
A practical flow-to-wireframe workflow
- Write the outcome: describe what the user should be able to do.
- Map the happy path: show the minimum decisions from entry to completion.
- Add meaningful branches: include only states that change the task or decision.
- Sketch the key screens: place the information and action needed at each step.
- Connect and test: let a teammate follow the path without a verbal explanation.
- Record open questions: separate content, research, and implementation questions.
Do not redraw a complete flow every time a label changes. Keep the task map stable while iterating on the screen hierarchy, then update the flow when the user decision or outcome changes.
Now connect Choose a time to Contact details and connect Back to the same selected date and time. For a first review, use the task “Book a consultation for Friday afternoon; if Friday is unavailable, find another day.” Check the no-times branch and whether the chosen time remains visible on return. If the next revision only makes Change date easier to find, change the wireframe. If it adds a waitlist, update the flow too: that introduces a new outcome, states, and follow-up questions.
Review checklist
- Can someone state the user, situation, and outcome?
- Does every branch represent a real decision, condition, or failure state?
- Does each wireframe show the information needed for its step?
- Is the primary action visible and named consistently?
- Can a reviewer identify what is known, assumed, and still unknown?
FAQ
Are user flows and wireframes interchangeable?
No. A flow focuses on the path and decisions; a wireframe focuses on the content and structure of a screen. A prototype can contain both.
Should I make a high-fidelity wireframe first?
Start with the lowest fidelity that answers the current question. Add detail when it helps test a real decision, not simply to make the artifact look finished.
What comes after a wireframe?
Connect the key screens and inspect the task with teammates to find missing paths. Observe intended users when the question is whether the flow and labels are understandable to them. Update the flow or screen structure based on what the review actually establishes.
Sources and scope
This guide combines product workflow guidance with the linked reference material. Product capabilities and limits can change, so check the current Mockitt page before relying on a feature detail.