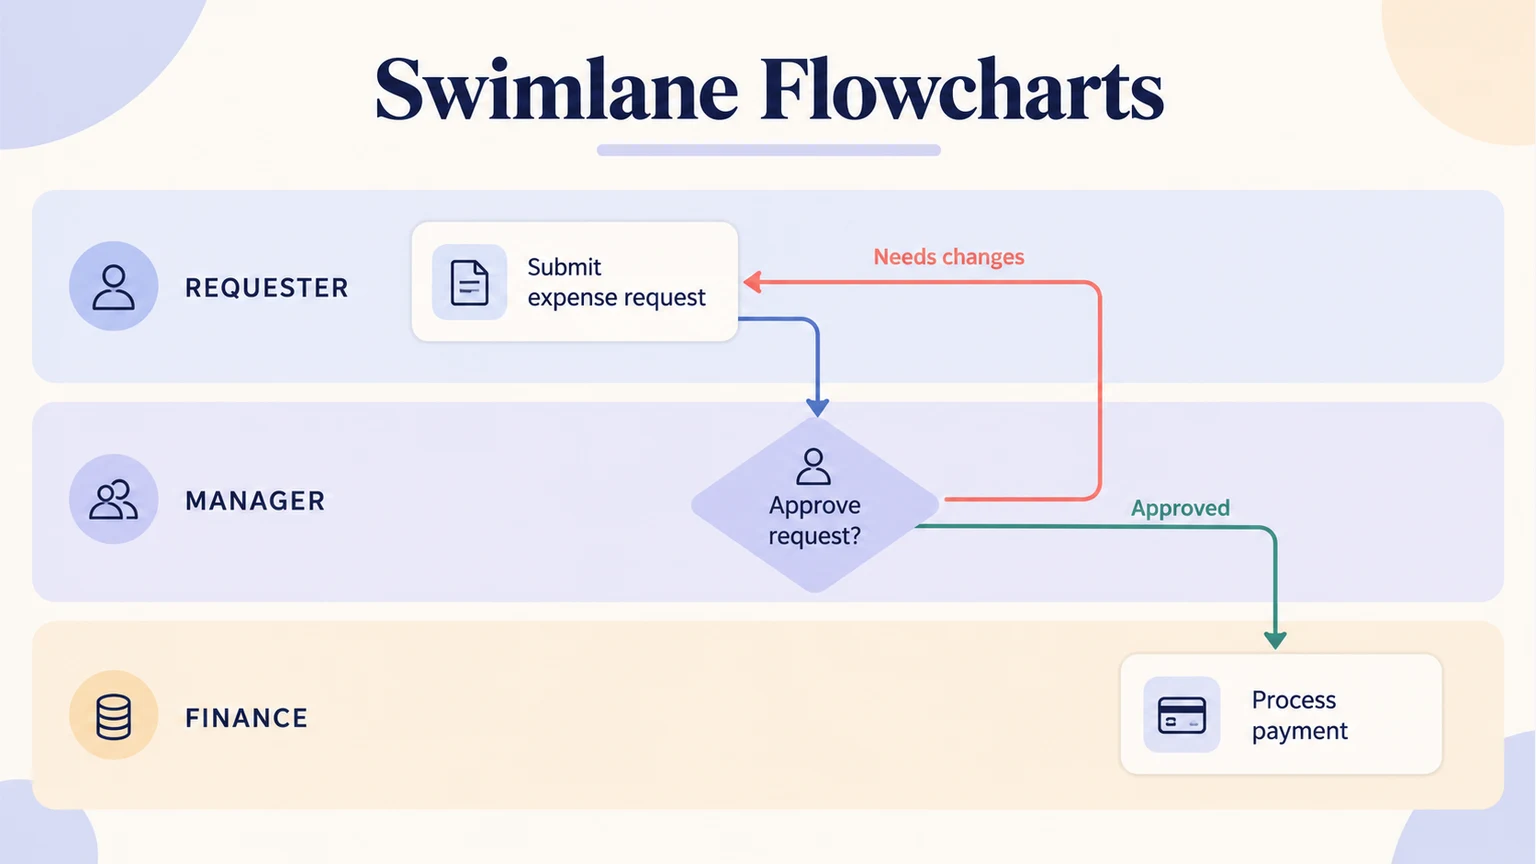
A swimlane flowchart groups process steps by the person, team, or system responsible for them. To create one, name the participants, put each action in its owner’s lane, and connect the actions in order. The crossings between lanes reveal handoffs that a plain sequence can hide.
Use Mockitt to map the process when you need to explain who does what next. Explore five visual examples, then follow an equipment-request process to plan your own lanes and handoffs before drawing.
What is a Swimlane Flowchart?
A swimlane diagram answers two questions at once: what happens next, and who is responsible for making it happen?
- What exactly is a swimlane flowchart?
- Why should you use it?
What exactly is a swimlane flowchart?
A swimlane flowchart, also called a cross-functional flowchart, organizes actions into lanes. Like other flowcharts, it shows sequence, decisions, and boundaries. The lanes add responsibility: a requester may submit a form, a manager may approve it, and an IT team may supply the equipment.
Each lane should have a clear role or system name. Put an action in the lane of the participant who performs it. If a task appears to belong in two lanes, split the work into separate actions or clarify which participant owns it.
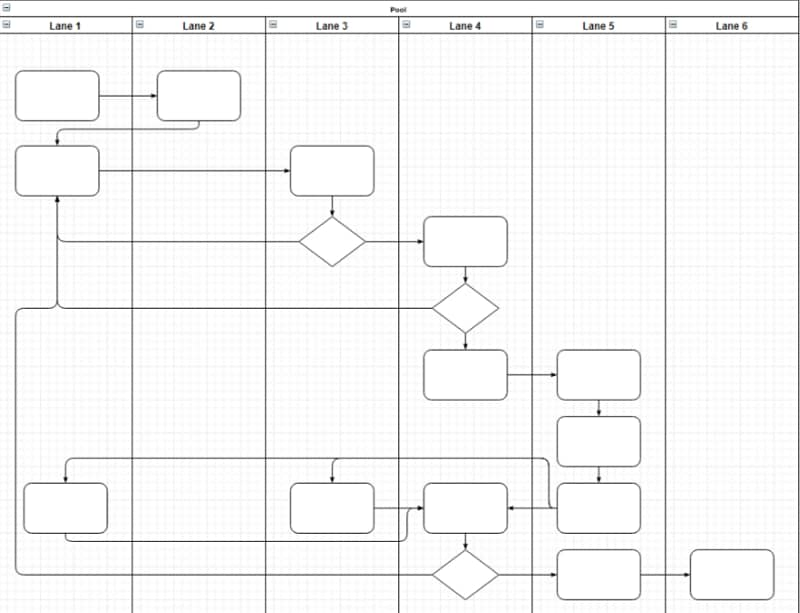
Image Source: SmartDraw
Lanes can run horizontally or vertically. Their orientation does not change what they mean: lanes identify participants, while arrows show sequence. Choose the orientation that makes the main route easiest to read. Do not assume that a lane’s position alone tells readers which step happens first.
Why use a swimlane flowchart?
Swimlanes are particularly useful when a process moves between teams. The diagram makes the ownership of each step visible instead of leaving readers to infer it from a long procedure.
1. Understand a complex process
Complex processes are hard to follow when actions and responsibilities are described separately. Swimlanes put them together so a reader can see both the sequence and the participant involved.
This view can expose duplicated work, but drawing it does not remove the duplication automatically. If two teams both verify the same request, ask whether both checks serve a purpose before changing the process.
2. Improve understanding and communication
A handoff arrow shows where one team depends on another. Add the information or item that must cross that boundary, such as an approved request or a completed form. “Send to IT” is less useful than “Send approved device request to IT.”
3. Find opportunities for improvement
As you know, a swimlane flowchart or diagram shows a detailed graphical view of a business process. This pictorial view can be helpful for process improvement later on.
Look for waiting between lanes, repeated approvals, and steps with no clear owner. Discuss those observations with the people doing the work before redesigning the process.
Swimlanes are also used within notations such as BPMN and UML activity diagrams, but a simple business flowchart does not automatically satisfy either notation. Use a formal notation only when your audience or project needs it.
The examples below show different ways to organize responsibilities. Study the lane labels and handoff arrows rather than copying the layout without understanding the process.
5 swimlane flowchart examples
These five examples illustrate different lane arrangements and process contexts. Compare how each one uses lane labels and connectors to explain responsibility.
1. Visual Paradigm
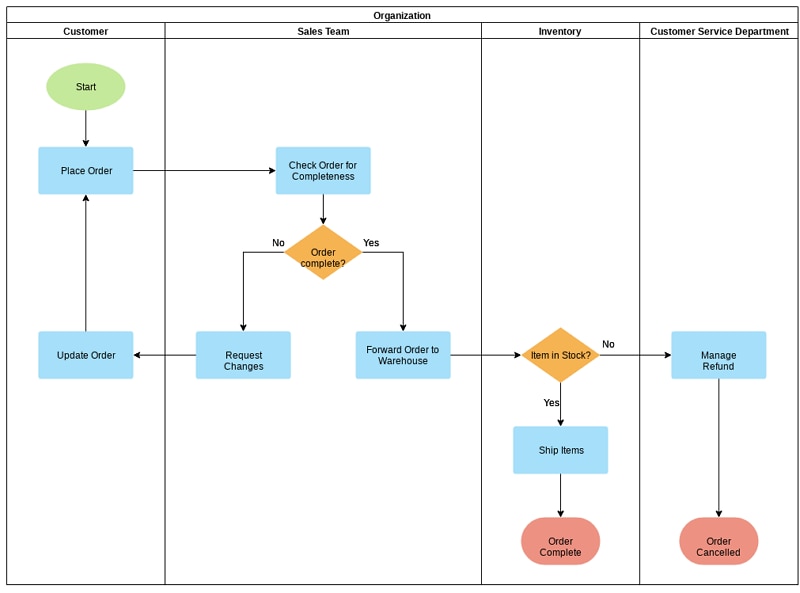
Example Source: Visual Paradigm
The Visual Paradigm example shows a process divided by responsibility. Read each action within its lane, then follow the connector to see whether the next action stays with the same participant or moves to another.
For your own diagram, start with the fewest participants needed to explain the process. Adding a lane for every job title can obscure the main handoffs.
2. Gliffy
Example Source: Gliffy
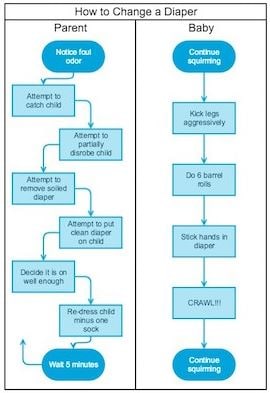
The Gliffy example uses two vertical lanes for a “How to Change a Diaper” workflow. It shows that swimlanes are not limited to large companies: any process with distinct participants can benefit from explicit responsibility.
Two features distinguish the diagram:
- Actions are grouped into clearly labeled participant lanes.
- Connectors establish the order, including any transfers between participants.
A lane describes responsibility, not a deadline. If timing matters, write the waiting condition or expected response in the relevant step instead of expecting readers to infer it from position.
3. Bright Hub
Example Source: Bright Hub
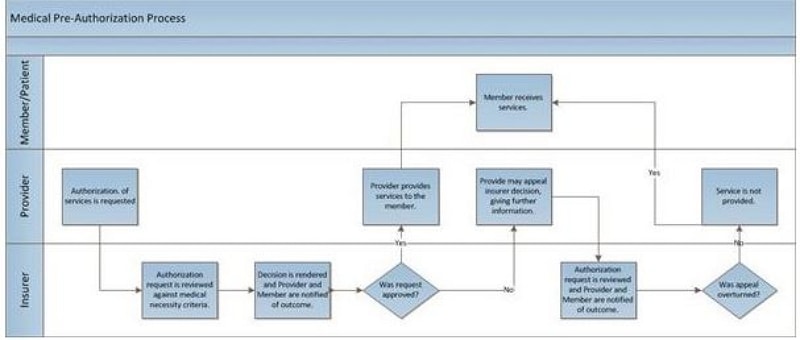
The Bright Hub example shows a medical pre-authorization workflow with horizontal lanes. Its value as a diagram example is the separation of participants and decisions; it should not be treated as guidance for a particular insurer’s current authorization process.
Rectangles identify actions and diamonds identify decisions. Label the outgoing decision paths so readers can trace the result of each answer.
4. Creately
Example Source: Creately
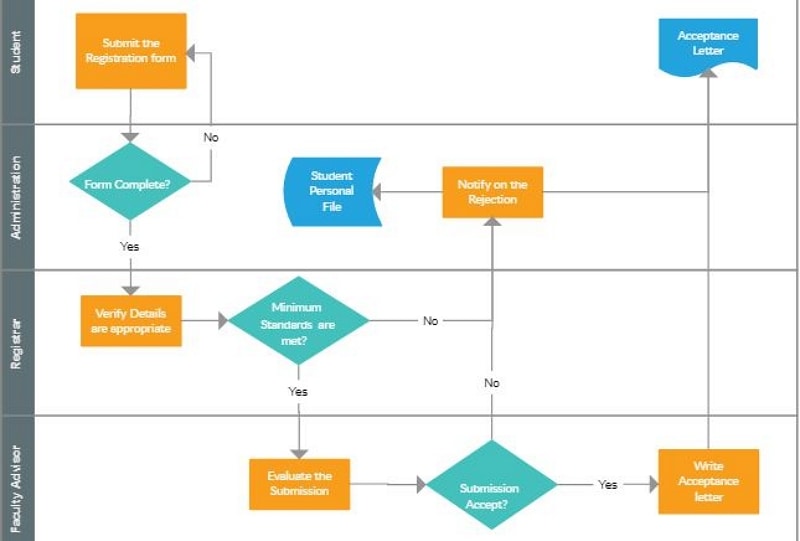
The Creately example presents a college-registration process across several departments. Notice the points where information must pass between lanes. A registration process can look simple within one department while still containing several handoffs overall.
5. Modern Analyst
Example Source: Modern Analyst
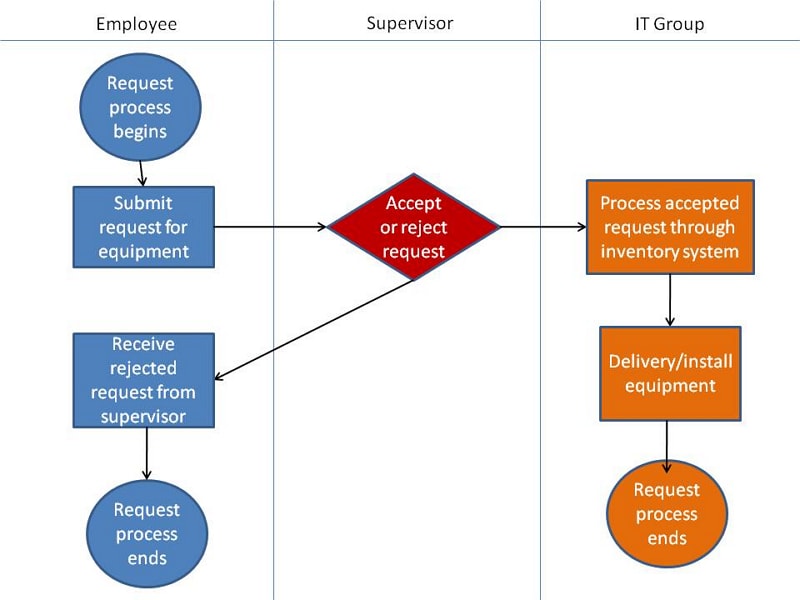
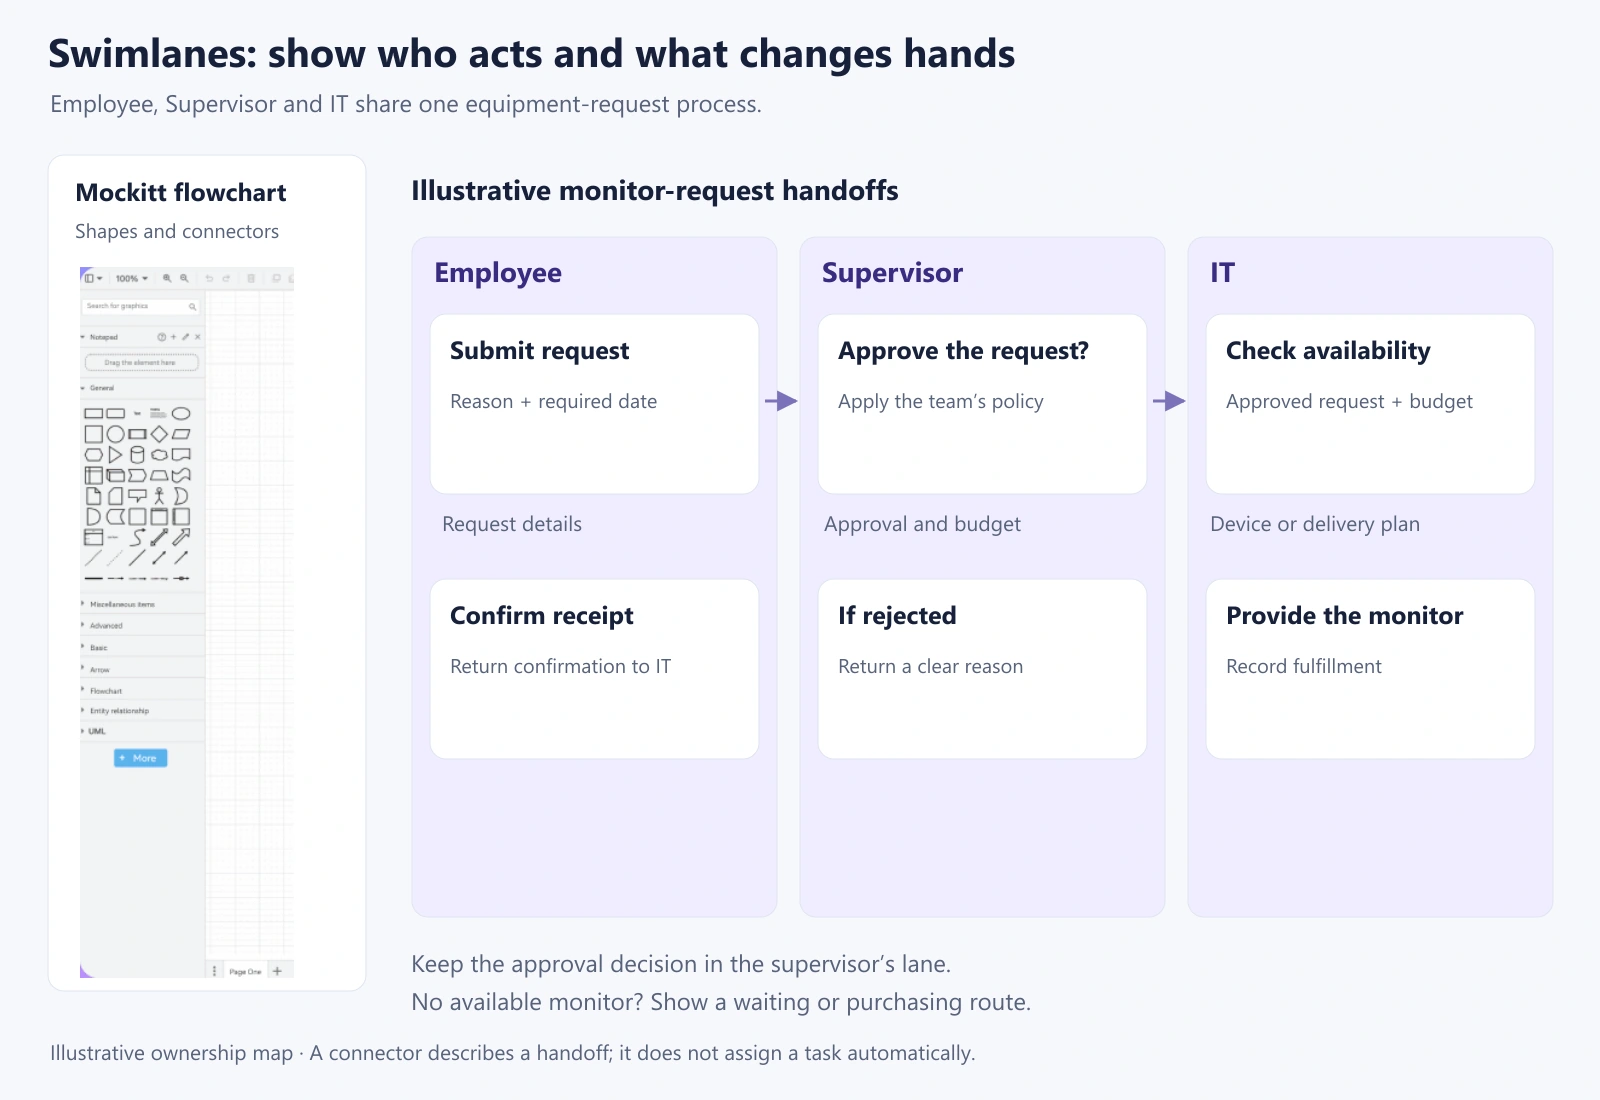
The Modern Analyst example uses Employee, Supervisor, and IT lanes. This is a useful starting structure for a workplace equipment request: the employee states the need, the supervisor decides whether to approve it, and IT fulfills the approved request.
Before drawing your own version, write the actions and owners in a small table. The following example uses the same three-role structure but makes the handoff information explicit.
Worked example: an equipment request
Suppose an employee needs a monitor. The process starts when the request is submitted and ends when the employee receives a device or receives a clear rejection. The example rules below are illustrative; the organization must supply its own approval policy.
| Lane | Action or decision | What passes to the next participant |
|---|---|---|
| Employee | Submit a monitor request with the reason and required date | Request details to Supervisor |
| Supervisor | Approve the request? | Approval and budget reference to IT, or rejection reason to Employee |
| IT | Check availability for the approved request | Available device or expected delivery information |
| IT | Provide the monitor and record fulfillment | Device and collection/delivery instructions to Employee |
| Employee | Confirm receipt | Receipt confirmation back to IT |
Keep “Approve the request?” in the Supervisor lane. The IT team may check availability, but that does not make it the owner of the budget decision. If no monitor is available, add a waiting or purchasing route in the appropriate lane; do not draw a direct arrow to “Received.”
When a request is rejected, show the reason returning to the employee. A disconnected “No” branch forces readers to guess whether the process ends or the employee can revise the request. For more on branch conditions, use the decision flowchart example.
Draw the lanes and handoffs in Mockitt
Start with three labeled lane areas: Employee, Supervisor, and IT. Place the actions from the table inside their owners’ areas, then connect them in sequence. Keep the approval branch close to the supervisor’s decision so it is easy to follow.
In the diagram, a connector crossing a lane boundary means work or information changes hands. It does not automatically assign a task in a workflow system. Use explicit action labels so the people reading the chart understand what the handoff requires.
Build a diagram people can review
Mockitt’s public flowchart guide shows how to add symbols and connectors. Use those basic operations to assemble the lane layout, then review the result at the size your team will actually read it.
Keep actions and lane labels distinct
Use clear text labels for the lanes and consistent shapes for the actions within them. Leave space between a shape and the lane border so a task cannot be mistaken for another participant’s responsibility. Avoid using color as the only indication of ownership.
Review the handoffs together
Mockitt also allows its users to communicate with other team members easily. It provides real-time collaboration so you and your team members can interact with each other during design.
Share the diagram with at least one person from each role. Ask them to trace an approved request, a rejected request, and an unavailable item. Where they disagree, clarify the underlying responsibility or rule before polishing the diagram.