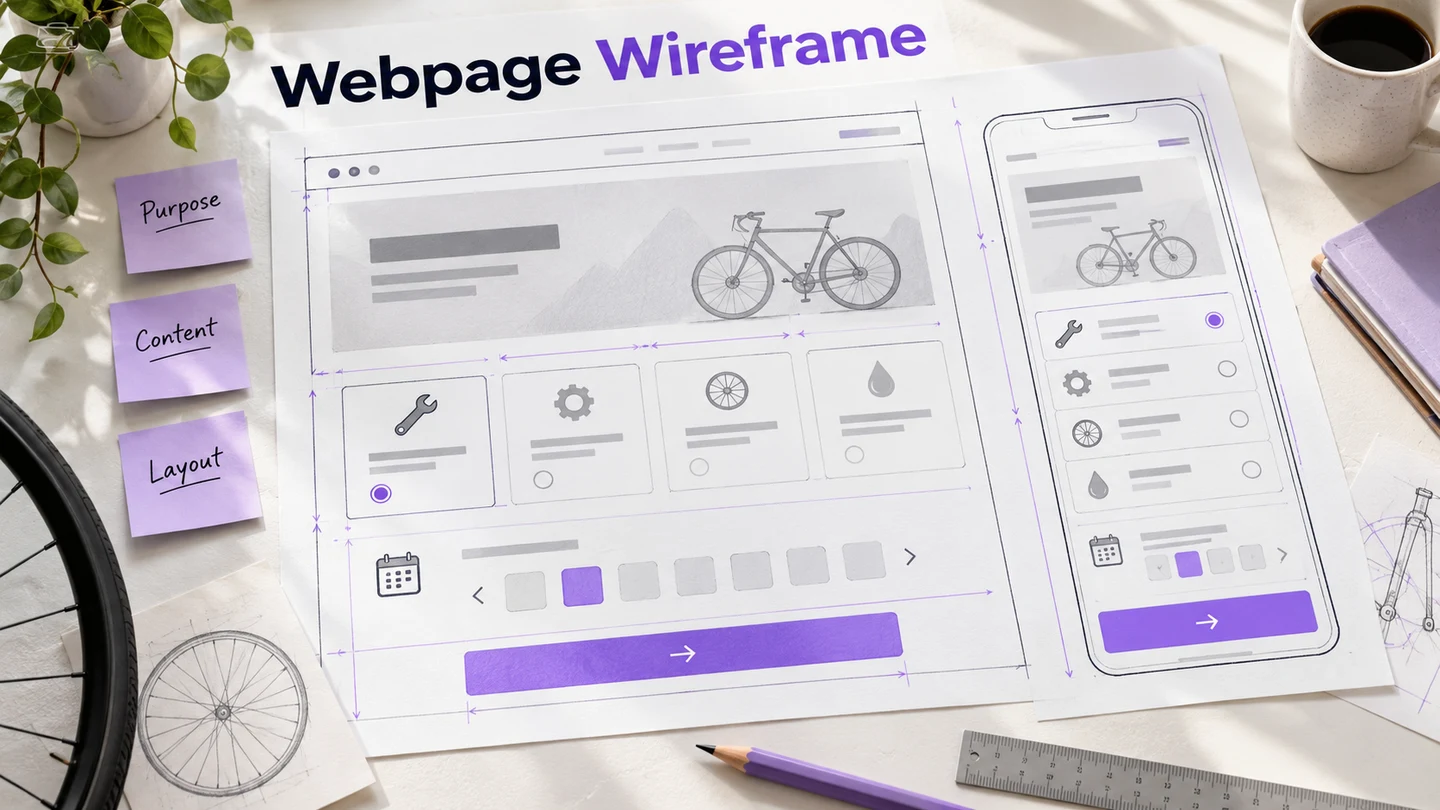
To create a webpage wireframe, define the page's main job, list the information a visitor needs, arrange it into simple regions, and review the layout before adding visual detail. Start with a heading, the primary content, one clear action, and supporting information. You do not need production code to decide where those elements belong.
You can build the layout with Mockitt's wireframe tools, using basic shapes, text, and reusable widgets. This guide keeps the focus on one webpage: the project setup, three building steps, six practical tips, and a service-booking example.
Use Mockitt to Create a Webpage Wireframe
Different wireframing tools have their own strengths and limitations. Mockitt provides a visual workspace for arranging page content and connecting screens when a review needs interaction. Start on a supported desktop browser, choose a canvas for the intended audience's device, and share the design for feedback.
The useful features for a webpage wireframe are straightforward:
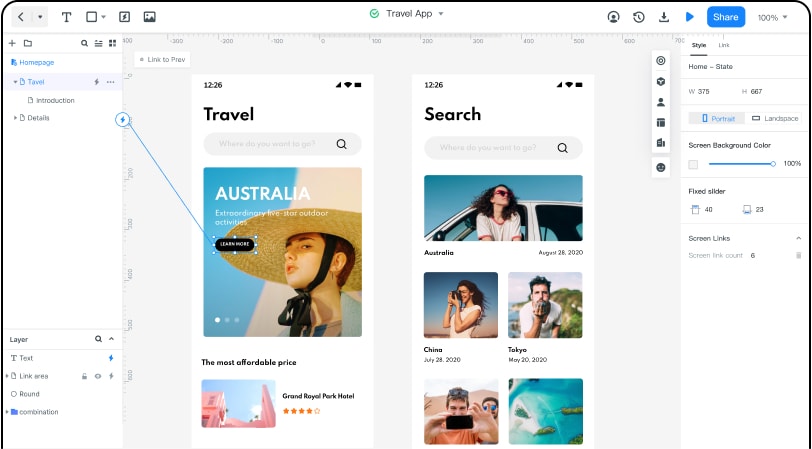
- Cloud-based projects. Keep the shared design available to collaborators and check that changes have saved before a review.
- Templates and widgets. The program has built-in templates that can be used in web page design wireframes. Choose suitable resources, then remove details that do not serve the page's purpose.
- Screen transitions. Gestures and screen transitions can be applied to a wireframe. Add only the interactions needed to explain navigation or a change of state.
- Team feedback. Add team members to your project so they can collaborate and give insights and recommendations on the wireframe.
- Reusable components. Widgets and icons can make it easier to maintain consistency in the project. Customize useful controls or groups, save them, and reuse them in later projects.
- Preview and sharing. Present the design for review before development. A wireframe or prototype is not an installable application or a deployed website.
Three Steps to Make a Webpage Wireframe
Using a suitable tool can make revisions easier, but the important input is the page brief. Write down the visitor, their question, the action they should be able to take, and the content required to support that action. If you are planning navigation across an entire site, first use a website wireframe to establish the page's place in that larger structure.
Step 1: Create a Project
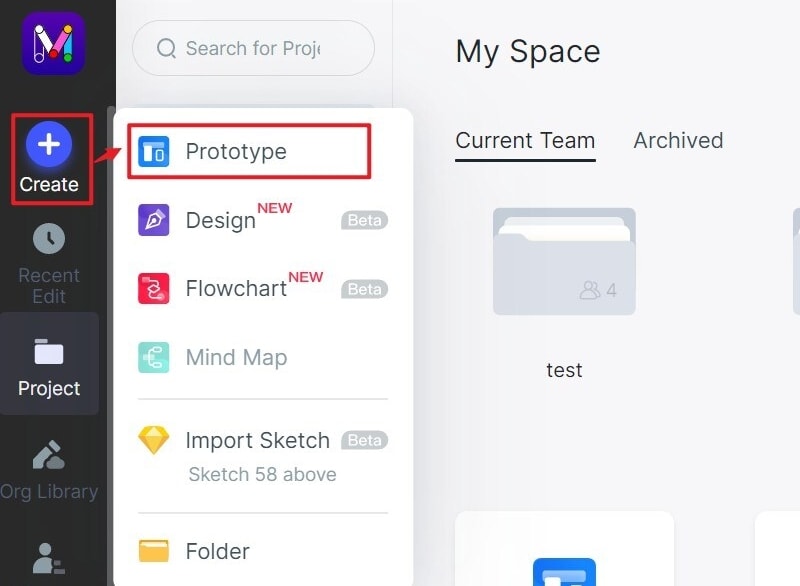
Open Mockitt, sign in, and create a new prototype project. Choose a blank project when you want to build the webpage wireframe from scratch. Give it a name that identifies the page and review purpose, such as “Repair booking — content layout.”
Select the canvas size for the page you are designing, not necessarily the device you are currently using. For a webpage, begin with a web-sized canvas and plan a narrower version for mobile visitors. The old guide screenshot highlights the Create → Prototype entry; project controls may be arranged differently in your workspace.
Step 2: Drag and Drop the Page Widgets
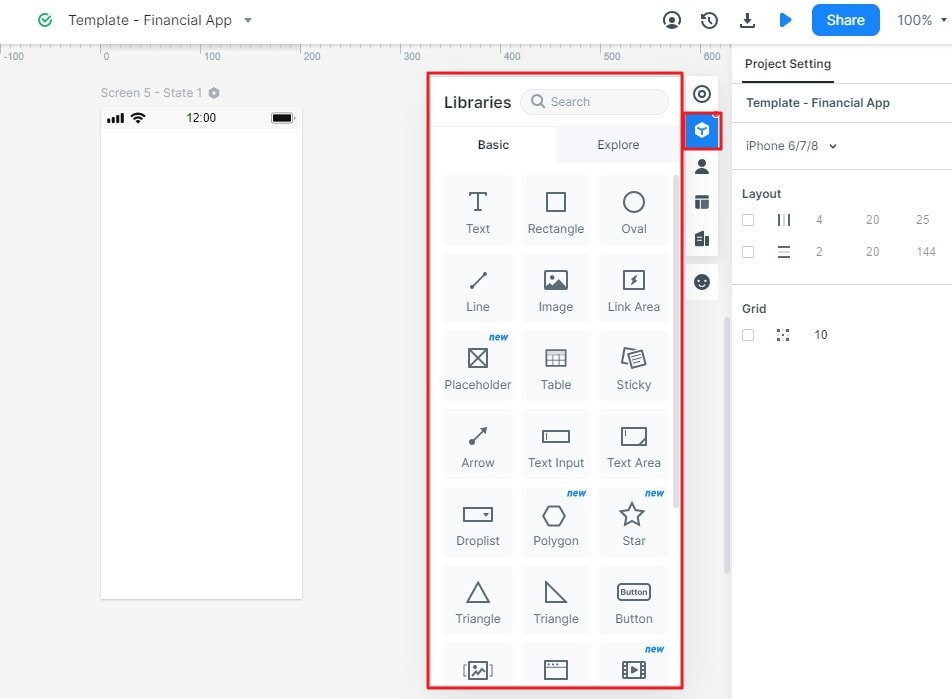
Add the widgets and icons that you planned on using in the webpage wireframe. To add them, drag the widgets and icons from the library and drop them on the canvas. Use rectangles for content regions, text for headings and labels, and simple controls for the main action. Placeholder images are sufficient when the image's position matters more than its final artwork.
Use realistic content where it changes the layout. A service name, price explanation, form label, or error message can expose a space problem that “Lorem ipsum” conceals. Keep decoration limited while the content order is still being decided.
Step 3: Save Useful Widgets for Reuse
Click the widgets and icons on the canvas to edit and customize them in the inspector panel. Save useful widgets in My Widget so you can reuse them in later projects. For a booking page, this might be a field with a label, helper text, and error message, or a consistent summary card.
The guide example below shows the Add to My Widget command. The widget-management guide explains how to work with these resources. Reuse the parts that remain consistent, then adjust the content and states required by this page.
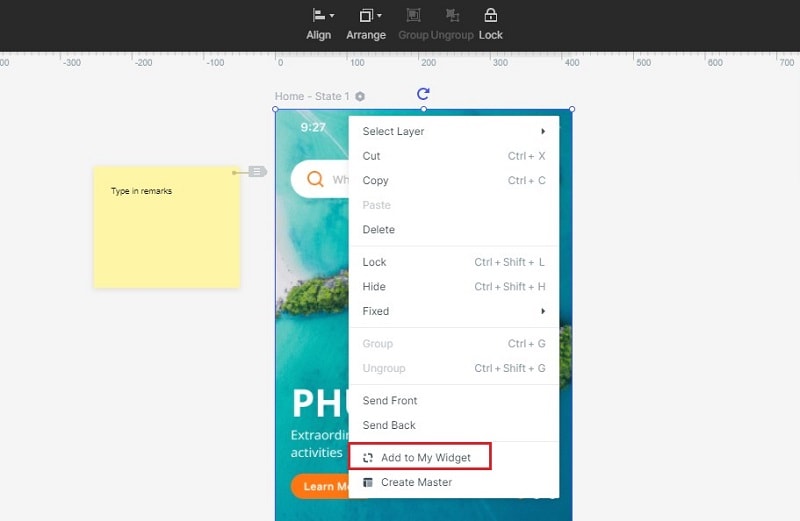
Example: Wireframe a Single Repair-Booking Page
Suppose a fictional bicycle shop needs a page where a customer can request a repair appointment. The visitor wants to know whether the shop handles their problem, what to provide, and what will happen after submitting a request. This example is a proposed layout, not a report of a live customer project.
Write the page brief first: “Help a customer request a suitable repair appointment without assuming the time is confirmed.” That last constraint affects the action label, supporting text, and response state. Use “Request a booking” rather than “Confirm appointment” if staff must review availability.
| Region | Content to include | Question to check |
|---|---|---|
| Heading and introduction | Repair booking, supported bicycle types, and the next step. | Can a visitor tell whether the service fits their need? |
| Request form | Repair issue, preferred date, and necessary contact details. | Are labels and required fields understandable? |
| Service information | Assessment process, location, and any known booking constraints. | Can someone decide without leaving the form to search? |
| Primary action | Request a booking, followed by an explanation of the response. | Does the action accurately describe what submitting will do? |
| Response state | Acknowledgment, request details, and the next contact step. | Will the customer understand that the appointment is pending? |
On a wide canvas, try the request form beside a concise service summary. On the narrow version, place essential eligibility and timing information before the form, then move secondary details below it. Keep the labels visible and let longer explanations wrap. A narrow canvas is a separate layout decision, not merely a scaled-down desktop picture.
Review the page with one task: “Your bicycle's brakes need attention. Request an appointment for next week and explain what will happen afterward.” Ask the reviewer to point to the information they need and describe the action in their own words. Record an unclear label or missing condition before discussing colors.
Show the response and one useful error state, such as a missing contact detail. Annotate what validation or availability checking must eventually do; a static wireframe does not perform those checks. When behavior becomes the main question, continue with the workflow for turning a wireframe into a prototype.
Six Tips for a Clear Webpage Wireframe
- Set a clear objective. Knowing what to include and what not to include, the main audience, and the purpose of the webpage wireframe will help you state a clear goal. Use that goal to settle competing requests for more content.
- Choose realistic canvas sizes. Design for the audience's expected devices and review how content reflows. A desktop layout does not automatically become usable on a phone.
- Keep repeated elements consistent. Fonts, spacing, buttons, and labels should be consistent across the webpage wireframe. Built-in widgets, icons, reusable styles, and symbols can help maintain that consistency.
- Share early. Share the progress of your webpage with the team to seek more insights, clarify questions, and find errors to correct. Early comments and feedback can help, but keep the page's objective in view when considering design suggestions.
- Add useful annotations. Add annotations when presenting the webpage wireframe so the audience can understand behavior that the drawing cannot show, such as validation, loading, or an unavailable option. Place the note beside the relevant element.
- Use color sparingly. Color can be distracting in a wireframe. If necessary, use it sparingly and consistently to mark important objects. If it indicates a state or action, explain that meaning in text too.
A webpage wireframe is ready for the next design stage when the content order, main action, and essential states are understandable. Keep unresolved questions visible and carry the agreed layout into visual design or an interactive review.