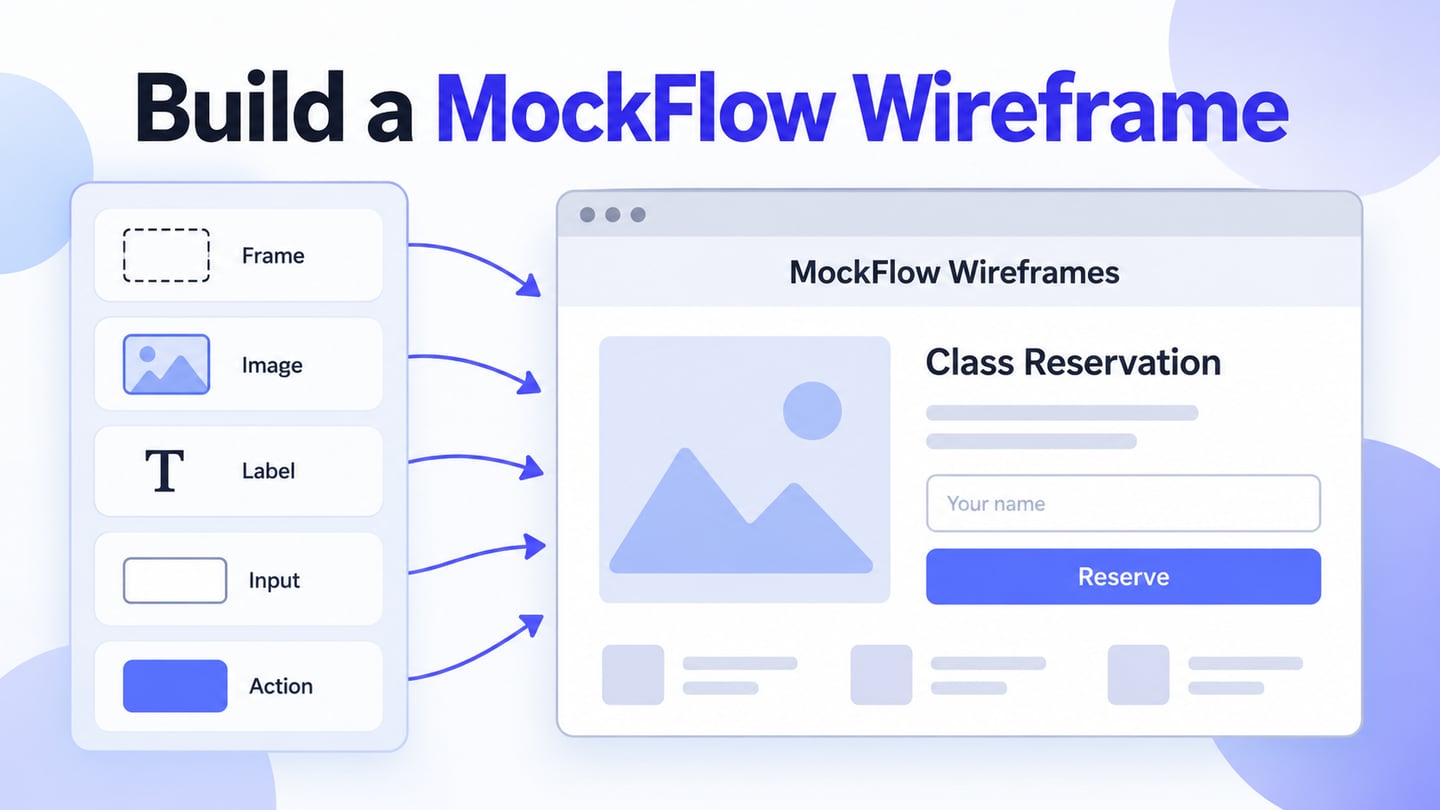
A MockFlow wireframe helps you arrange screens with reusable interface components before deciding on detailed visual styling. This walkthrough keeps the task small: assemble a mobile layout, add content and inputs, then review the intended actions. If the next step is a linked review in a browser, a wireframe workflow in Mockitt can also help you demonstrate how those screens connect.
How to Create Wireframe with MockFlow
Start with the official WireframePro getting-started guide. The steps below describe the component-based workflow; pack names and controls can vary between versions.
Step 1: Sign In to MockFlow
Visit MockFlow’s official site and sign in, or create an account if necessary. Use the official service or authorized download and check the current plan’s limits before starting a shared project. A cracked copy is not a supported route to licensed features.
Step 2: Add Elements to Your MockFlow Wireframe
Open the component selector and choose a UI pack appropriate to your project. Search for an existing pack before building a new one. MockFlow also documents custom component packs: create a pack, name it, and add selected components for later reuse. A saved component does not imply that every placed copy will automatically update.
An older example used an iOS 11 component pack. For a new project, choose a currently available pack that matches the device and controls you need.
Step 3: Drag and Drop the Specified Project Size
Place a device frame or appropriately sized screen on the canvas. Pick dimensions that match the prototype’s review context instead of relying on an old device-pack name. Use guides to align the header, content area, and any status bar. Keep the status bar only if it helps explain the mobile layout.
Step 4: Drag and Drop the Image Box
Search for an image component, then drag it into the wireframe. Return to the search box and find a label component. Place it beside the image and adjust the type size and alignment so the label clearly describes the content.
Step 5: Add an Input to Your MockFlow Wireframe
Search for "Inputs" in the search box. Drag and drop your favorite design into the wireframe design. Resize and align the input box as you desire. Additionally, you can set the font size and color of the text that will be included in the Input text box.
Step 6: Add Controls and Explain Their Behavior
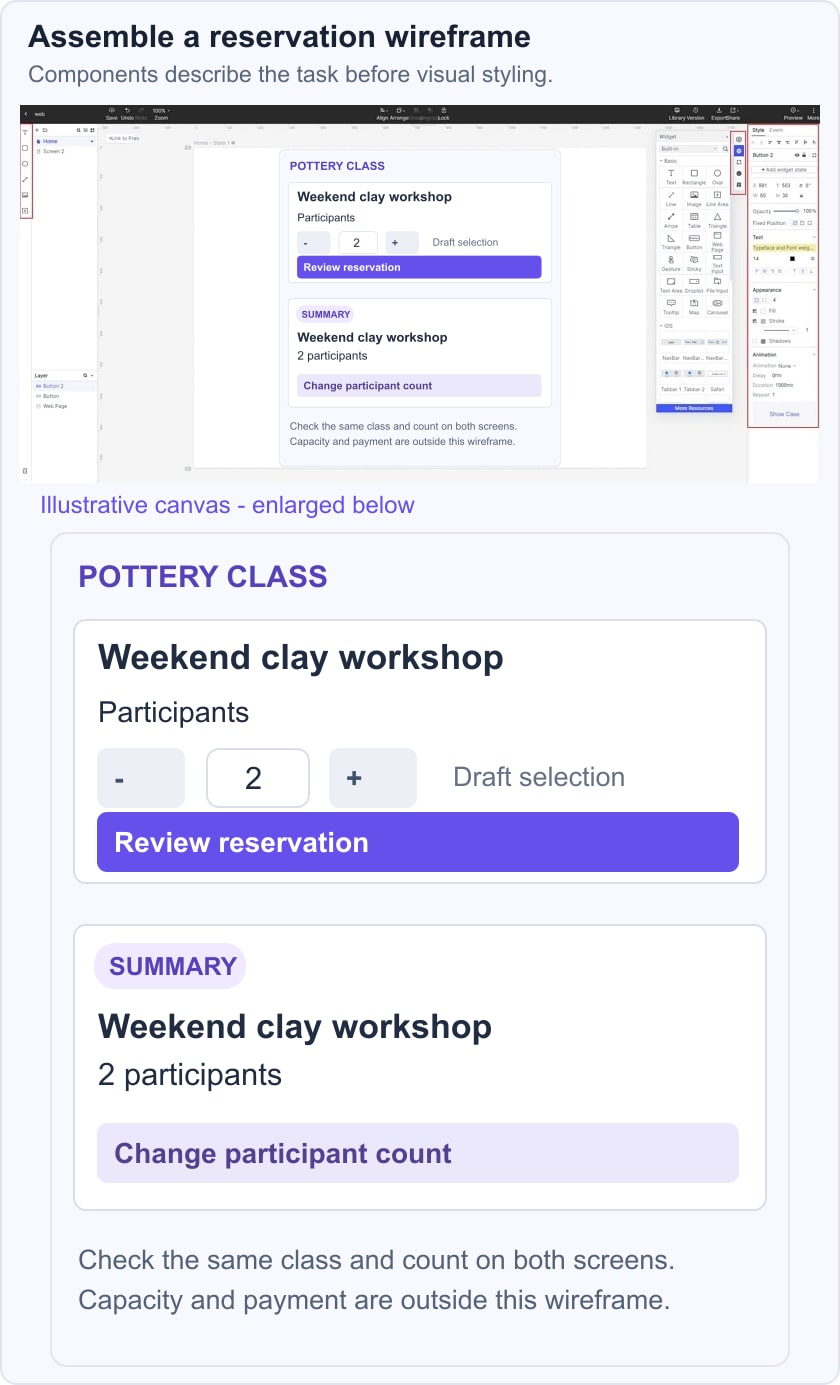
Add controls such as buttons and radio options where the task requires them. A drawn button is only a visual element until you configure its supported interaction or explain its behavior. For a pottery-class reservation example, use a participant count, a “Review reservation” action, and a second screen that summarizes the class and count.
Review the reservation example before adding color: can someone identify the selected class, change the number of participants, and return from the summary without losing context? The wireframe represents those decisions; it does not check real class capacity or take payment. MockFlow’s wireframe documentation feature can help record behavior that is not visible in a static frame.
How to Create Wireframe with MockFlow Alternative
Mockitt provides another way to build and review the wireframe as a connected flow. Its browser workspace brings screens, widgets, and preview links together. Choose it when the immediate deliverable is an editable prototype that teammates can review, and confirm any required sharing or export options in the current account.

Useful capabilities for this workflow include:
- Share the project with teammates so they can review the layout and comment on unclear decisions.
- There are numerous templates, widgets, and icons in the program's library making it easier to create a quick wireframe.
- Use the sharing or export options available to the project, and check that the chosen output preserves what the reviewer needs.
- A cloud workspace keeps the project accessible to authorized collaborators with an internet connection.
- Connect screens and configure interactions to demonstrate the intended flow.
Here are steps in creating a wireframe with Mockitt
Step 1: Open Mockitt
Open Mockitt and sign in to the current workspace. The remaining screenshots show historical Mockitt interfaces, not MockFlow. They preserve useful examples of project setup and widget editing; follow the current workspace controls if their labels differ.
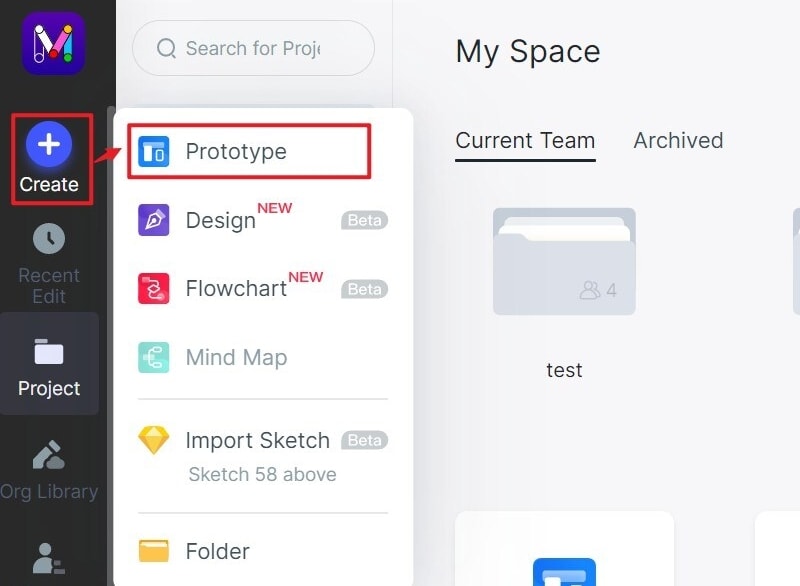
Step 2: Creating a New Project
Click on the "Create Project" button followed by a tap on the "Blank Project" option to begin creating your wireframe. Besides, you can also choose the "Create Project" from the Demos if you would like to use the templates in the program's library in designing your wireframe.
Step 3: Title and Size of the Project
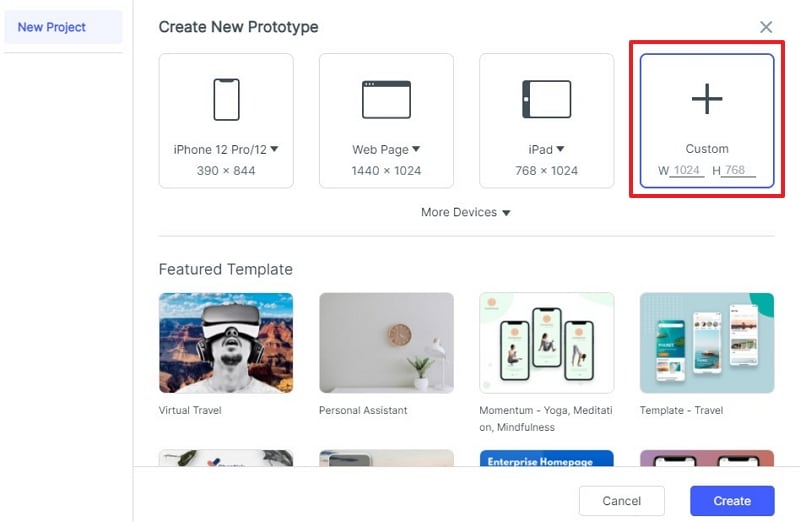
Give the project a clear name and select a suitable mobile or web preset, or enter a custom size. For the reservation example, use the same phone dimensions for the selection and summary screens. Confirm the viewport size with the team before arranging components.
Step 4: Adding Elements on the Wireframe
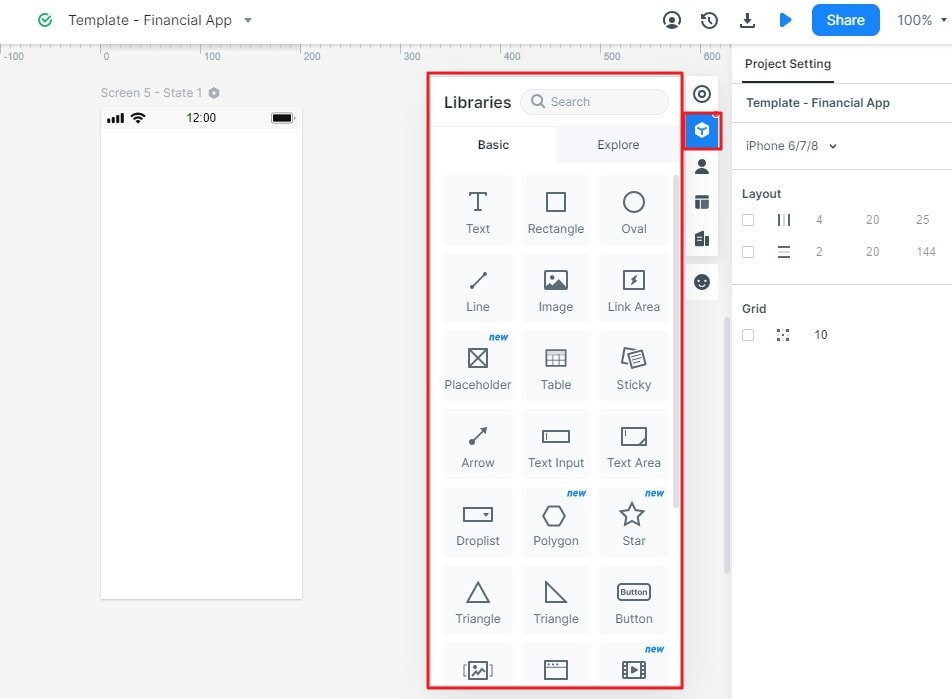
The page layout is set then all you need is to add the UI elements into the wireframe. To do this, simply drag the required widgets and icons from the Fast Widgets panel on the left side of the window and drop them in the Canvas. Position the widgets and icons where you need them in the wireframe and you can also resize them into the best dimensions.
Step 5: Editing and Saving the Customized Elements
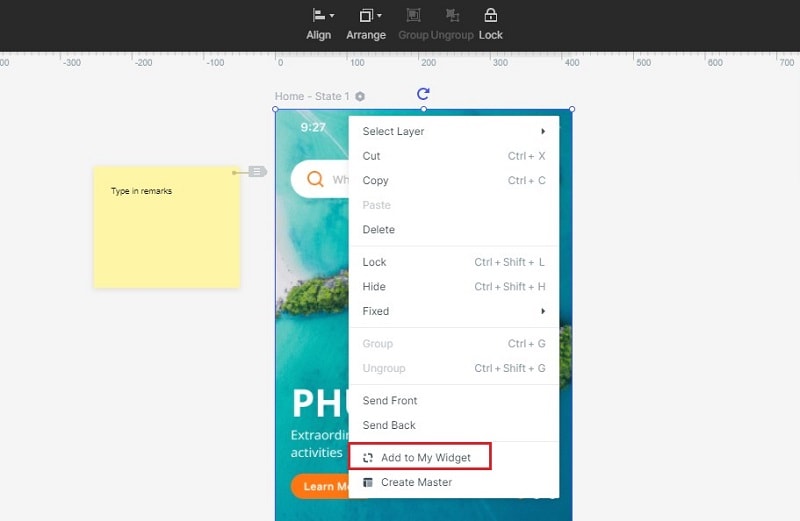
Additionally, you can edit the widgets already in the Canvas from the Inspector panel, however, you will first have to click on them. Save the customized elements by dragging them from the canvas and dropping them in My Widget panel.
Tips for Creating Wireframe in MockFlow
A useful wireframe makes decisions visible. Use the following checks while you build, rather than waiting until every screen looks finished.
For a board-based approach to frames and states, compare the Whimsical wireframe workflow. The UI wireframe tool guide can help you compare the type of deliverable each tool supports.
- Although it may seem outdated, sketching a wireframe on a piece of paper is very resourceful as it will help you set the foundation of the wireframe. You can also sketch your wireframes digitally with the help of third-party tools.
- Consistency is an amazing skill that should be upheld when creating MockFlow Wireframe.
- Avoid using colors in your wireframe design, however, if necessary, then do it sparingly.
- Share the progress of your wireframe with the team as well as the client. Team collaboration of design ensures that the objective of the product is maintained. It also helps to correct errors at an early stage.