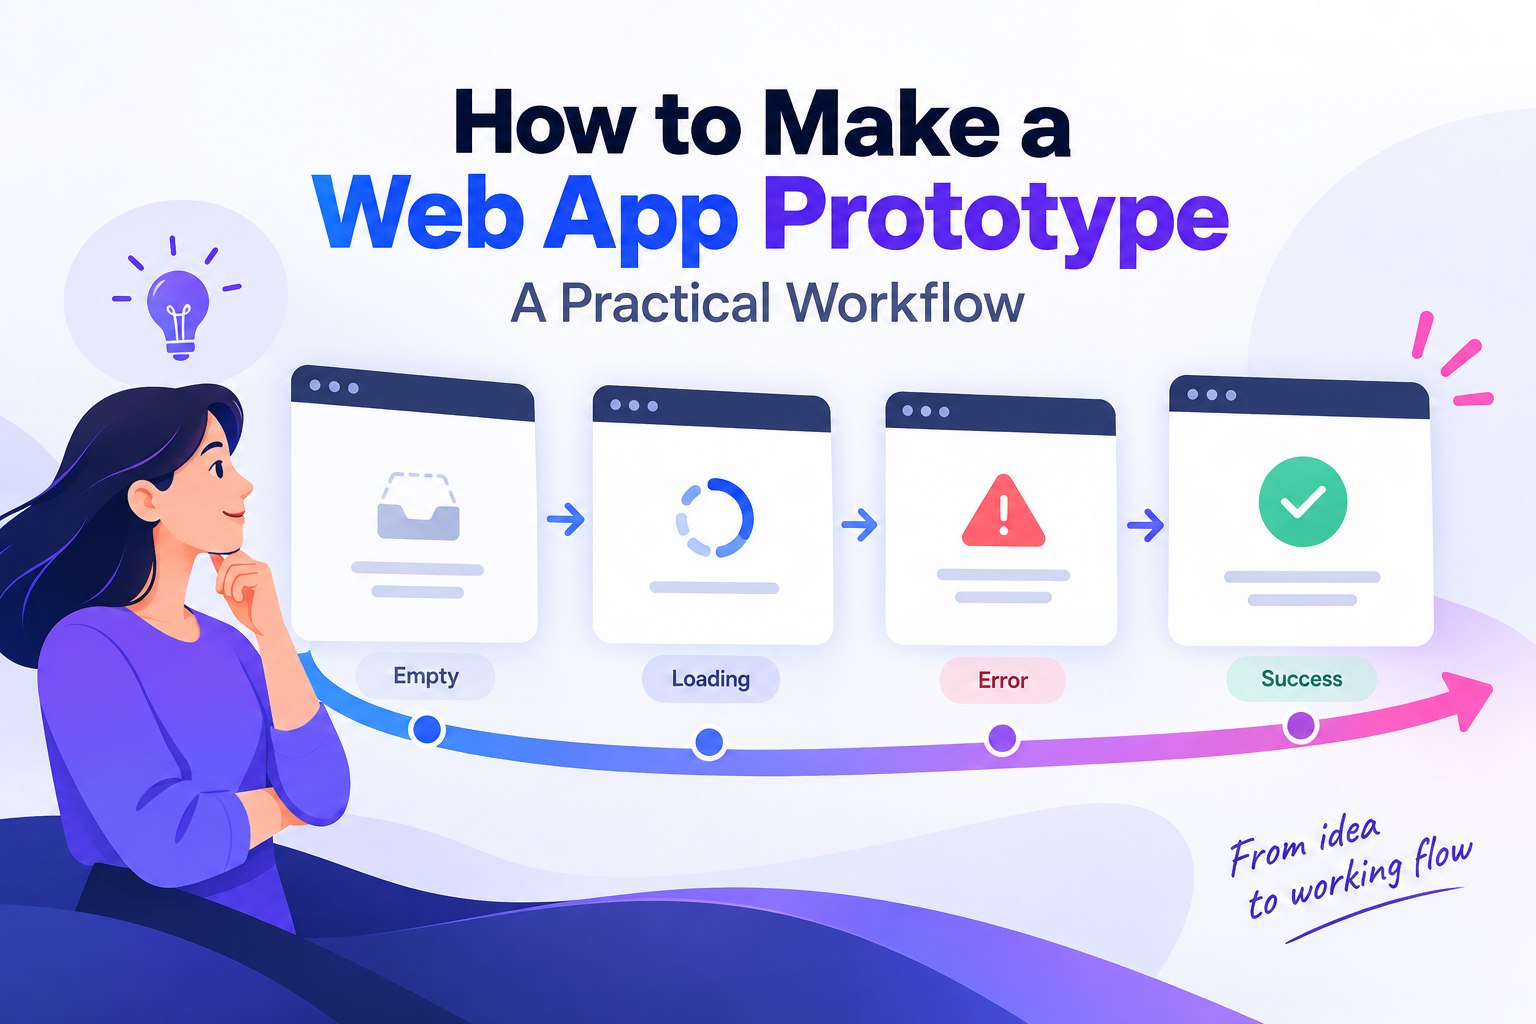
A web app prototype models a task through connected screens, user actions, and visible system states before the application is implemented. Start with one complete route, add the states that can interrupt it, and review the same task at the viewport sizes that matter. The steps below show how to build that model in Mockitt and prepare it for review and handoff.
A Tool for Web App Prototyping
Mockitt is a powerful all-in-one prototyping tool. Its visual editor lets you arrange screens and define interactions without implementing the application first. Beginners can start with one task, while experienced designers can model more detailed states and flows.
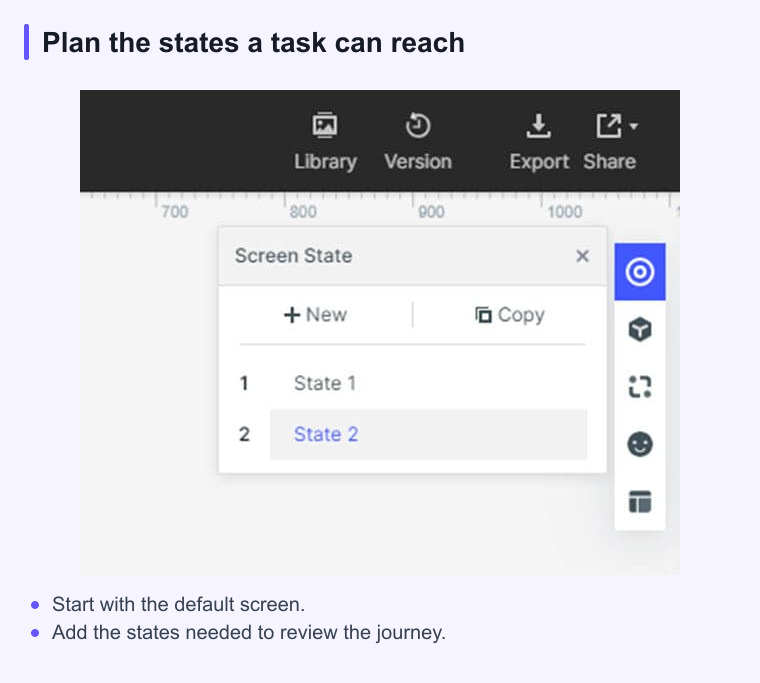
Mockitt has a plethora of templates to choose from anytime. These provide a design starting point that you can adapt instead of drawing every element from scratch. Besides, you have a pool of widgets and icons to choose from to make your prototype more appealing. The good thing is that you can save them in your own library then reuse them any time you need. You can select widgets depending on the type that ranges from iOS, Windows, built-in, basic, material design, and element among others. Mockitt is also a powerful collaboration tool as team members can access a shared project from compatible devices with an internet connection.
- Mockitt offers plenty of templates that suit diverse industries.
- There are several widgets and icons to create beautiful interfaces.
- It supports real-time collaboration and therefore, team members can edit projects on the same page, share feedback, and comments in real-time.
- This program allows users to create interactive and animated prototypes.
- With Mockitt, users can preview the interactions defined in the prototype.
How to Create a Web App Prototype
The screenshots below show an earlier Mockitt editor. They illustrate project creation, reusable widgets, links, notes, sharing, and handoff; some captures use a phone canvas. For this web-app task, choose a web-sized canvas and make separate narrow-layout variants where needed. The phone examples do not demonstrate a responsive web layout.
Step 1: Create a Project
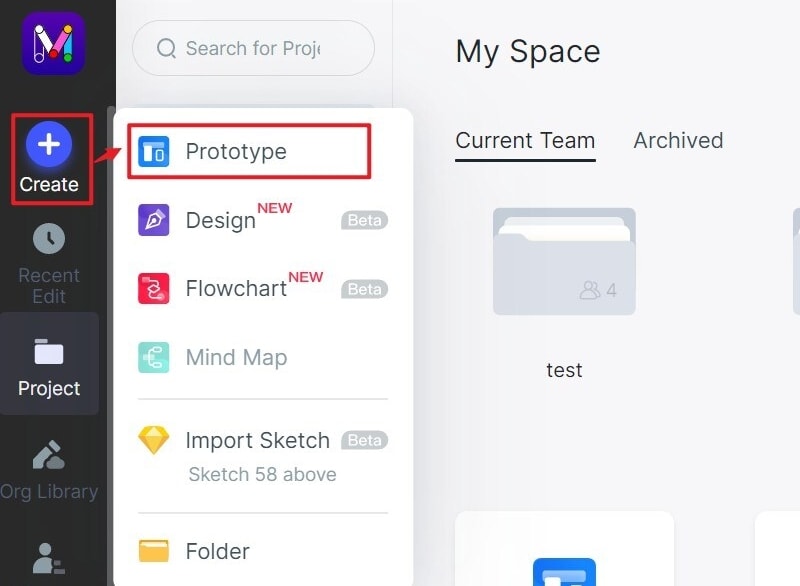
To start with, go to the Mockitt website and log in using your credentials. Once logged in, locate and click the "Create" button followed by "Prototype".
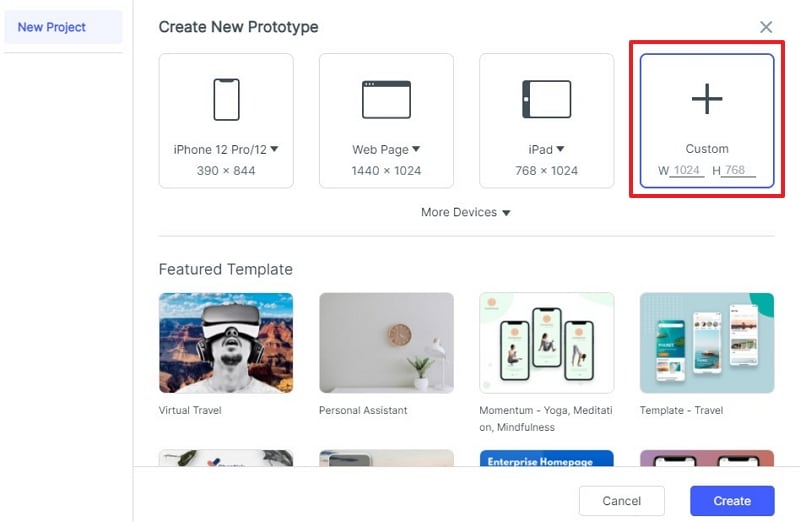
You will be taken to a new page to fill in the project details like your project's name and the desired canvas size/template. Choose a Web Page or custom viewport appropriate to the web task rather than copying the phone dimensions used in some of the older widget examples.
If you want to edit the project's details, simply hover the cursor over the project and choose the "Settings" option. Change the project's details such as name, size, and type then hit the "Save" button.
Step 2. Insert Widgets and Icons
Widgets and icons are going to make your website look appealing. You can add Fast Widgets, Built-in Widgets, My Widgets, and Icons.
- For the Fast Widgets located in the left pane, simply double-click, drag, press the hotkeys, and start drawing.
- For the other widgets located on the right side, click their respective icons to access them then double-click them and drag them to the canvas. To select categories of widgets, click the "Built-in" drop-down icon and choose specific categories of widgets you want to use.
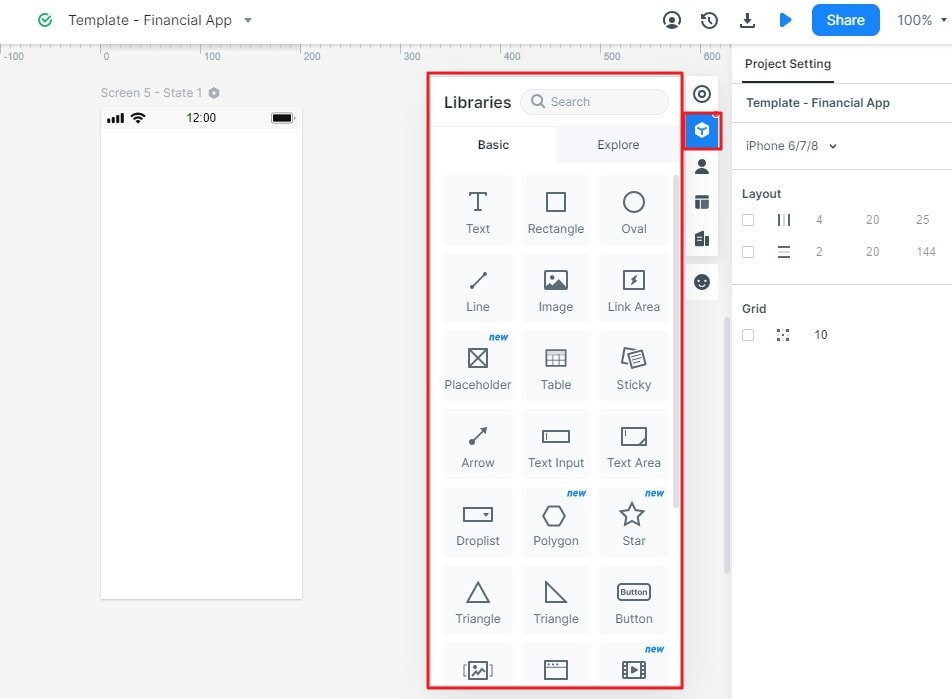
- Drag the desired widget like text area, sticky notes, buttons, sliders, drop-down buttons, and radio buttons among others depending on your need. You can also drag a suitable image (for your webpage) to the canvas background from the source folder then resize it to meet your needs.
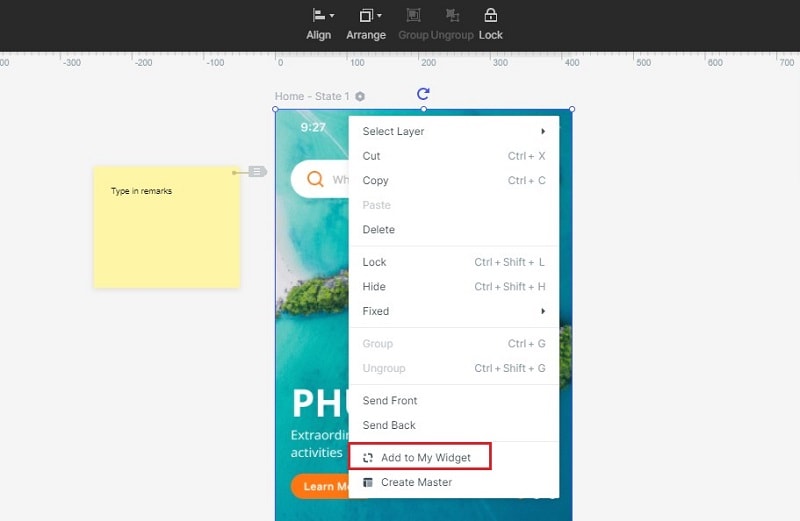
- To save a reusable widget, use the “My Widget” library or the widget’s context menu. The historical editor labels that action “Add to My Widget.”
Step 3. Create Interactions
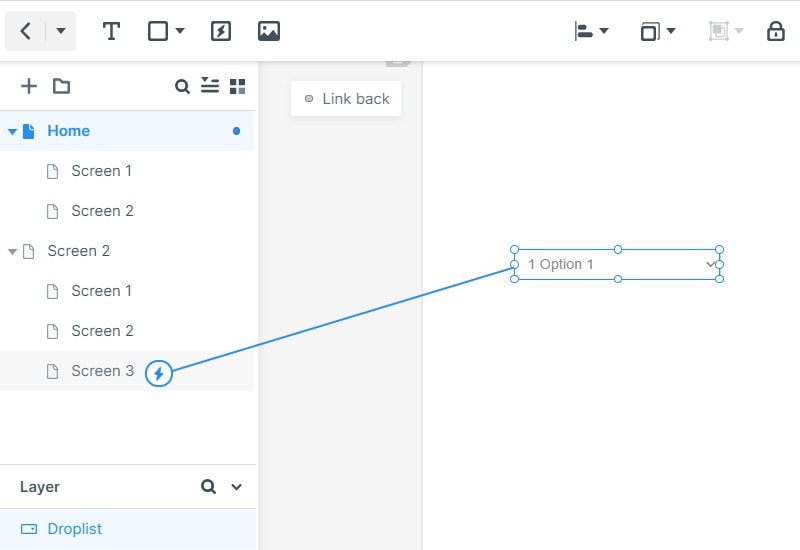
This process can be accomplished in two different ways. One way is to select the widget and navigate to the "Link Panel" at the right. Hit the "New Link" option and choose the desired gesture, action, destination screen, and animation. The other way is to click the widget, drag the arrow icon on the left of the widget to the target screen then set the desired gesture, action, and animation on the Link Panel.
Step 4. Add Notes to Your Web Prototype
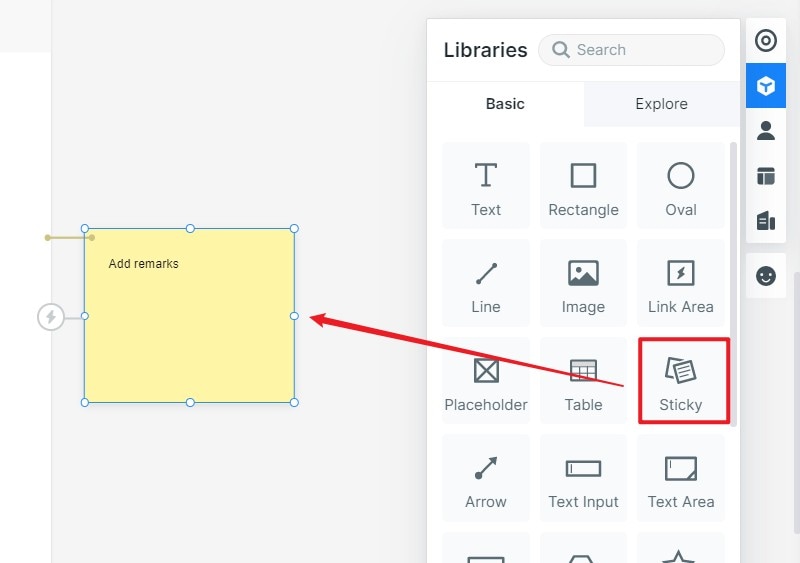
Select the "Built-in" widgets, choose the "Sticky" widget and drag it to the canvas. Start typing text inside it.
Step 5. Preview and Share
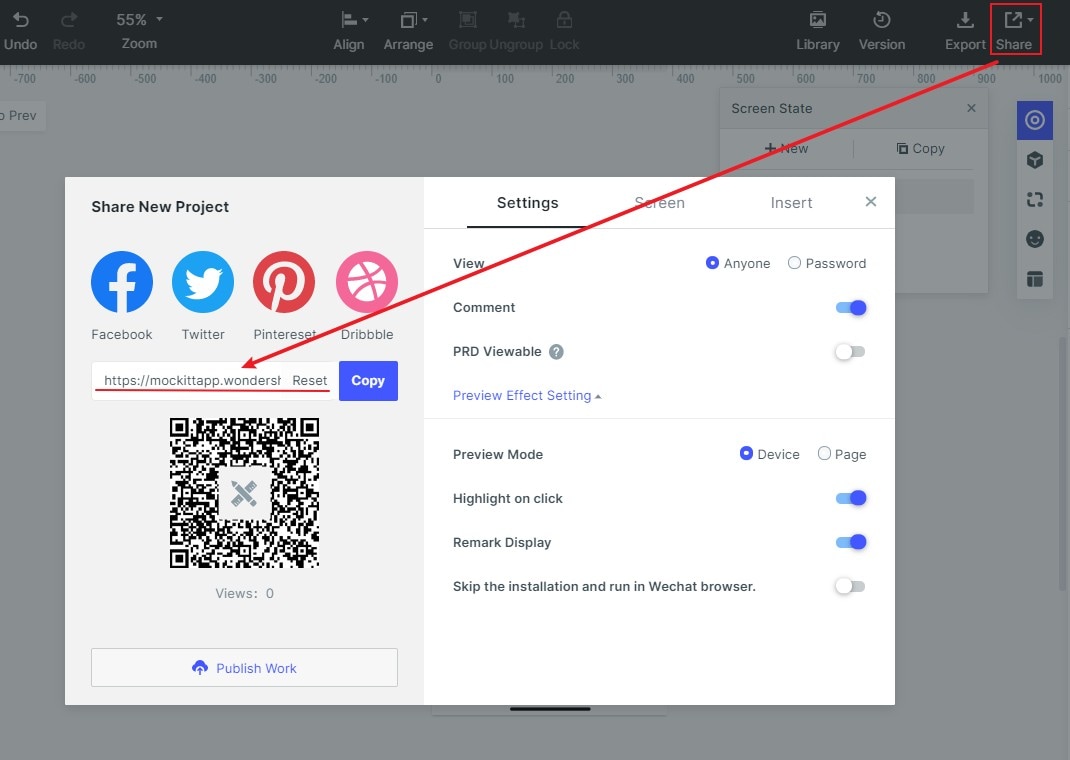
Click the "Preview" tab and interact with your prototype. If satisfied, hit the "Share" button to receive the QR code and project link. Share these details with your friends to see your prototype. You can change the visibility settings as well.
Step 6. Hand Over to Developers
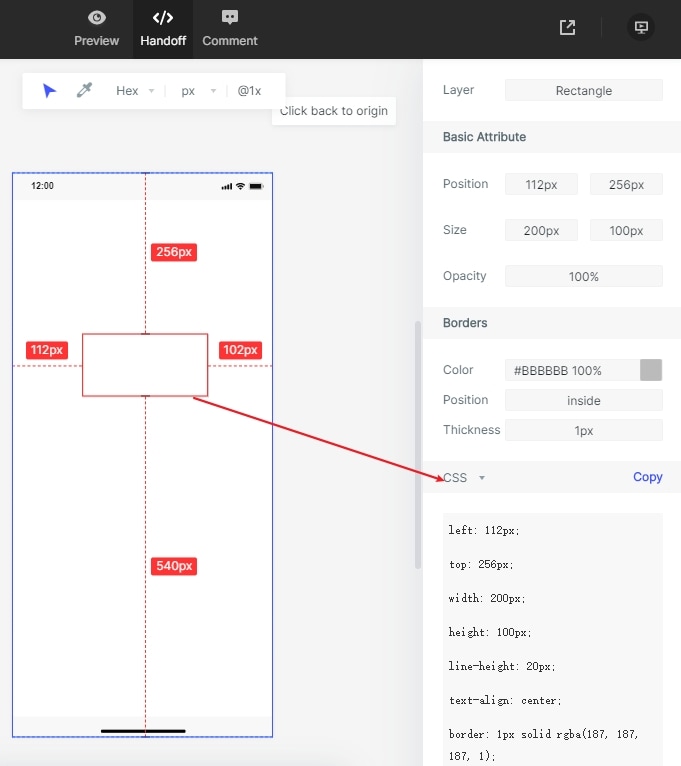
Developers can use the "Handoff" view to inspect design properties and copy available CSS style values. Include notes about states, validation, and data behavior; style values do not implement those functions.
Give a web app prototype a testable scope
A web app prototype does not need every page to be useful. Choose one end-to-end journey and include the states that could change a user’s decision, such as loading, empty, success, and error.
Share the prototype with a short task list. Reviewers can then comment on the same actions and you can distinguish a flow problem from a visual preference.
Worked example: submit a support request
Use a fictional support portal to test whether someone can submit a request and recognize its status. The task is: “Your team cannot export its monthly report. Ask support for help, then check what happens to the request.” This gives the review a visible end point without suggesting which control to use.
- Prepare the route. Create a request list, a new-request form, and a request-detail screen. Use a realistic subject, “Monthly report export fails,” a product selector, a description, and a Submit request action. Keep the values consistent across screens so reviewers can recognize their request.
- Build the alternate states. An empty list needs a clear way to start. A form with no subject should retain the other values and explain what needs fixing beside that field. After a valid submission, show a pending state with one clear status message; a second click must not appear to create another request.
- Connect recovery and completion. A simulated failed submission should preserve the draft and offer Retry. A successful submission should show a request reference, the submitted details, and the next expected step. Returning to the list should reveal the new request. Keep success and failure as separate, deliberately chosen prototype branches; do not imply that a real service processed either one.
- Review the same task at a narrow width. Keep the subject, current status, and primary action readable. Decide how list columns stack or disappear, where field errors appear, and whether long descriptions push the submit control out of reach. A separate narrow screen models a layout decision; it does not demonstrate automatic responsive behavior.
During review, record where the participant hesitates, whether the draft survives the recovery route, and whether they can explain the final status. Add unresolved validation, duplicate-submission, and persistence rules to the handoff notes for engineering to implement and test.
Validate responsive states before handoff
A web app prototype should show how the task behaves when the viewport, content length, or network state changes. Start with the desktop route if it is the primary context, then deliberately review the narrowest supported layout.
| Check | Prototype evidence | Decision |
|---|---|---|
| Layout | Same task at desktop and narrow widths | What stays visible and what reflows? |
| Content | Short, long, empty, and translated labels | Does hierarchy survive real content? |
| System state | Loading, error, permission, and success | Can the user recover without guessing? |
| Handoff | Annotated states and linked interactions | Can engineering identify the expected behaviour? |
Mockitt is useful here because the team can keep screens, links, and state variants in one reviewable flow. Treat the prototype as a model of selected behaviour; verify production constraints separately with engineering.
A five-pass web prototype review
- Trace the primary task from entry to completion.
- Resize the frame and inspect wrapping, overflow, and sticky controls.
- Replace sample copy with the longest realistic label and value.
- Break the route with an error or empty response and check recovery.
- Export a decision list with owner, evidence, and implementation note.
This sequence catches more than visual polish alone. It gives the team a concrete record of which responsive and state decisions are intentional.
Use a structured prototype critique to review the unresolved design choices with the team. If you need to compare this version with a later iteration, define a repeatable usability benchmark before changing the task or measurement.
Conclusion: The workflow above produces a web app prototype that reviewers can navigate and discuss. Check the main path, add the states that affect the task, and hand over the agreed behavior with its design specifications.