A useful calendar app design makes dates, events, and changes easy to understand. Choosing a prototyping tool is one part of the work; you also need to decide how users create an event, correct a conflict, and confirm a change. Use the calendar-design workflow and scheduling example below to review those decisions before development.
A Tool for Designing a Calendar App
You can use Mockitt to prototype a calendar app in the browser. Arrange a calendar view, add event details, and link controls to the screens or states you want people to review. The prototype represents the interface and its interactions; it is not a live calendar service and does not synchronize bookings by itself.
 Original tutorial screenshot from an earlier Mockitt interface; current panel labels may differ.
These features support the calendar-design workflow:
- Reusable components: Start with interface components or your own event cards, then add interactions to the controls that reviewers should use.
- Icons and widgets: Use familiar calendar and navigation elements where appropriate. A widget gives you a starting point, not a complete set of booking rules.
- Share and preview: Send the project’s preview link to reviewers and confirm its access settings before the session.
- Browser-based editing: Create and review the prototype online without treating a desktop player as a required part of the workflow.
Steps to Design a Calendar App
Follow these steps in Mockitt. The retained screenshots show an earlier interface and an example calendar; they illustrate the workflow rather than current dates or an exact match to today’s panel labels.
Step 1: Create a New Project
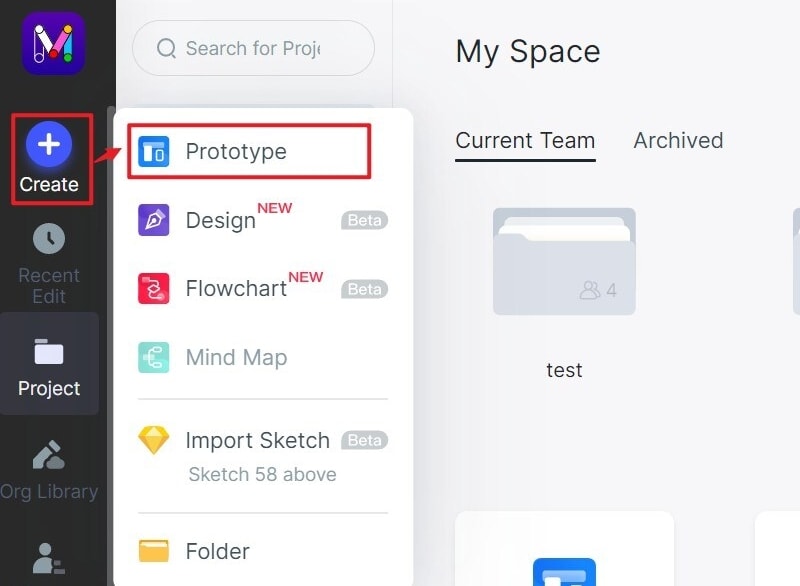
Sign in and create a prototype project. Choose a mobile or web screen size to match the calendar you are designing, or set a custom size. Name the screens by their tasks, such as “Day view,” “Event details,” and “Change time.”
Step 2: Design the Calendar App
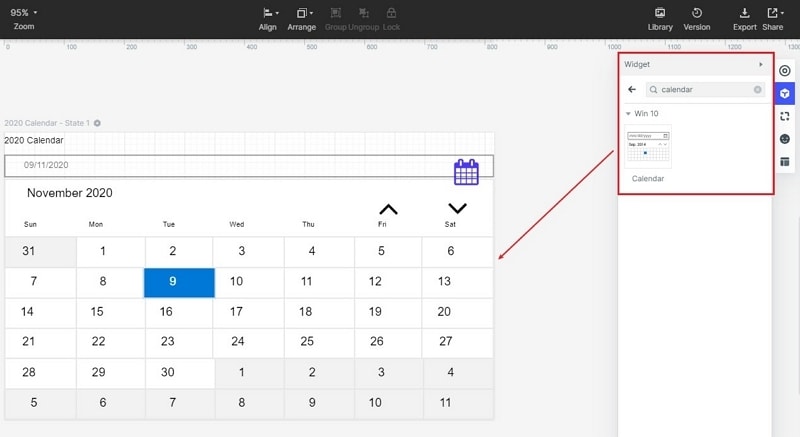
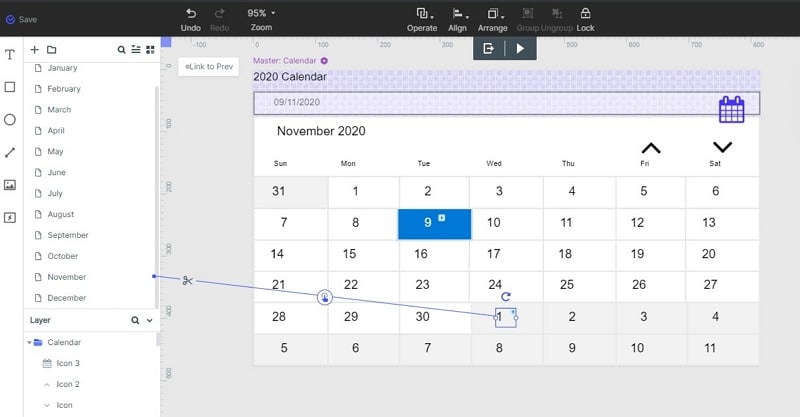
- Add widgets and icons: Drag calendar elements from the available libraries, or build a day view with text, lines, and event cards. The original screenshot shows a Calendar widget. Keep the selected date, event time, and navigation controls visually distinct.
- Add links between screens: Select an interactive element and link it to its destination screen or state. Connect an event card to its details and an edit control to a change-time view. Choose a trigger and transition that make the change understandable.
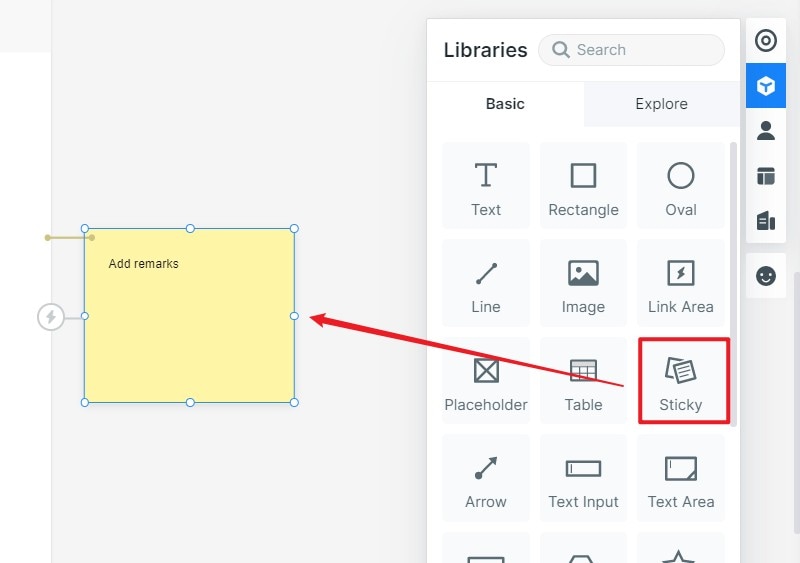
- Add notes: Use annotations or a sticky note to explain rules that the prototype cannot enforce, such as room capacity or recurring-event exceptions. Keep these review notes separate from text meant for end users.
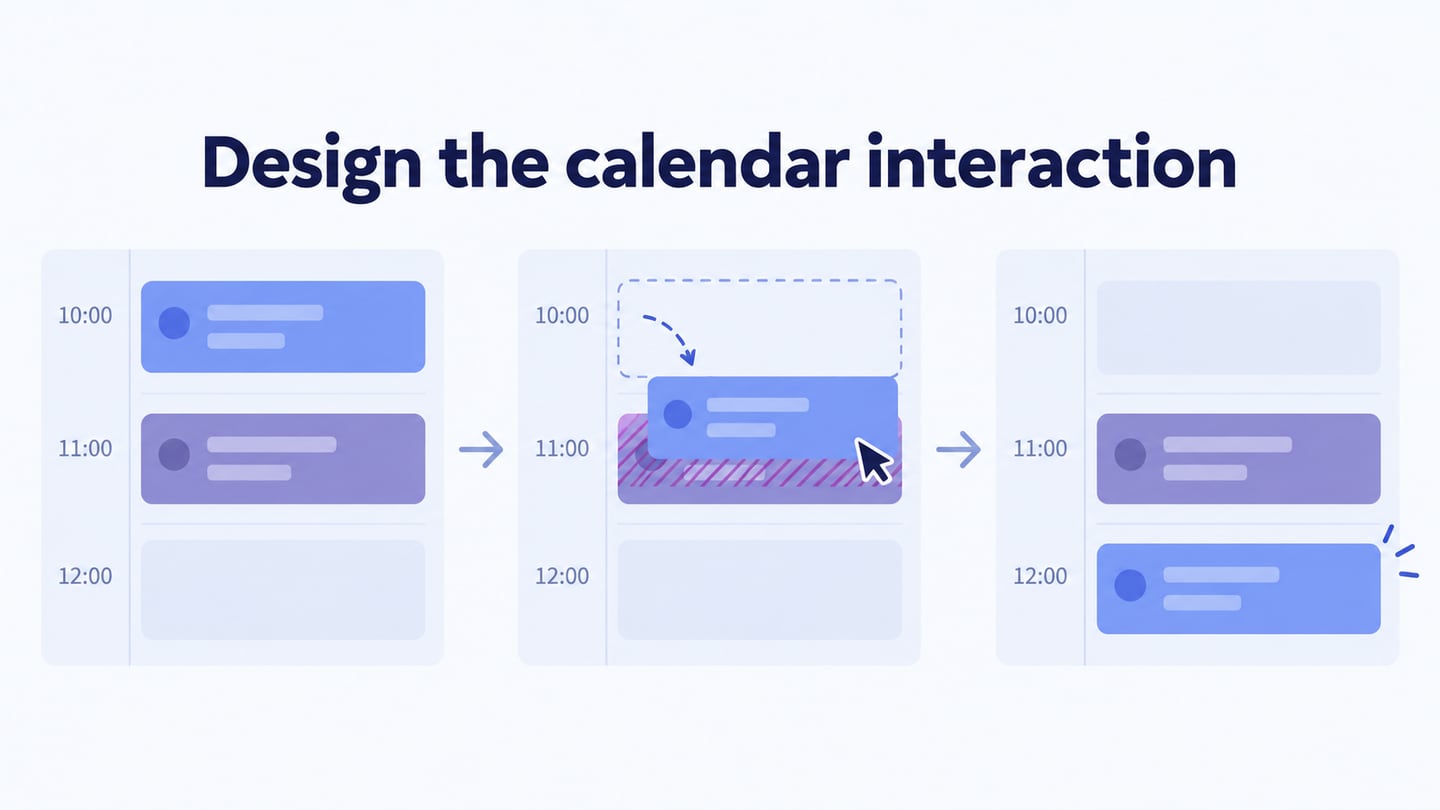
Consider a community-room booking calendar with a workshop scheduled for 10:00. A user tries moving it to 11:00, but another booking already occupies that slot. Show which booking conflicts, preserve the unsaved workshop details, and offer an available 12:00 slot. After confirmation, both the event details and the day view should show the new time. If availability is held only temporarily, show hold expiry and recheck the slot while retaining the entered booking details.
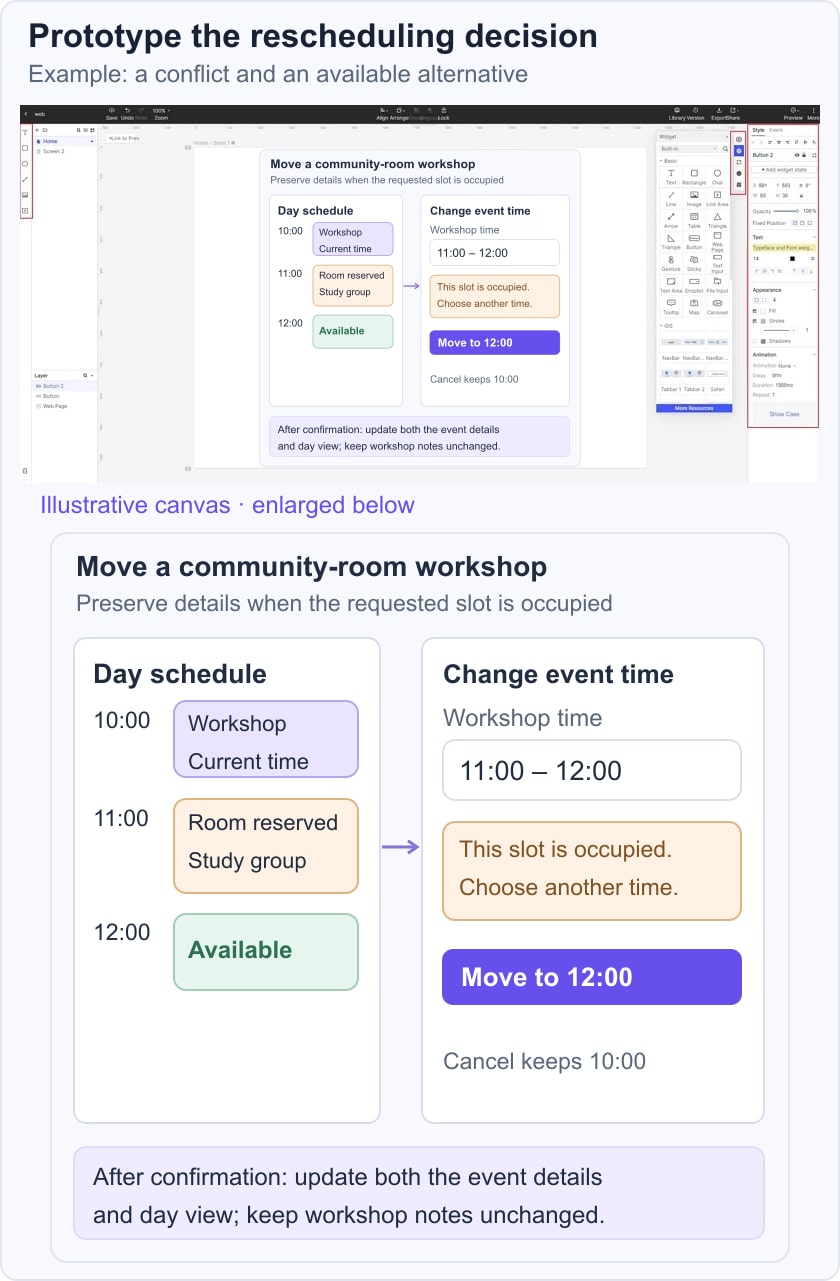
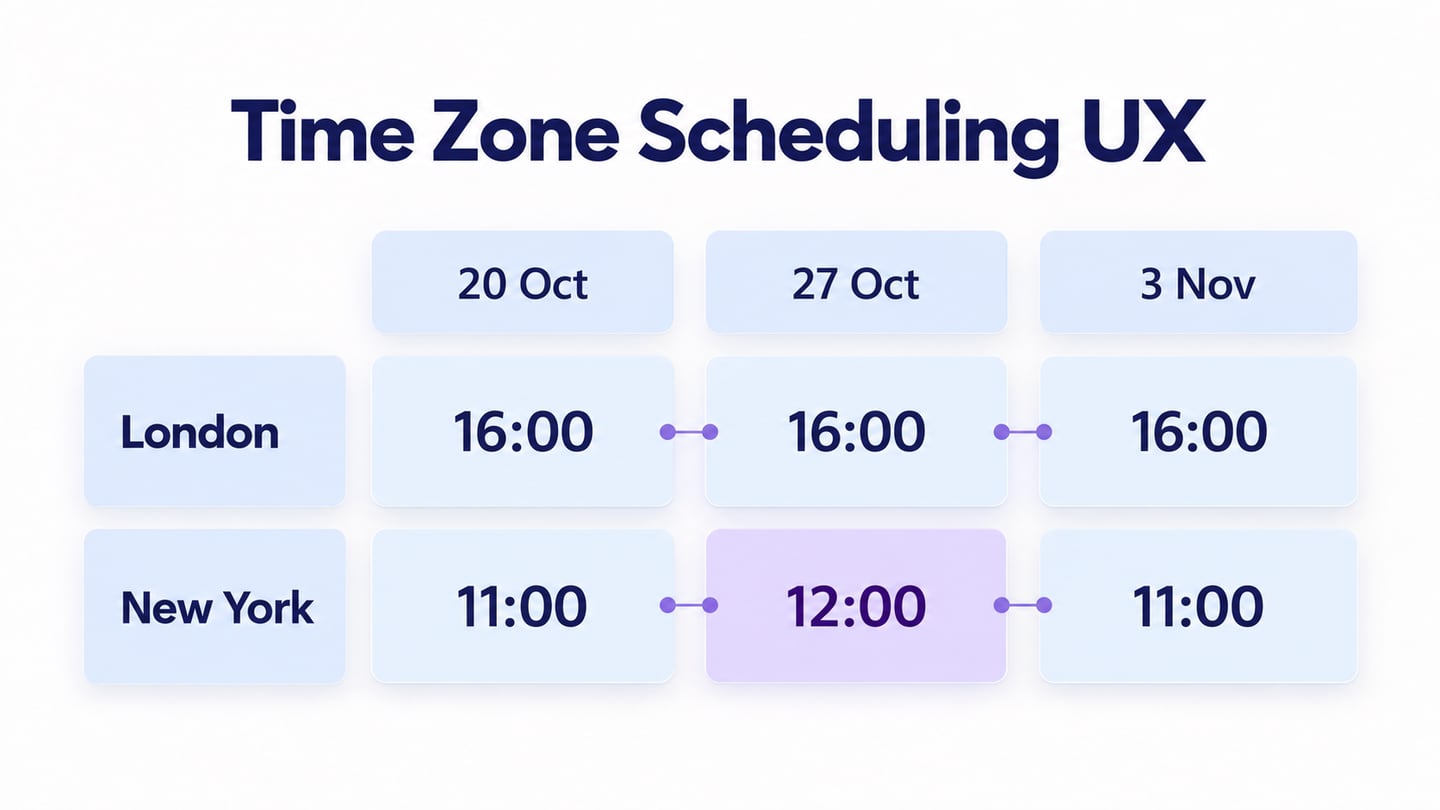
Use a separate state for cancellation so “Back” does not accidentally save the move. If the calendar supports recurring events, ask whether an edit affects one event or the series. For cross-time-zone scheduling, make the displayed time zone visible before confirmation; that rule needs implementation and testing beyond the prototype.
Step 3: Preview the Calendar App Design
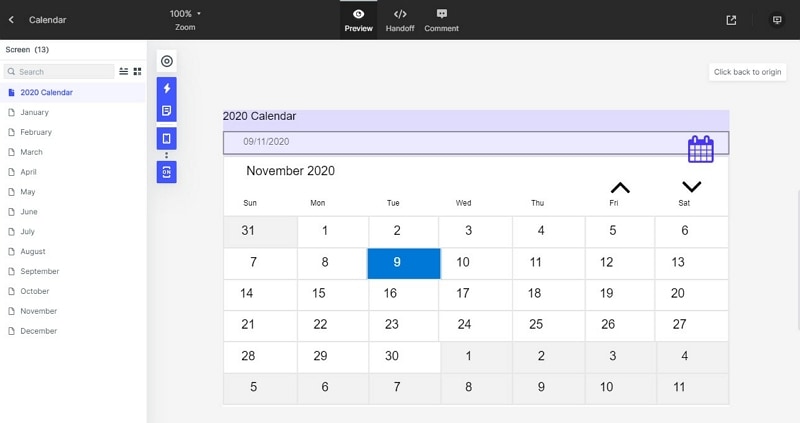
Select Preview and follow the event-editing path. Open the shared preview on the intended mobile device as well as a desktop browser when both matter to the project. Check that event labels remain readable and that the occupied slot cannot be mistaken for an available one.
Step 4: Share the App Calendar Design
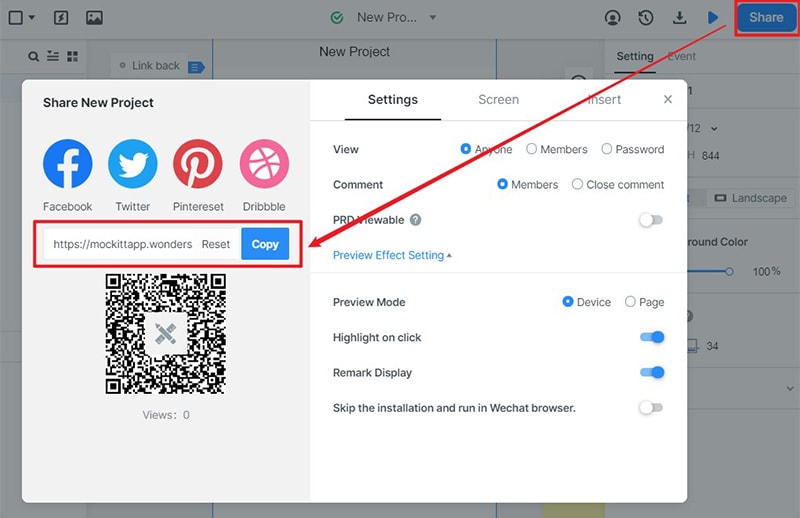
Use Share to copy the preview link, check who can access it, and send it to the people reviewing the schedule. The original sharing screenshot records an earlier interface; use the current project’s generated link rather than a URL shown in an archived image.
Useful Tips to Do Calendar App Design
The calendar grid is only part of the experience. These design choices help keep the event workflow understandable.
1. Choose Technology Around the Scheduling Rules
Choose technology that supports the actual scheduling problem: single or recurring events, local or shared calendars, and the required availability checks. Avoid adding features only because they are fashionable. Write down which behavior is simulated in the prototype and which requires a data source or service in the finished app.
2. Keep the Main Actions Simple
Make viewing, adding, and changing an event easy to distinguish. Use clear labels and keep the selected date visible. A compact month view can help someone navigate, while an agenda or day view may be easier for reading long event names. Choose the view that supports the task instead of showing every possible calendar control.
3. Test the Calendar Flow
Test event creation, editing, cancellation, and conflicts with representative tasks. In the room-booking example, ask the reviewer to move the workshop without losing its notes. A prototype review can expose unclear controls and messages; it cannot establish that live synchronization, permissions, or reminder delivery work correctly.
4. Make Feedback Specific
Ask reviewers where they expected an event to appear and what they thought a change would affect. Record the task, observed difficulty, and proposed revision instead of collecting only general ratings. Familiar interface patterns can guide the next iteration, but the booking task should decide whether a change helps.