A software requirements document (SRD), often called a software requirements specification (SRS), records the behavior and constraints a software team agrees to build and verify. This guide explains a useful outline, develops the original airline-booking example and shows how to connect individual requirements to prototype states. A prototype makes selected behavior visible; it does not replace the written specification or implementation tests.
What is a Software Requirements Document?
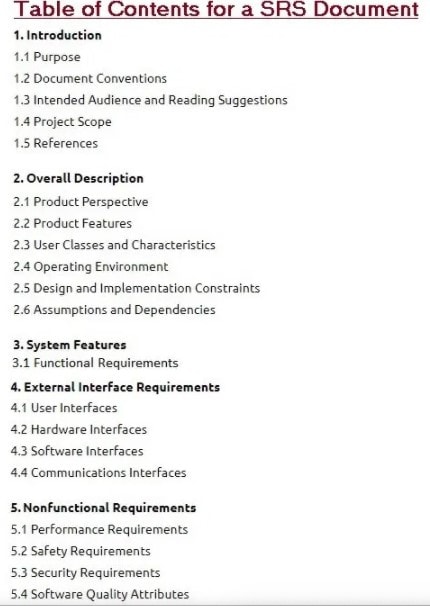
An SRD describes the software’s purpose, users, expected behavior, constraints, assumptions and dependencies. It may cover a website, desktop application, mobile app or connected service. State what is required without treating every early design choice as a fixed implementation rule. The historical structure diagram below illustrates common categories; it is an example outline, not a claim of compliance with a current standard.
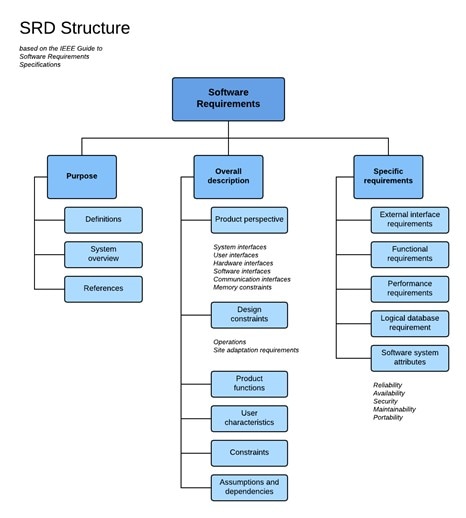
Begin with purpose and scope, then explain the operating context and specific requirements. Give important terms consistent definitions. Separate functional behavior—such as cancelling a reservation—from quality requirements such as response time, accessibility or availability. Define how each applicable requirement will be checked rather than rely on words such as fast, secure or user-friendly.
The document’s size should follow the project’s complexity, not a page-count target. A small feature may need a concise specification linked to supporting diagrams. A larger system may need several maintained documents. Include out-of-scope work, unresolved decisions, requirement owners and dependencies so readers can distinguish an agreement from an assumption.
Use the following outline as a starting point, then make the example requirements precise enough for a design review and a test case.
Software Requirements Document Examples and Outlines
A useful SRD supports four related tasks:
- Divide the intended behavior into manageable requirements with stable identifiers.
- Provide a shared reference for design, development, testing and review.
- Explain the required behavior and constraints without hiding unresolved design choices.
- Record feedback, approvals and changes so their effects on related work can be assessed.
The sample contents below separates the introduction, overall description, system features, interfaces and nonfunctional requirements. Retain only sections relevant to your system, while recording why an expected category does not apply.
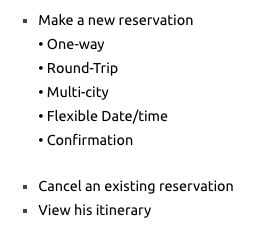
The original airline-reservation example distinguishes traveler and staff tasks. These lists are a useful inventory, but each broad item still needs preconditions, behavior, exceptions and a verification method. Booking a flight, for example, is not fully specified by a button labeled Confirm.
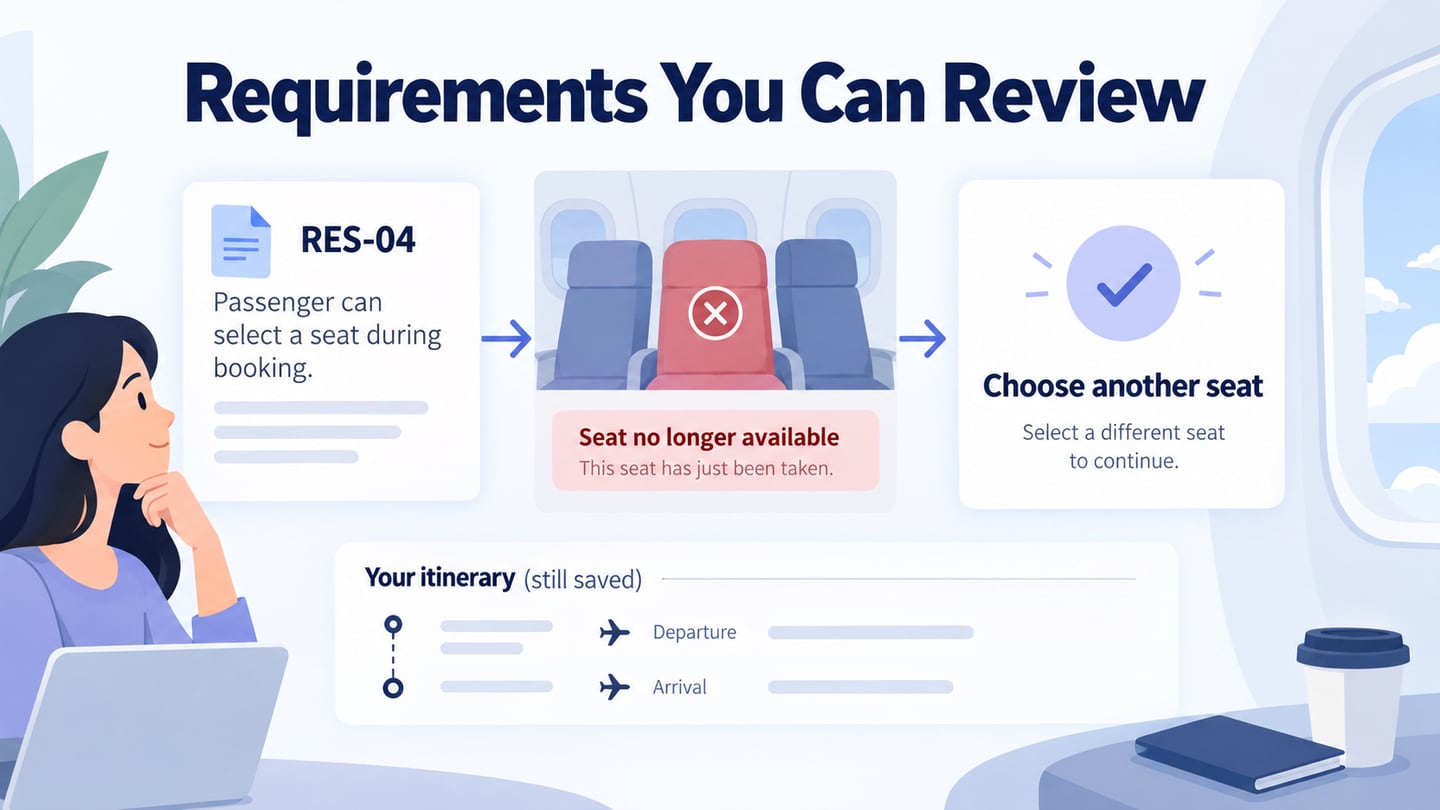
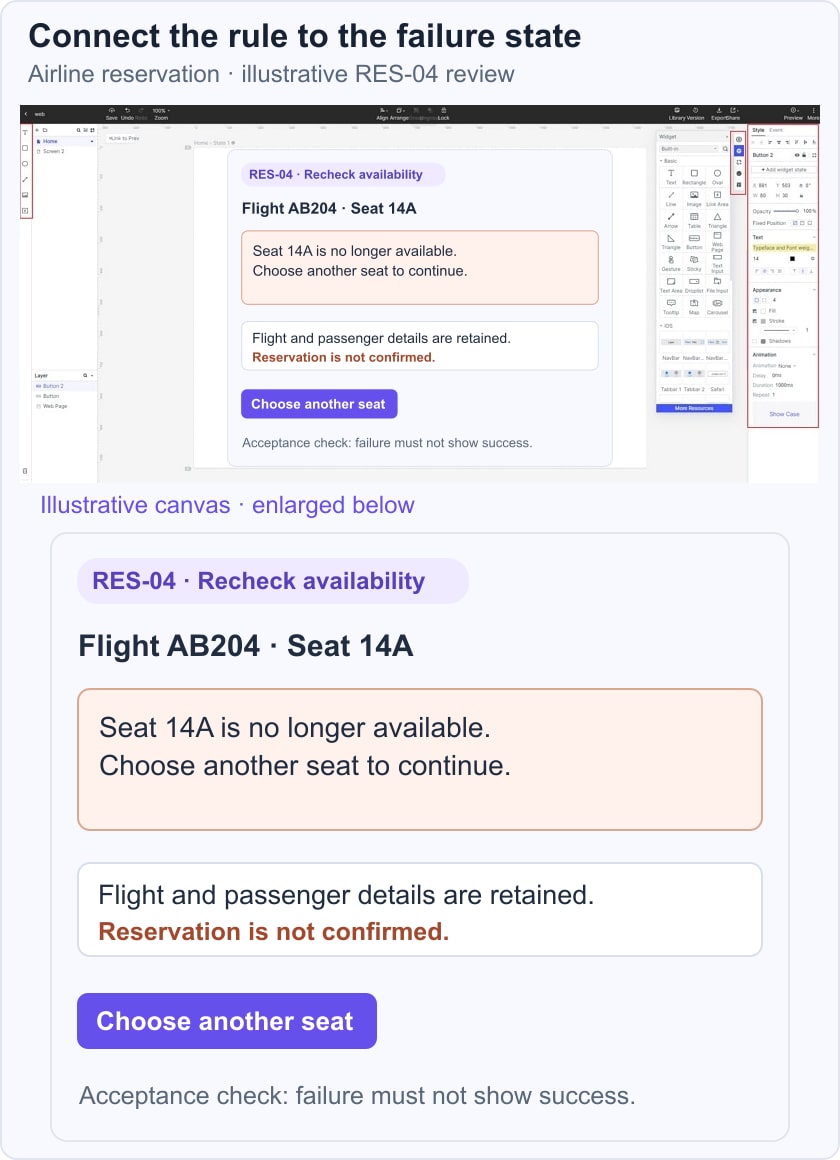
Traveler tasks include searching for flights, making or cancelling a reservation and viewing an itinerary. For an illustrative requirement RES-04: when the traveler submits a selected seat, the service must recheck availability before confirming the reservation. If the seat is no longer available, it must explain the problem and preserve the flight and passenger details while the traveler selects another seat.
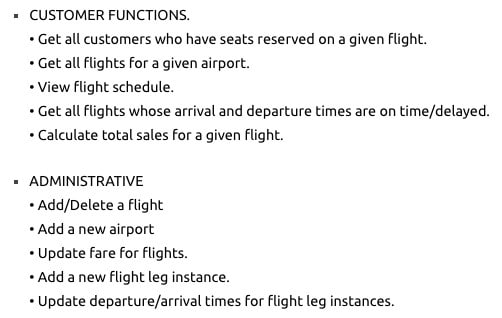
Staff tasks include viewing schedules, managing flight records and handling reservations. Define the authorized role for each action and what is recorded when a change is made. A staff action must not become available merely because a prototype links to its screen; the implemented service must enforce permissions.
Give each requirement an ID, source, owner, priority and verification reference. For RES-04, the source might be an agreed inventory rule; the acceptance check would cover both an available seat and a seat lost before confirmation. Specify which details must remain and which state must not appear on failure. Record unresolved issues, such as how long a seat can be held, instead of inventing a policy.
Keep the Requirement, Prototype and Test Connected
A small traceability record could link RES-04 to the seat-selection and unavailable-seat screens, plus an implementation test for concurrent requests. When the availability rule changes, review all three. IBM’s traceability guidance describes linking requirements to development and test artifacts so coverage and change impact can be examined.
A prototype complements the SRD by showing a selected workflow or state. It can be rough or visually detailed, static or interactive, depending on the review question. Stakeholders can examine what happens after a seat becomes unavailable and identify a missing rule. Approval of that representation is not proof that the inventory service or transaction handling works.
Prototyping can support iterative work, but neither Scrum nor Kanban requires a particular prototype sequence. The Scrum Guide defines Sprints independently of prototype versions. Choose the representation needed to resolve the current uncertainty and keep the specification updated when the team agrees to a change.
How to Create a Prototype for an SRD in Mockitt
Use Mockitt’s prototyping workspace to represent the interface states associated with selected requirements. The older operation images below illustrate project setup, widgets, linking and preview; current controls may differ. Design inspection and generated output do not replace engineering, permission checks or testing. Useful review activities include:
- Organizing screens around a named requirement and user task.
- Using available components as a starting point, then adapting labels and states.
- Connecting the relevant actions to their expected outcomes and recovery paths.
- Sharing a reviewable representation and recording specific feedback.
- Checking workspace access settings before sharing, and using synthetic passenger details.
- Handing off the agreed behavior, assets and unresolved questions alongside the specification.
Seven Steps to Connect an SRD to a Prototype
Step 1: Define the Review Scope
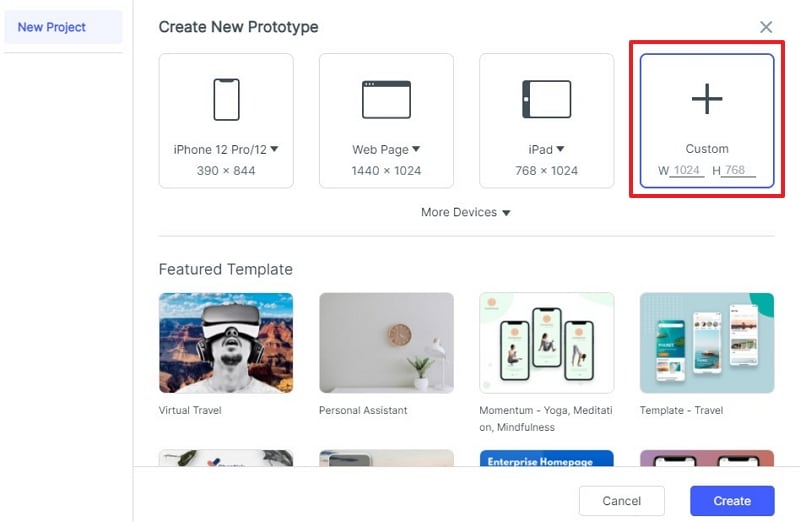
Create a project for the traveler’s seat-selection task. Note the target device and input methods, but do not assume a fixed screen size proves responsive behavior. Include RES-04 in the relevant screen or review note so its purpose remains visible.
Step 2: Build the Required Interface
Add the flight summary, seat choice, passenger summary and confirmation action. Use synthetic data. Keep the labels aligned with the terms in the SRD.
Start with the available basic widgets.
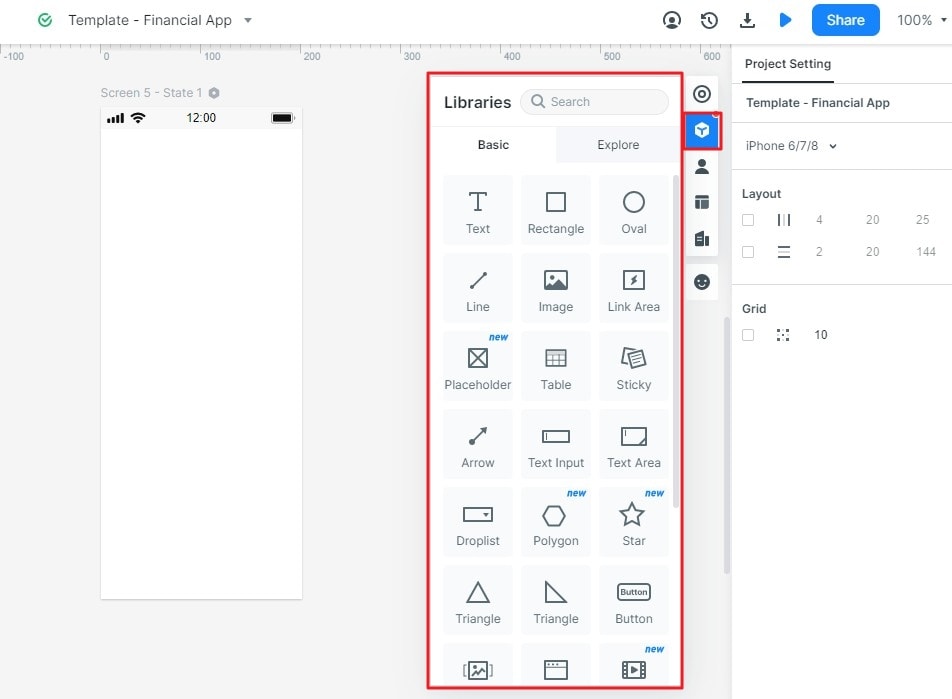
Use additional library components when they fit the task, and inspect their states before reuse.
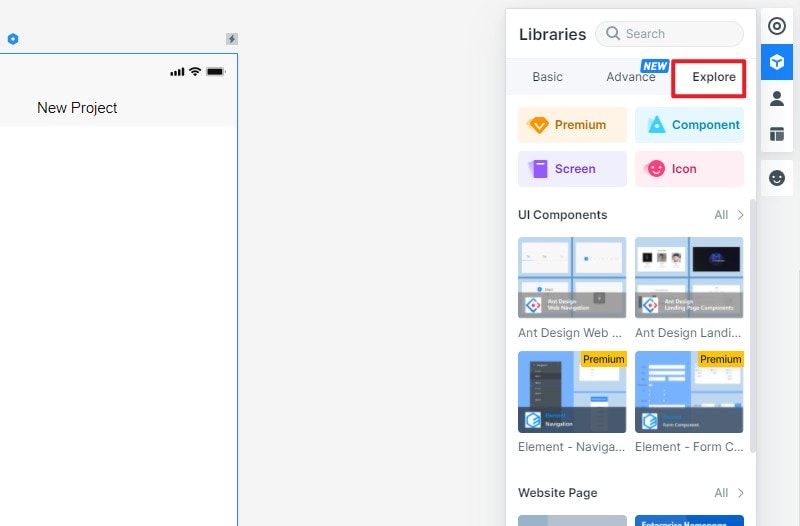
Step 3: Represent the Required States
For the airline example, create a Seat no longer available state that preserves the flight and passenger details and offers Choose another seat. Put RES-04 next to the related screens. This is an illustrative review case, not a live reservation service.
Step 4: Connect the Relevant Actions
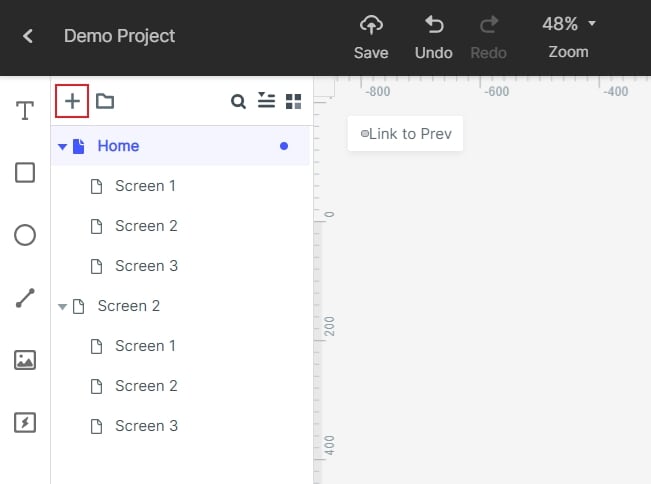
Link selection, submission and recovery states so a reviewer can follow the intended behavior. Keep success and failure distinct; an unavailable seat must not lead to a reservation-confirmed screen.
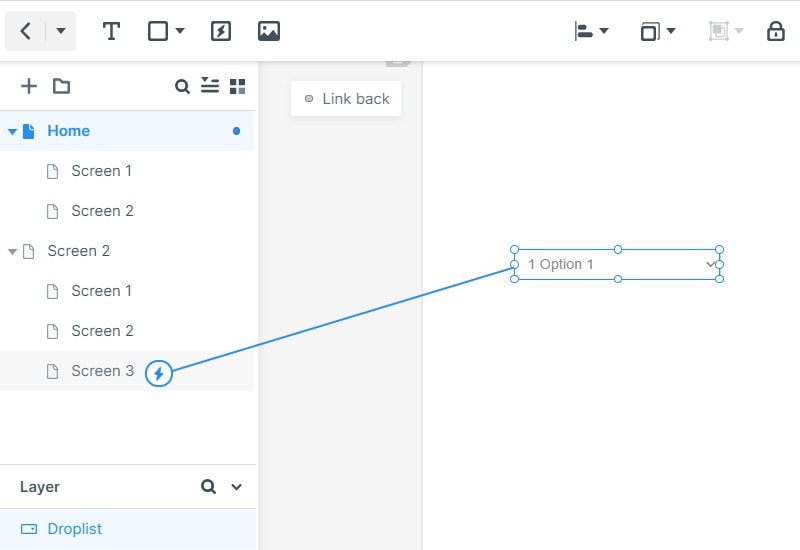
The earlier linking example below shows how one interface control can point to another screen. Apply that relationship to the reservation states rather than assume the tool checks actual seat inventory.
Step 5: Preview the Requirement
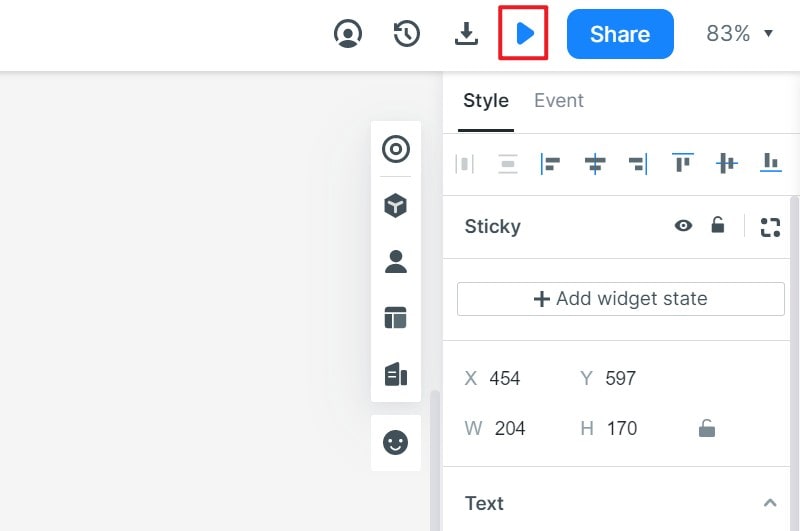
Walk through both the available-seat and unavailable-seat paths. Ask the reviewer to identify what was preserved, what failed and what they can do next. This checks the representation; concurrent inventory changes still require implementation tests.
Step 6: Review and Resolve Feedback
Share using appropriate workspace permissions. Attach comments to requirement IDs and record whether a comment changes the rule, clarifies the design or remains an open question. Update the SRD and linked screens together.
Step 7: Hand Off with Verification References
Provide the approved state descriptions, relevant design assets and the requirement-to-test references. Confirm the available inspection and export options in the current workspace. Developers still need to implement and test the actual behavior, access controls and data handling.
The SRD explains what must happen and how it will be verified; the prototype makes selected behavior easier to discuss. Keep their identifiers and decisions connected. A clear unavailable-seat path is more useful than a polished booking screen that leaves the failure rule unspecified.