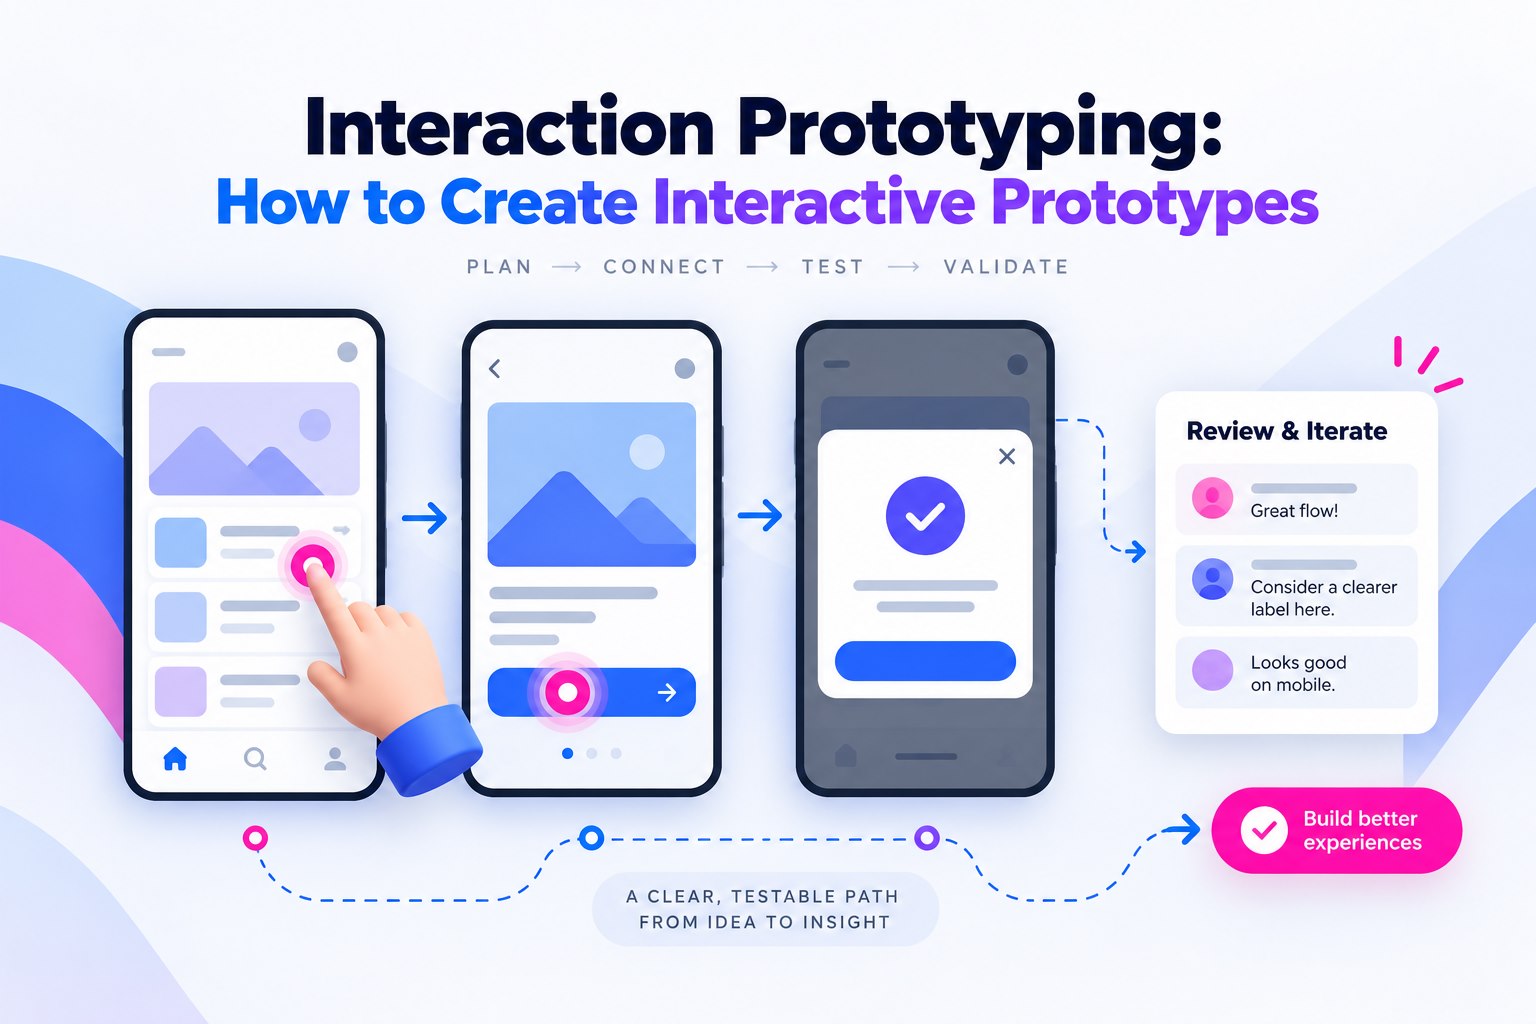
Interaction prototyping models what happens after a user acts: the trigger, the system response, the visible feedback, and the recovery route. An interactive prototype connects those states so reviewers can attempt a task before implementation. The walkthrough below covers the editor steps, then applies them to a project-renaming example with validation, saving, failure, and cancellation.
Part 1: What is Interaction Prototyping
You might already know that a prototype depicts the overall structure and function of a product for its target platform. Based on its level of resemblance to the real product, it can be identified as a low, medium, or high-fidelity prototype.
Interaction prototyping focuses on how a product responds to user actions. It can start with low-fidelity screens or use detailed, high-fidelity layouts, depending on the question you need to test. Link pages, define states and events, and add transitions where they explain behavior. These interactions simulate selected parts of the product; they do not require a finished visual design or working backend.
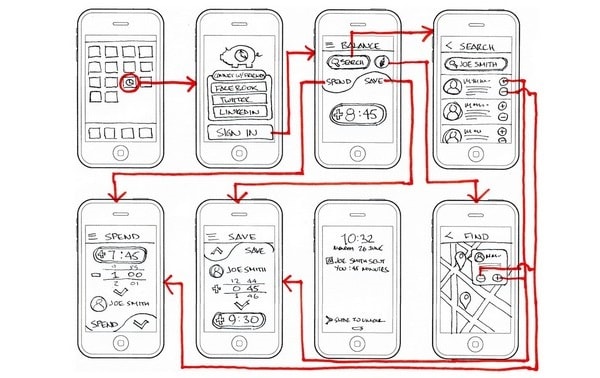
Source: Interaction Design
An interactive app prototype can demonstrate selected behaviors of the intended product. While it might take more time to work on interaction prototyping, it can have the following benefits as well:
- It gives reviewers a way to try selected product interactions and discuss the user experience.
- You can share the interactive prototype with developers to explain intended behavior, alongside requirements, assets, and implementation notes.
- It can be used for product testing pre-development and help you improve your design with the given feedback.
- You can easily use an interactive prototype to pitch to your investors and explain the working of your product before its development.
Part 2: How to Work on Interaction Prototyping
Since interaction design prototyping can be extremely beneficial, you can use a professional tool like Mockitt. It is a user-friendly and intuitive application that can help you work on interaction design prototyping without coding or technical hassle.
- You can find tons of dynamic widgets and other ready-made design elements that you can drag and drop to your prototype.
- Mockitt will let you connect different screens, set triggers and states for various elements, and even include animations and transitions to your designs.
- Team members can review a shared prototype and leave comments on screens and flows.
- You can manage project access, keep named versions, and share design details with colleagues during handoff.
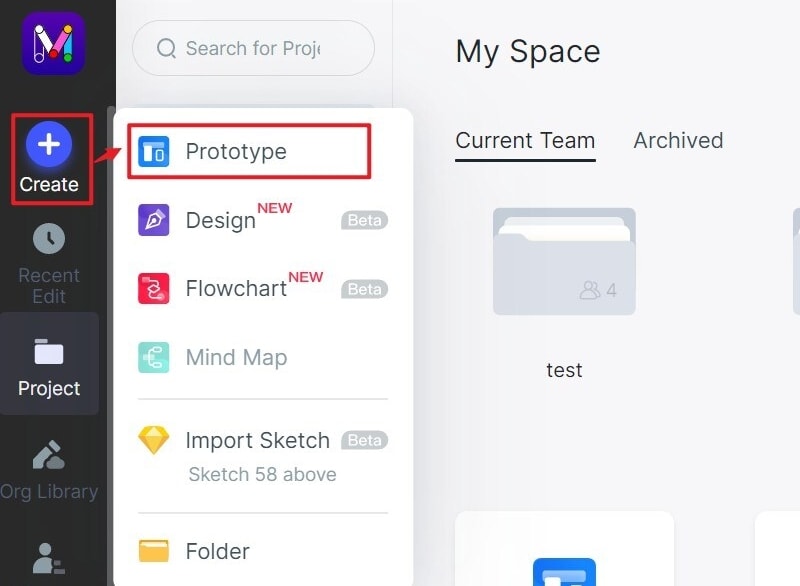
The following screenshots show an earlier Mockitt editor. Use the visible Create, screen, link, event, state, Preview, and Handoff controls as historical workflow examples; control positions and labels may differ in the editor you use.
Step 1: Set up a new project
To start with, you can just launch the desktop or web application of Mockitt and log in to your account. Just click on the “Create” button to start working on a new prototype and choose the target device or canvas size.
Step 2: Add screens and other widgets
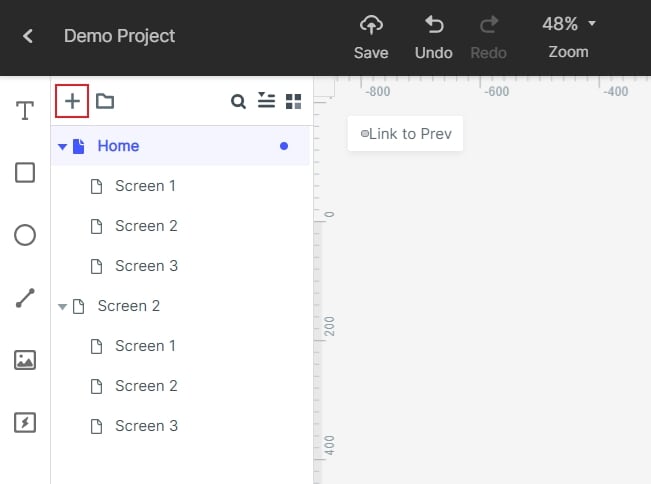
Once you get the working canvas, you can click on the “+” button from the side to add a new screen. You can move or delete different screens for your prototype from here.
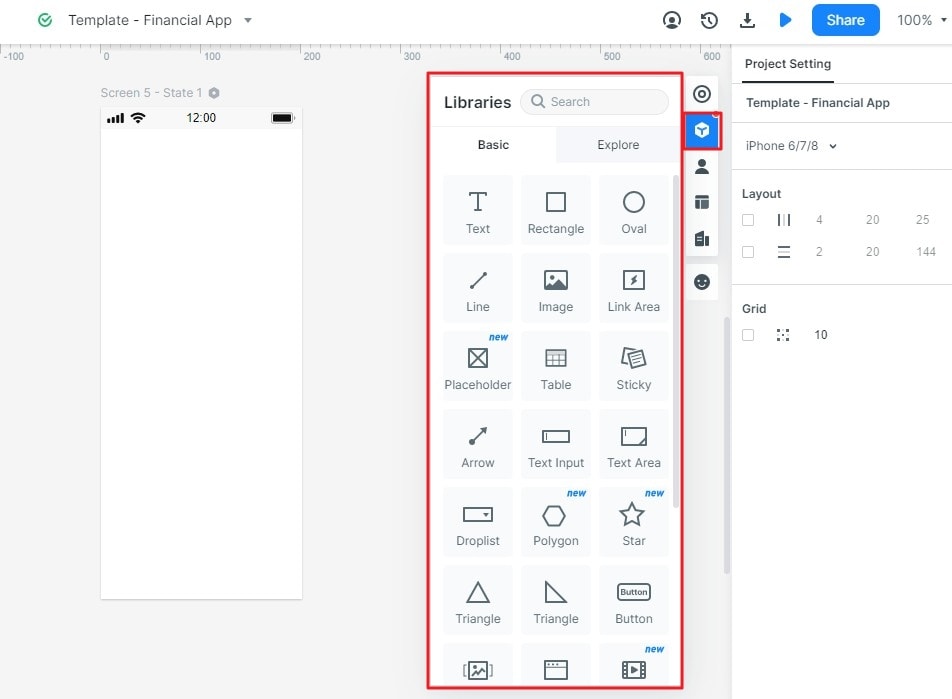
On a floating window from the sidebar, you can find all kinds of basic widgets. Simply select any widget of your choice and drag-and-drop it to the canvas to start working on your prototype’s design.
Step 3: Work on interaction prototyping elements
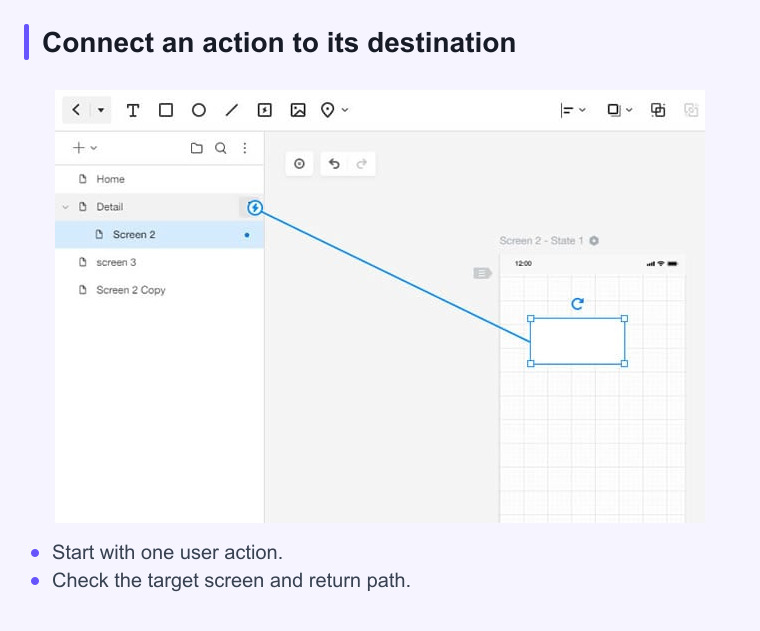
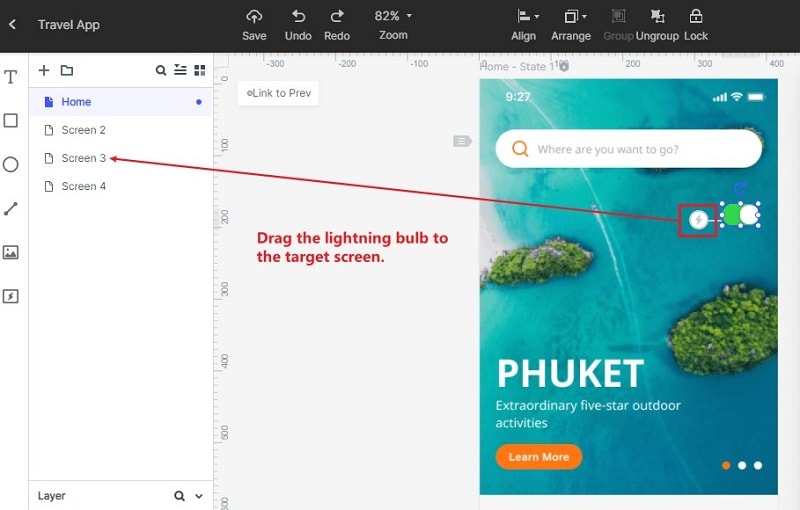
There are tons of interactive elements that you can use and customize in Mockitt. For instance, you can select a widget that should trigger a transition. Click on the bulb icon and drag the link to the target screen to connect it.
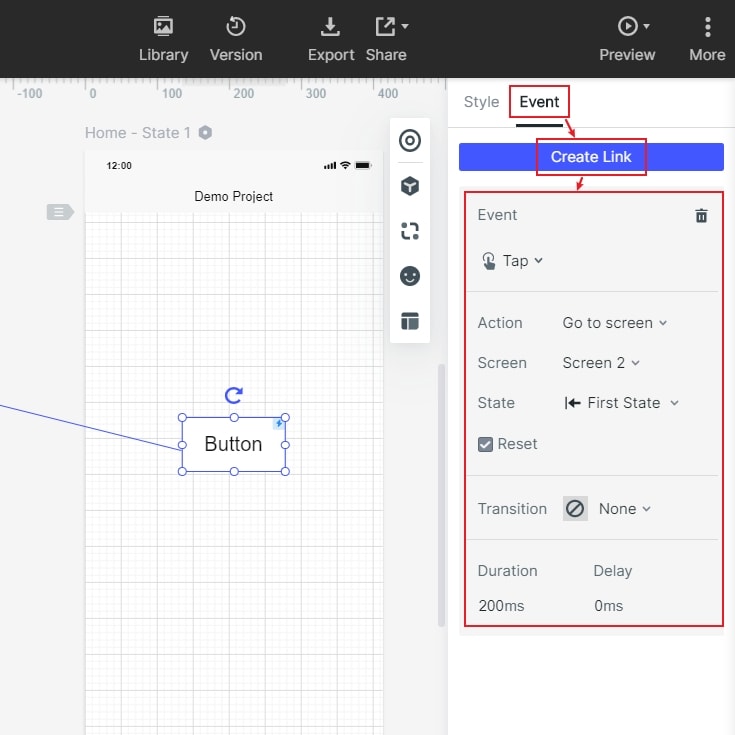
After linking the elements, you can go to the sidebar to explore their properties. Here, you can set up different events, actions, and states for the element.
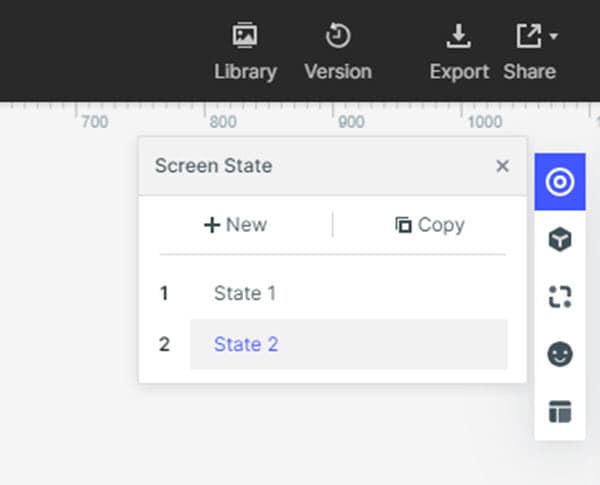
The Screen State panel below creates variants of a whole screen. Use it to plan states such as editing, pending, and saved; distinguish these screen variants from the state of an individual widget when recording the interaction.
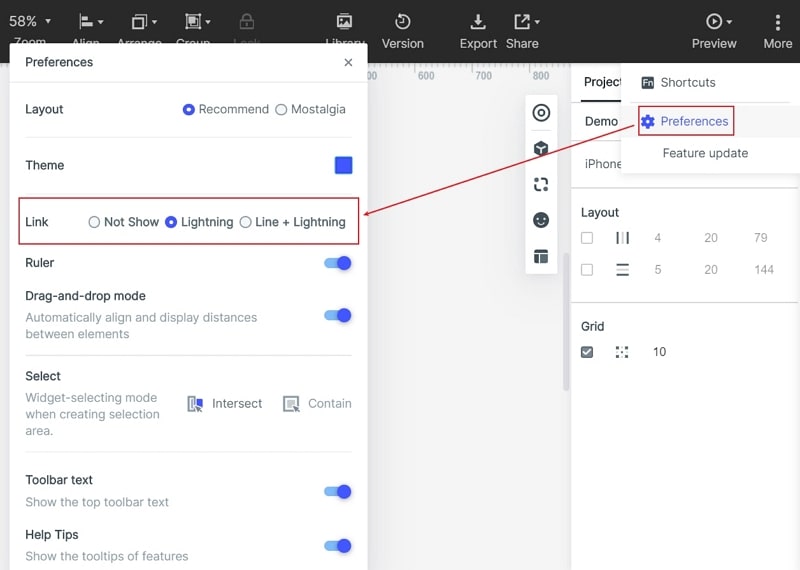
You can further go to the “Preferences” option from the sidebar and choose to make the interactions visible or not.
Worked example: rename a project without losing the draft
Use the fictional project “Spring launch” to test one small interaction: rename it “Summer launch,” recover from a failed save, and return to the project list. This example is a behavior specification for the prototype, not a claim that a backend has stored the name.
- Start with a known state. Show the current project name and an Edit name action. Connect that action to an editing state with the existing name, a Save button, and Cancel. State explicitly that Cancel returns to the original name without applying the draft.
- Separate validation from saving. Add an empty-name state with the message “Enter a project name.” Keep the editor open and identify the field to fix. For a valid draft, Save leads to a pending state that still shows “Summer launch” and explains that saving is in progress. Decide how repeated activation is handled while this state is visible.
- Give each outcome a destination. On success, show the new name with a clear confirmation and return to the updated project list. On a simulated failure, keep the draft, explain that it has not been saved, and offer Retry and Cancel. Retry should return to the pending state; Cancel should return to the original name. Model these as explicit screens or states if the prototype does not simulate conditional data.
- Check the return path. Close the editor and reopen it from the list after each outcome. Record which name should appear. If the design uses a dialog, specify where focus should return after closing and how keyboard users reach Save and Cancel; confirm the implemented behavior separately.
Ask a reviewer to complete the task without naming the controls. Watch whether they distinguish an unsaved draft, a pending request, and a saved change. Record the exact transition that caused confusion, then revise that transition before adding decorative animation.
Step 4: Preview your interactive prototype
After working on the overall interaction design prototyping, you can click on the “Preview” button from the top and check how it would be rendered from a user’s perspective.
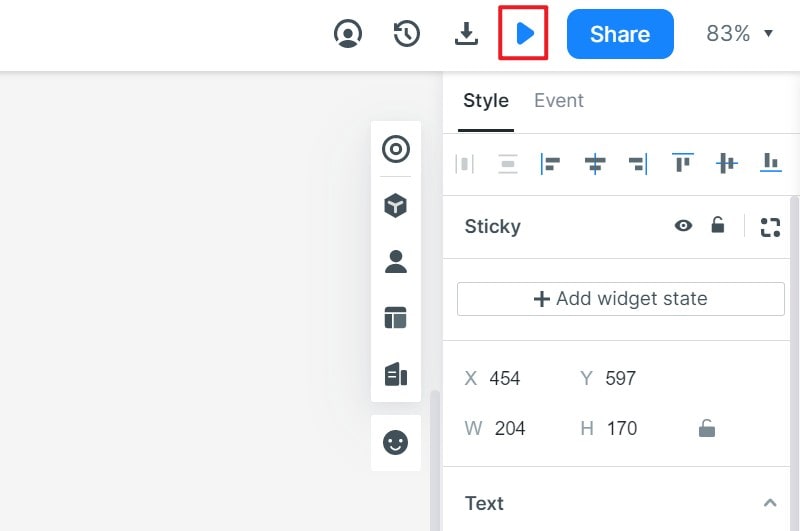
Besides that, you can also explore the “Handoff” option to inspect design details and prepare them for developers.
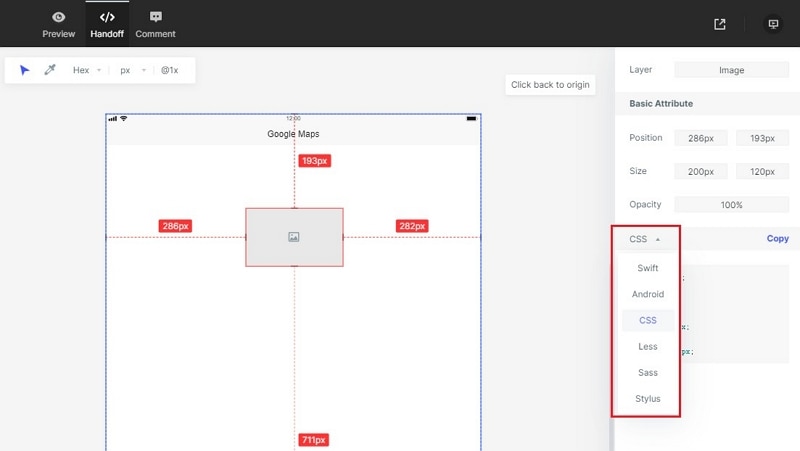
By now, you would be able to work on interaction prototyping pretty easily. If you also want to work on an interactive app prototype for any platform, then I would recommend using a tool like Mockitt. Having a wide range of features, you can use it to create and review web, desktop, or mobile prototypes.
A practical interaction pass before review
Before sharing an interactive prototype, walk through the main task from the user’s point of view. Check that every primary action has a clear destination, each important state has a visible response, and the back path still makes sense.
A short review in Mockitt’s online prototyping workspace can expose broken links and missing states while the change is still easy to make. Record the question each interaction is meant to answer, then ask reviewers to test that path rather than comment on unrelated visual details.
Model the complete interaction state
An interaction is more than a link between two screens. Document the trigger, the immediate response, the visible feedback, and the path back when the action fails or is cancelled.
| Part | Question | Example |
|---|---|---|
| Trigger | What action starts the change? | Tap Save after editing a project name |
| Response | What does the system do next? | Validate and show a pending state |
| Feedback | How does the user know what happened? | Confirmation text and updated label |
| Recovery | What can the user do after failure? | Keep the draft, fix the field, and retry |
Use Mockitt to connect the states and review the route at the device size that matters. Keep the business rule in a note or handoff record; a prototype interaction does not prove that the production service will respond the same way.
Interaction review checklist
- Every primary action has a visible result or an explicit reason it is unavailable.
- Back, Cancel, and Escape return to a predictable place.
- Loading and error states do not trap the user.
- Labels describe the outcome rather than the implementation detail.
- Keyboard focus, touch targets, and motion preferences are included in the review.
Record the expected state transition beside the prototype. That small artefact makes a later implementation review faster and exposes gaps while the design is still easy to change.
For the next team review, work through a prototype critique checklist and attach each comment to the trigger, state, or recovery route it concerns.