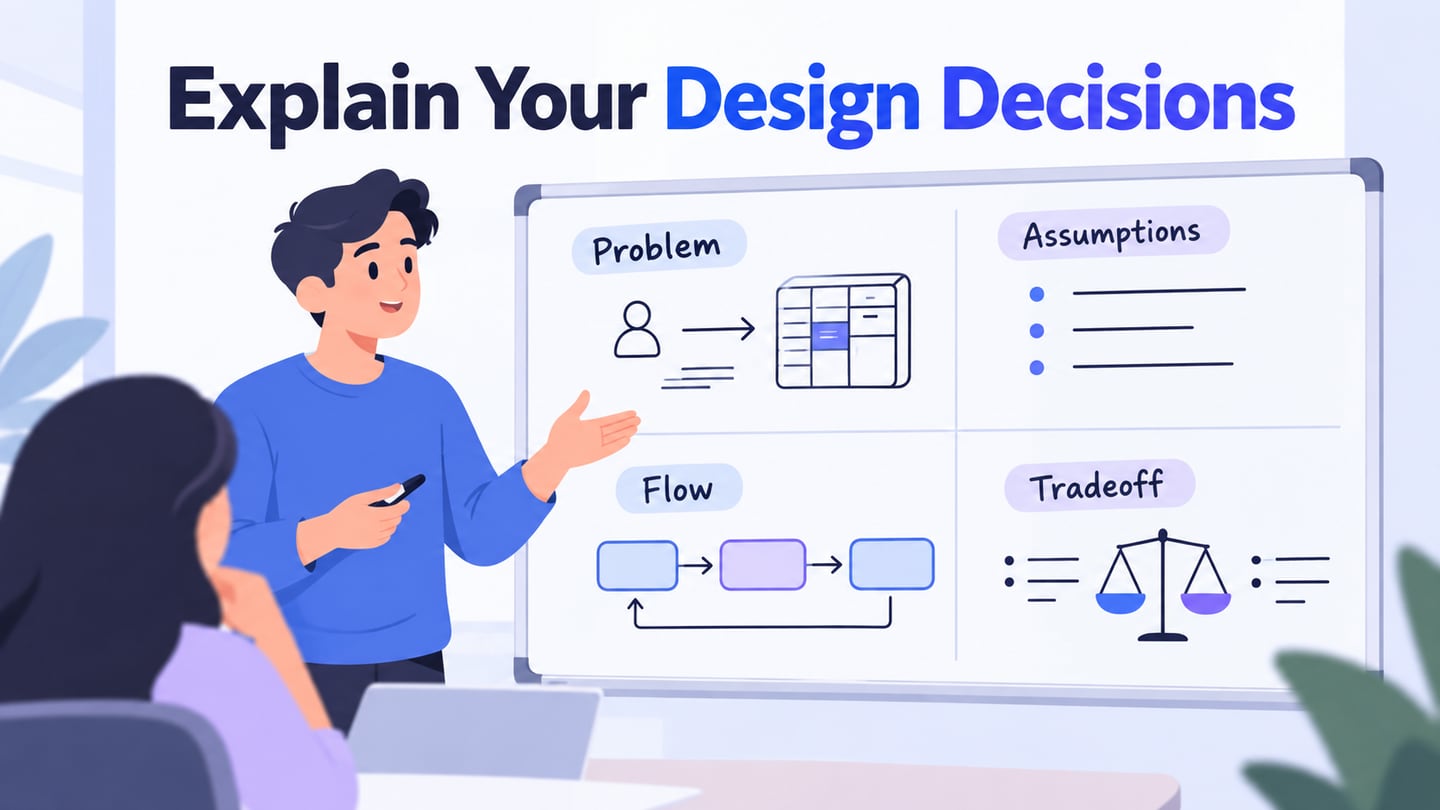

A whiteboard design challenge asks you to explain how you approach a product problem under a time constraint. Formats vary between employers, so confirm the duration, tools, and expected deliverable before the interview. A simple structure helps you keep the problem, assumptions, flow, and tradeoffs visible while discussing an unfamiliar task.
The exercise may happen remotely or onsite and can involve sketching, discussion, or both. The candidate receives a prompt and works through it with the interviewer. Use a compact UX workflow rather than assuming that every company uses the same round or time limit. A sketch is a way to explain your reasoning, not necessarily a finished interface.
The interviewer may answer questions or temporarily represent a stakeholder, such as a product manager or user. Clarify what information is part of the prompt and what you are assuming. Role-play can help the discussion, but an interviewer’s answer is not a substitute for research with actual users.
Practice makes the mechanics of the exercise more familiar: writing legibly, keeping the board organized, and explaining why you chose one path. Nielsen Norman Group’s UX careers research discusses practical exercises among hiring approaches. An exercise can reveal reasoning and collaboration, but it is only one part of evaluating someone’s work.
- Show interest by clarifying the problem and responding to new information.
- Make your reasoning visible; confidence alone is not evidence of experience or maturity.
- When a decision is questioned, explain the tradeoff and consider whether the new information changes it.
What Does a Whiteboard Challenge Help an Interviewer See?

A board can fill with plausible screens while still leaving the problem unclear. Reserve space for the objective, assumptions, and the path you are exploring. Design can be messy, but a readable structure helps another person follow the discussion and contribute. You do not need to pretend that your first idea is the final answer.
The interviewer may be interested in how you frame the problem, use the available evidence, choose a manageable scope, and respond to feedback. A polished drawing cannot answer those questions by itself. Use the following prompts as a practice checklist, not a universal employer scoring rubric:
1. Are you asking questions to clarify the purpose?
2. Are you targeting users and their context?
3. Are you making educated guesses and asking the right questions?
4. Do you go beyond the UI and think holistically about the whole scenario?
5. Do you understand basic design principles and patterns?
6. Do you mention weaknesses and improvements in your solution?
7. Do you provide ideas outside of the exercise?
8. Do you suggest appropriate next steps for research, the roadmap, or implementation?
9. Do you understand the possible technical limitations?
Five Common Mistakes to Avoid
Practice a few different prompts and ask a partner to question your choices. This is different from daily UI practice, which may focus on a visual screen: here you are practicing an explanation, a task flow, and a decision under constraints. Avoid these five mistakes:
Keep the board readable. Write complete labels, leave space between groups, and use arrows consistently. If a sketch becomes crowded, summarize it in a cleaner area. Messy handwriting is not proof of panic, but it can make your reasoning harder to follow.
Explain the important decisions. Say what question you are working on and why you are choosing a direction. A short pause to think is reasonable; tell the interviewer you are taking a moment. Constant narration is less useful than a clear explanation at the right points.
Discuss feedback without becoming defensive. Listen to the question, clarify the concern, and explain the tradeoff. Revise when the new information warrants it. You can disagree respectfully without treating every suggestion as a command to redraw the solution.
Leave a visible record. Capture the objective, assumptions, flow, and key decisions as you discuss them. A conversation without a shared sketch can be difficult to summarize or revisit.
Choose a manageable scope. Compare alternatives briefly, then develop one task far enough to show a coherent path. Name the important branches you have deferred instead of pretending that the sketch covers the whole product.
A Five-Step Approach to a Whiteboard Design Challenge
There is no single perfect approach to a design interview. The five steps below give you a structure that you can adapt to the prompt and available time. Clarify the problem before drawing screens, and keep enough time to explain the tradeoffs and summarize what you would test next.
1. Ask Questions to Clarify the Problem
2. Ask about users and their context
3. Write down the main stages of the story
4. Draw some important screens
5. Summarize the story, talk about alternatives, improvements, or other use cases.
1. Ask Questions to Clarify the Problem
As with any design project, don't start designing until you understand the problem you're solving. The first step is to ask questions to get more information about the design issue, for example:
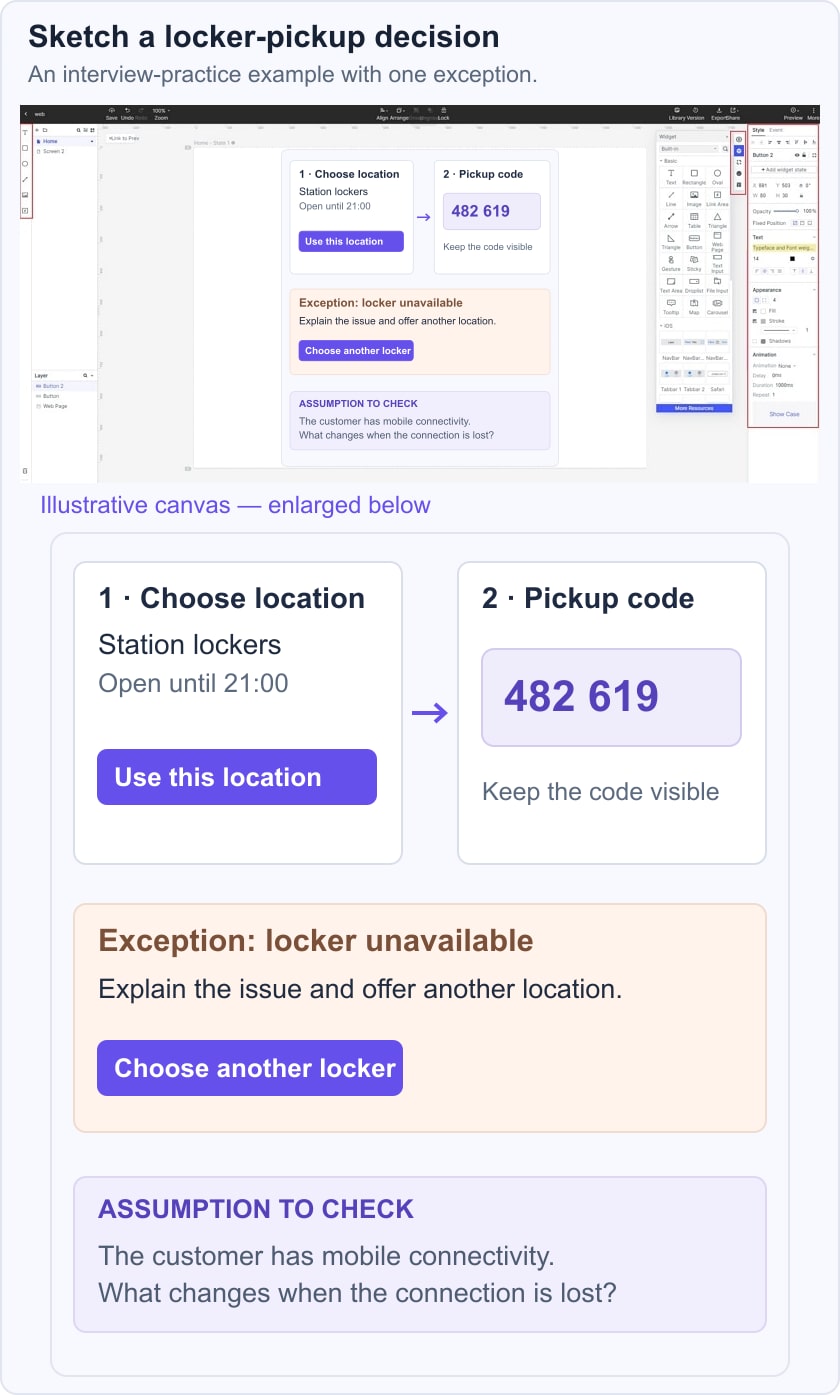
Try an illustrative prompt: help a customer collect a parcel from a pickup locker. Clarify whether the customer has already chosen a location, how they receive the code, and what happens if the locker is unavailable. A possible practice timebox is five minutes to clarify, ten to sketch the main path, five to explore one exception, and five to summarize. These times are an exercise suggestion, not an employer’s interview policy.
- What is the purpose of the design?
- What are some of the details and context of the problem?
- What are the timing, device, or other restrictions?
2. Ask about users and their context
Ask who the users are and what is known about their context. When information is unavailable, state a provisional assumption and explain how it affects the design. Do not turn a guess into a researched user need. These questions can help you identify the gap:
- What types of users are there?
- What are some assumptions about their behavior and problems?
- What are the common use cases?
- What benefits should we provide?
3. Write down the main stages of the story
Now that you understand the problem and the users, it is very important to write down the milestones in the story before you start drawing. It will help you focus and guide the design all the way. It's also important to start with just one use case and tell a story, not just paint screens.
4. Draw some important screens
It's time to draw some screens! Once steps 1 through 3 have been prepared, it will be fairly easy to develop a user interface based on common design patterns. Remember:
For the locker prompt, show location selection, the pickup code, and one unavailable-locker branch. Keep the assumption about connectivity beside the flow rather than hiding it in the sketch. After the interview practice, you can use Mockitt to connect the screens and ask a reviewer to walk through the task. That follow-up makes the sequence testable without claiming the sketch is a complete service.
- Draw your story based on what was mentioned in step 3
- Draw only the critical screens in the task flow.
- Draw clearly and mark drawings
5. Summarize the story
Summarize the user’s path, the main design decision, and one important tradeoff. Explain what remains uncertain and how you would investigate it. You do not need to design every alternative, but you should be able to say why the chosen path fits the problem and what might make you change it.
Use Intuition as a Starting Hypothesis
Experience can suggest a useful starting point when there is little time or evidence. State the reasoning you do have, name the assumption, and explain what would validate or challenge it. “My intuition says” is not enough on its own; connect the choice to a user task, a constraint, or a familiar pattern that may fit the situation.
Assumptions
List consequential assumptions on the board. For a locker-pickup task, mobile connectivity and the availability of a working locker could change the flow. Ask the interviewer whether either is constrained by the prompt, then explain how you would research it in a real project. Agreement during the exercise does not validate the assumption for real users.
Conclusion
Design challenges involve prioritization and tradeoffs, so there may be several defensible solutions. Finish with a clear task, a visible path, and an honest account of uncertainty. For further practice, compare your questions with a user-interview approach; in an actual project, those questions would need evidence beyond the interview exercise.